Rover 108 User Manual
Page 5
Rover Mowers Limited Ride-on Mower Grass Catcher
2. RETROFITTING
2.1 Cutterhead modifications - (Model 180 cutterhead only)
All Rover Ride-on Mowers manufactured before
September 1989 must be modified to take advantage
of the Rover Ride-on Mower Grass Catcher i.e.:
Rancher 12 hp Auto-Drive Model: 1866/180
Cutterhead modifications
Rancher 12 hp Selector Drive Model: 1766/180
Cutterhead modifications
This modification allows maximum air velocity to be
achieved at the outlet chute necessary for the catcher
to effectively collect grass cuttings.
These modifications involve the cutting of air intake
ports into the top of the Model 180 (30") cutterhead
and welding in stiffeners
CAUTION
Modifications to the cutterhead must
be carried out by an Authorised Rover
Service Dealer or Warranty on
products will be void.
________________________________________________________________________________________
3. ASSEMBLY
3.1 Towbar installation
(Refer to Selection Chart - Section 1.1)
A towbar may need to be fitted to some models of the
Rover Rancher and Raider Ride-on Mower to
facilitate the mounting of the Ride-on Mower Grass
Catcher.
The mounting position of the rear bumper bar varies
between models of Rover ride-on mowers. Due to this
configuration the rear bumper bar model 1I0 has
three sets of mounting holes in the side mounting
flanges, which suit all front engine Ranchers and
Lawnking mowers currently manufactured by Rover.
(Refer to Figure 3. l).
The Rear Bumper Bar Model 110 is fitted as a
standard feature on the Lawn King and is an option
on Rancher Ride-ons and the Raider Ride-on.
CAUTION
Towbar brackets have 3 sets of
holes per side
Lawn King has the towbar fitted
as standard
1. Slide the towbar over the rear of the chassis with
the side brackets pointing upwards.
2. Align the holes in the towbar side brackets with
the holes in the rear of the chassis. Retain the
towbar with the four bolts, shakeproof washers
and nuts supplied.
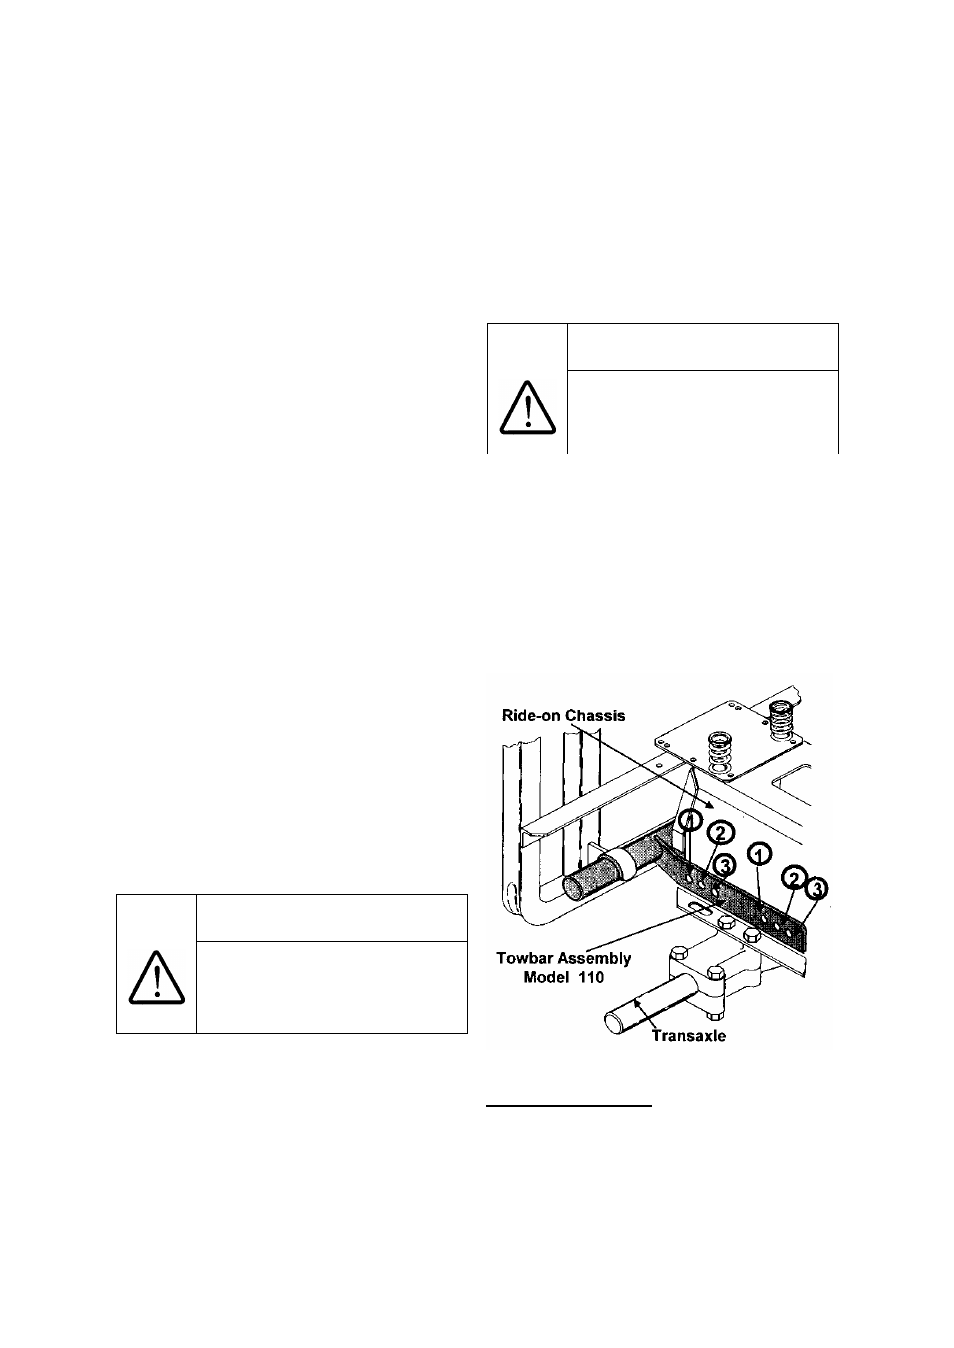
Figure 3.1 – Towbar Installation
Towbar mounting holes
1
v Rancher Selector Drive, Auto
Drive
v Rancher Ride-ons
2
v Rancher Hydro
v Lawn King ride-ons – 18” dia.
Rear Tyres
3
v Lawn King ride-ons – 20” dia.
Rear Tyres