Connection procedure, External dimensions, Cn 2 – Renesas Emulator MCU Board M38D29T2-RLFS User Manual
Page 5
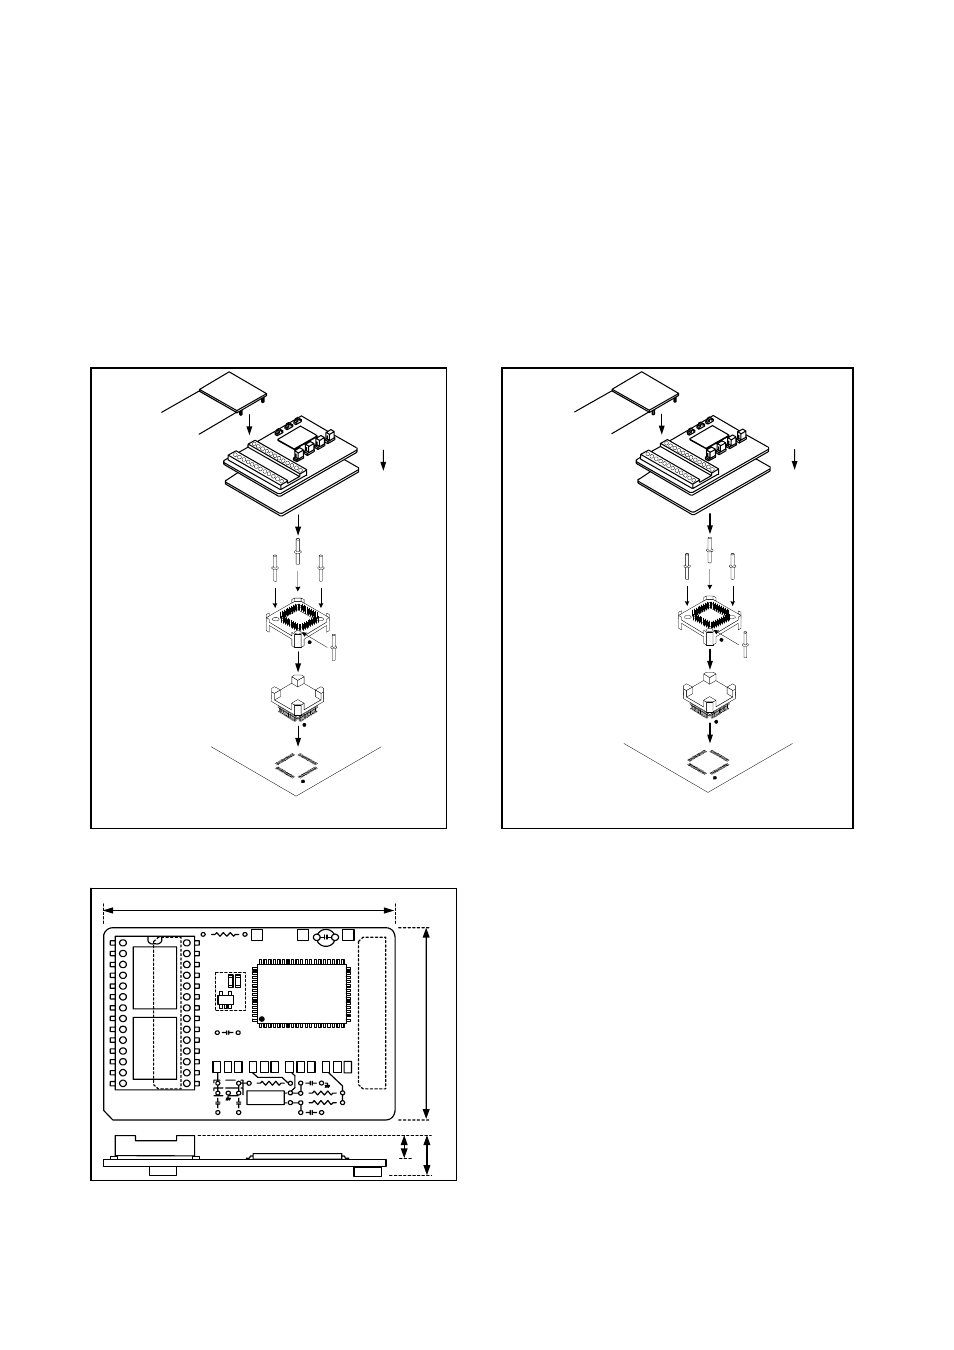
5. Connection Procedure
(1) For M38D29T2-RLFS-FP
1 Mount the NQPACK064SA160 to the foot pattern of the user system.
2 Attach the included M3T-F160-64NSA to the M38D29T2-RLFS.
3 Mount the YQPACK064SA on the NQPACK064SA160.
4 Attach the tip of the probe of the emulator to the M38D29T2-RLFS, and connect the M38D29T2-RLFS and YQPACK064SA.
(2) For M38D29T2-RLFS-HP
1 Mount the NQPACK064SD-ND to the foot pattern of the user system.
2 Attach the included M3T-F160-64NSD to the M38D29T2-RLFS.
3 Mount the YQPACK064SD on the NQPACK064SD-ND.
4 Attach the tip of the probe of the emulator to the M38D29T2-RLFS, and connect the M38D29T2-RLFS and YQPACK064SD.
Figure 3 Connection procedure of M38D29T2-RLFS-FP
Figure 4 Connection procedure of M38D29T2-RLFS-HP
(1)
YQ - GUIDE (x4)
YQPACK 064 SA
NQPACK 064SA160
64-pin 0.8mm pitch
foot pattern
●
: No. 1 pin
(4)
PLQP 0064GA- A ( 64P6U-A)
Emulator
(2)
(3)
M3T- F 160- 64 NSA
(4)
Be sure to align the pins.
M38D29T2 - RLFS
(1)
YQ- GUIDE (x4)
YQPACK064 SD
NQPACK 064SD - ND
64-pin 0.5mm pitch
foot pattern
●
: No. 1 pin
(4)
PLQP 0064 KB - A ( 64P6Q- A )
Emulator
(2)
(3)
M3T-F160-64NSD
(4)
Be sure to align the pins.
M38D29T2 - RLFS
6. External Dimensions
Figure 5 External dimensions
64. 0
45
.0
5.4
9.2
CN
2
VCC
GND
RESET
+
R1
C 6
C 5
R5
R6
(3/4)