Connect your kc-550/kc-350 – Roland KC-550 User Manual
Page 10
10
Connect your KC-550/KC-350
Refer to the following diagram and connect the KC-550/KC-350 to the external equipment you are using.
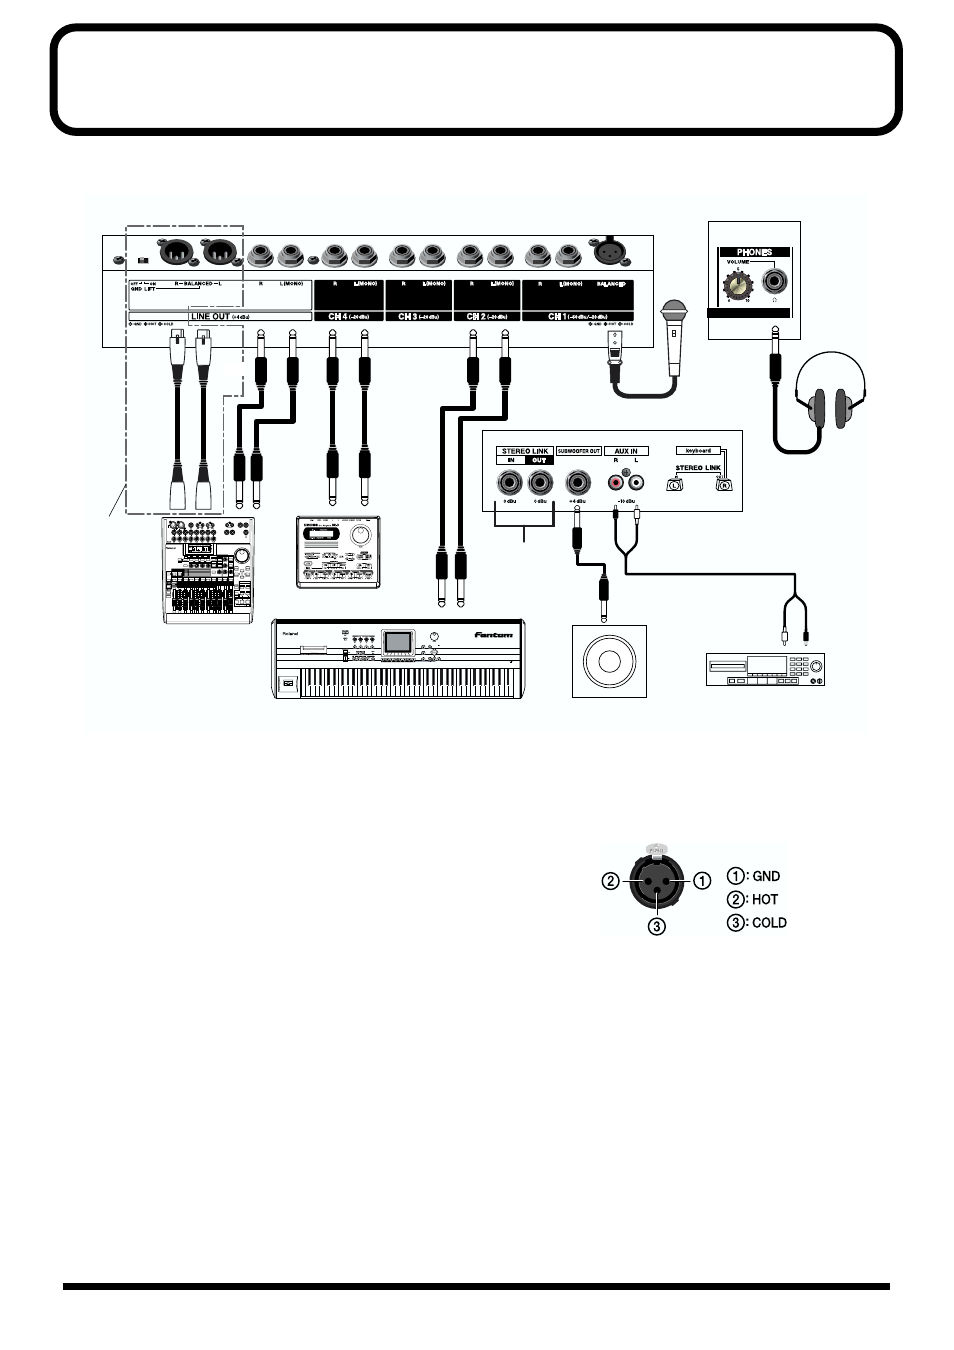
fig.30-1
Here is an example of a setup that makes full use of the KC-
550/KC-350’s mixer and monitor functions.
A mic is input to
CH 1
, which accepts mic level input.
Connect a keyboard, recorder, or other sound-generating
device to the
CH 2
,
CH 3
and
CH 4
inputs.
The KC-550’s line outputs include both XLR-type and 1/4"
phone connectors. Furthermore, both types can be used
simultaneously.
* To prevent malfunction and/or damage to speakers or other
devices, always turn down the volume, and turn off the power
on all devices before making any connections.
Set all of the KC-550/KC-350’s channel volume knobs (
CH 1
,
CH 2
,
CH 3
and
CH 4
) as well as the
VOLUME
knob to zero.
* The pin assignment for the XLR type connectors is as shown
below. Before making any connections, make sure that this pin
assignment is compatible with that of all your other devices.
fig.31
* When connection cables with resistors are used, the volume level
of equipment connected to the inputs (
CH 1
through
CH 4
,
AUX IN
and
STEREO LINK IN
) may be low.
If this happens, use connection cables that do not contain
resistors, such as those from the Roland PCS series.
* Howling could be produced depending on the location of
microphones relative to speakers. This can be remedied by:
1. Changing the orientation of the microphone.
2. Relocating microphone at a greater distance from speakers.
3. Lowering volume levels.
Mixer
Keyboard
CD Player
Subwoofer
(With built-in amp)
Rhythm Machine
Stereo
Headphone
Control Section
Jack Panel
Mic
KC-550 only
INPUT
INPUT
OUTPUT
OUTPUT
Stereo Link (P.12)
or