RIDGID Metal Detector User Manual
Page 13
Ridge Tool Company
11
Activating Frequencies
Frequencies can be chosen for the set of Checked-Active
frequencies so they will be available using the Frequency
Key . Frequencies can also be deactivated to keep the
frequency set smaller.
Each frequency is activated by choosing it from a list in the
Main Menu
(See Figure 15). Frequencies are grouped by
category:
Sonde
Active Line Trace
Passive Line Trace (Power)
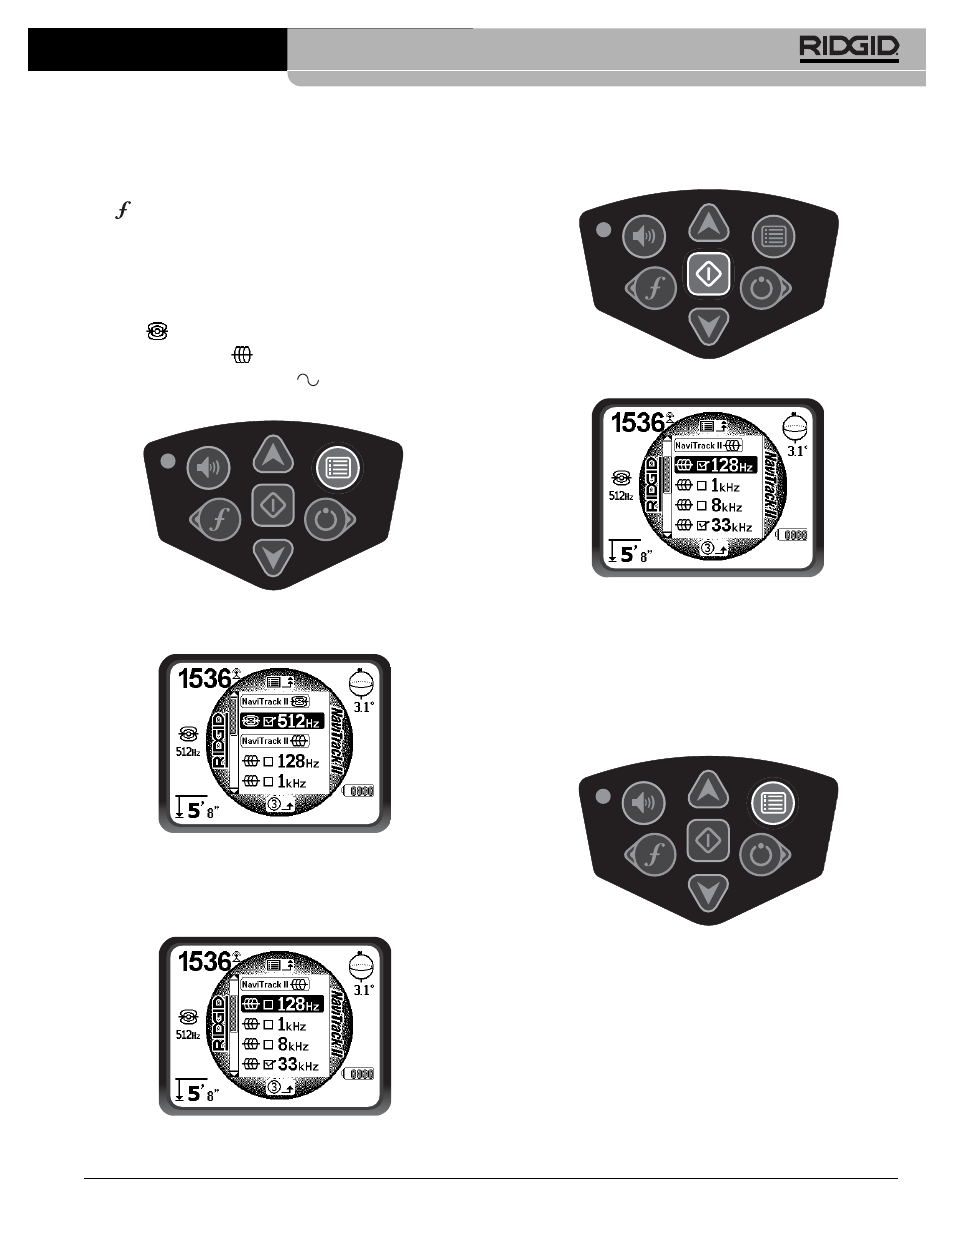
1. Push the Menu Key:
Figure 14 – Menu Key
The Main Menu is then activated:
Figure 15 – Main Menu
2. Using the up and down arrows, highlight the fre-
quency desired. In
Figure 16, below, the operator is
activating a 128 Hz frequency.
Figure 16 – Highlighting a Desired Frequency (128 Hz)
3. Press the Select Key
(shown below) to check the box
for each frequency intended for use.
Figure 17 – Select Key
Figure 18 – Desired Frequency Checked
4. Frequencies that have been selected for use will
show a check in the box next to them. These are
“Checked-Active” frequencies.
5. Press the Menu Key again to accept the choices
and exit. The last selected Checked-Active frequency
will now be the “In-Use” frequency.
Figure 19 – Menu Key
The Main Menu lists all frequencies currently available for
activation. For information on adding additional frequen-
cies to the Main Menu so they can be chosen for activa-
tion,
see “Frequencies Selection Control” on page 23.
(European versions of the NaviTrack II include a 93 kHz
Line Tracing frequency.
See the note on page 17 on
using this frequency.)
NaviTrack
®
II