Raypak 302-902 User Manual
Page 41
41
HI DELTA FILTER BOX KIT
NOTICE:
These instructions are intended for use by qualified personnel specifically trained and experienced
in the installation of this type of heating equipment and related system components. Installation and
service personnel are required to be licensed in some states. Persons not qualified shall not attempt
repairs according to these instructions.
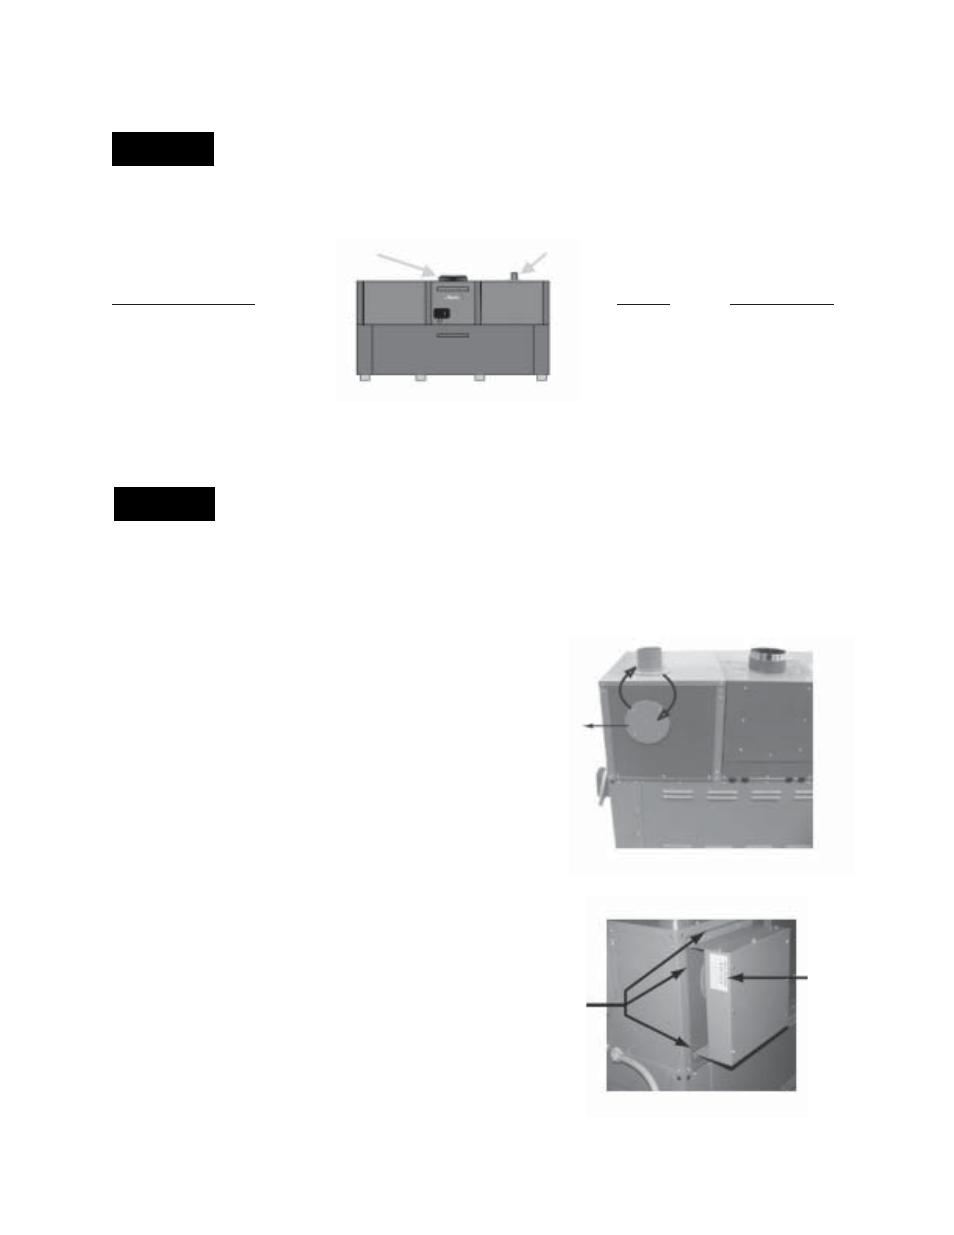
Vent collar
Air intake collar
THIS KIT INCLUDES:
MODEL
PART NUMBER
1- Filter box
992-1532
#007101- 8”
1- Decal (attached)
1802-2342
#007102- 10”
6- Screws
1- Instructions
Heater as shipped
HI DELTA FILTER BOX INSTRUCTIONS
NOTICE:
These instructions pertain only to units installed outdoors only. All Hi Delta units are shipped with the
air intake collar mounted temporarily on the top of the heater for shipping purposes. If this is to be
installed outdoors, the air intake collar and filter box must be relocated to the back of the unit to prevent
recirculation of flue products.
1. Turn off the gas and power to the unit.
Air intake
Vent
collar
collar
2. Remove the four screws holding the air intake collar on
the top of the unit.
3. Remove the four screws holding the cover plate. See Fig. 1. Cover
plate
4. Remove the white gasket paper off the air intake collar.
5. Align the four holes of the air intake collar over the four
holes on the opening on the back of the heater.
6. Mount air intake collar on back of the heater using four
screws.
Fig. 1 Back of heater
7. Remove the white gasket paper off the cover plate.
8. Align the four holes of the cover plate over the opening
on the top of the heater.
Filter
9. Mount the cover plate using four screws.
Align filter
warning
box to edges
10. Hold the box over the air intake filter warning decal
facing outward and align the top and side edges as
shown in Fig. 2.
Fig. 2 Back of heater