Heat exchanger removal, Maintenan, Maintenance – Raypak HI DALTA HD101 User Manual
Page 41
41
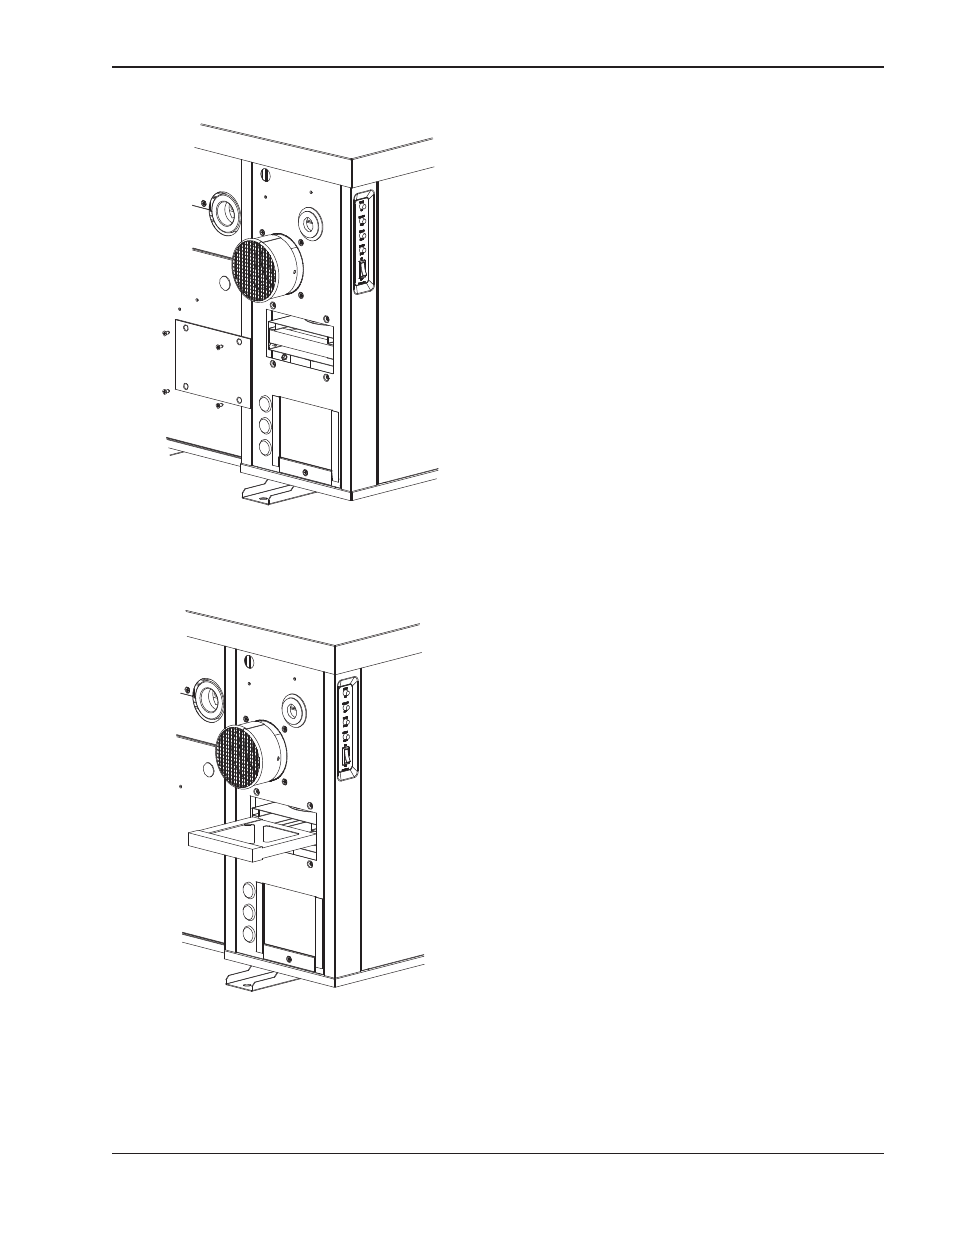
3. Remove the (4) screws holding the panel in place.
4. Pull the air filter out for inspection. Replace if nec-
essary.
5. When replacing, note the direction of the air flow
defined on the side of the filter. The arrow should
be pointing downward.
6. Replace the panel and screws before operating.
Fig. 34: Remove the Screws and Panel
Fig. 35: Inspect the Air Filter
Heat Exchanger Removal
Refer to Fig. 36 for the following procedure.
1. Before beginning, make sure the heater is cool to
the touch. Shut water, gas and electricity off, close
valves and relieve pressure, then remove the relief
valve. Remove side inspection panels.
2. Remove screw behind inspection panels holding
the jacket top down.
3. Remove the front panel. Remove two additional
screws holding the jacket top to the top support.
4. Disconnect vent pipe from the flue exhaust and set
aside.
5. Remove jacket top, then disconnect vent switch
hose.
6. Remove two rows of screws holding the flue col-
lector to the combustion chamber. Remove two
additional screws located on the front combustion
panel. Cut any silicone holding the flue collector
and heat exchanger in place.
7. Carefully lift and remove the flue collector.
8. Lift heat exchanger straight up being careful not to
damage the refractory.
9. Reverse the above procedure to re-install. Make
sure sufficient high temperature silicone sealant
(RTV) is placed along the vertical sides of the tube
sheet and flue collector.