Assembly instructions – Ryobi 330B User Manual
Page 9
ASSEMBLY INSTRUCTIONS
9
ASSEMBLING UNIT AS A BLOWER
Blower Tube Assembly
WARNING:
To prevent serious personal
injury, stop the engine and allow the impeller
to stop before installing or changing tubes.
WARNING:
To prevent serious personal
injury or damage to the unit, the blower tube
must be installed while operating this unit as
a blower.
NOTE: If the unit was assembled as a vacuum unit,
remove all vacuum parts and store away in a
secure place for later use.
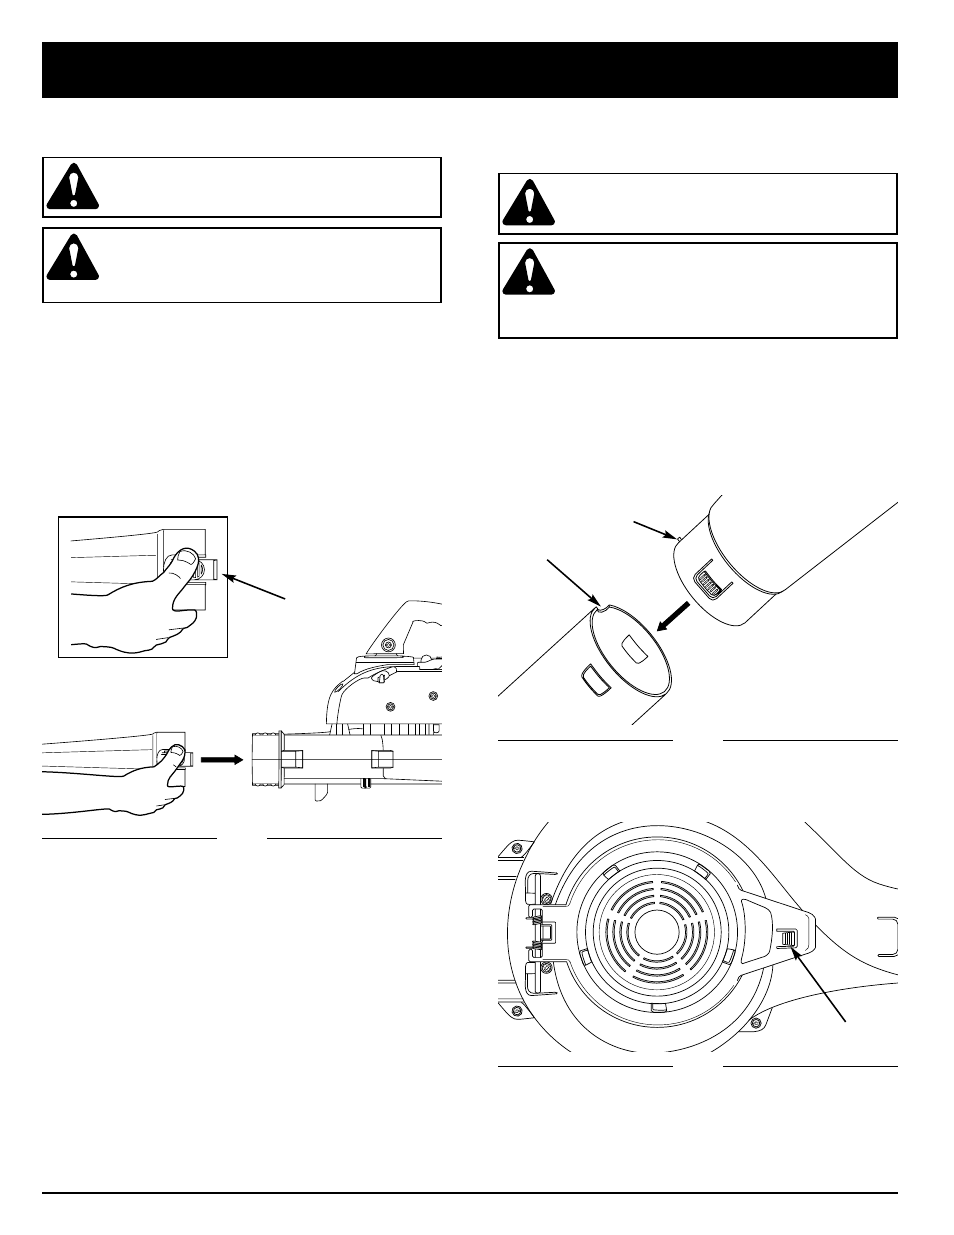
Installing
• Install the blower tube over the blower outlet and push
on until both tabs snap into place (Fig. 1).
Removing
• Remove the blower tube by pressing both tabs at the
same time and pulling off the blower (Fig. 1).
ASSEMBLING UNIT AS A VACUUM
(Optional Vacuum Kit)
Vacuum Tube Assembly
WARNING:
To prevent serious personal
injury, stop the engine and allow the impeller
to stop before installing or changing tubes.
WARNING:
To prevent serious personal
injury or damage to the unit, always install
vacuum tubes, vacuum bag and make sure
the vacuum bag is completely zipped closed
when operating this unit as a vacuum.
NOTE: If the unit was assembled as a blower unit,
remove all blower parts and store away in a
secure place for later use.
Installing
1. Assemble the vacuum tube by installing the lower
tube into the upper tube with the tab on the lower
tube aligning with the notch on the upper tube. Push
the lower tube down and snap into place (Fig. 2)
2. Turn the unit over and open the vacuum door by
pressing the tab button and swinging the door open
(Fig. 3).
Fig. 1
Fig. 2
Fig. 3
Tabs
Tab Button
Notch
Upper Vac Tube
Lower Vac Tube
Tab