NHT Evolution System User Manual
Page 21
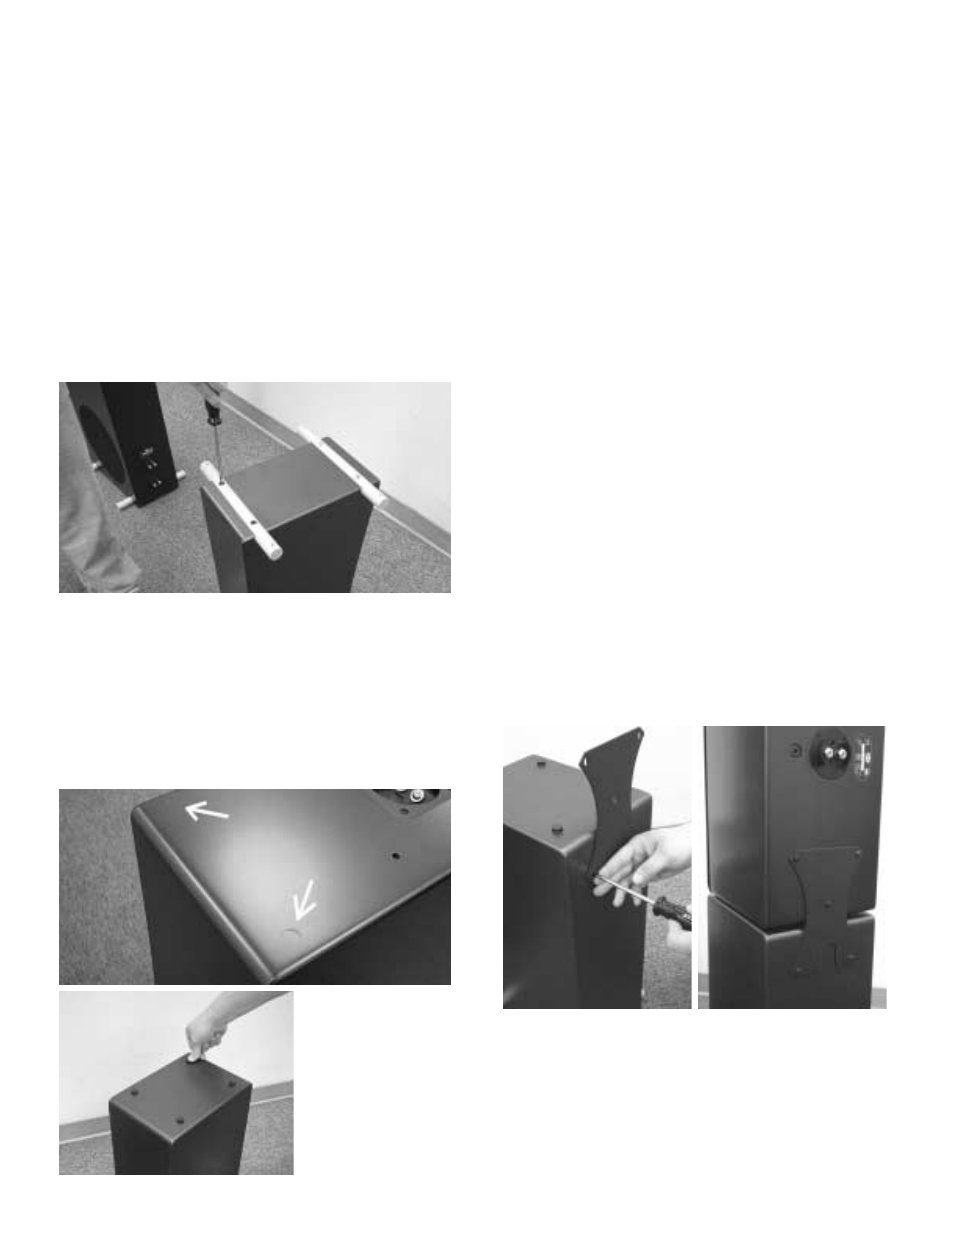
4.4 Assembling Monitors On Pedestals
Step 1: Install Aluminum Stabilizer Bars
Carefully turn the P5 or P6 bass module upside
down on a soft surface, being careful not to
scratch the paint. Find the four threaded holes
on the bottom of the pedestal. Gently place the
stabilizer bars over the threaded holes. Start the
four large (1/4-20) screws by hand. Once they
have been started, tighten them with the #3
Phillips screwdriver.
Step 2: Attaching Rubber Feet
Attach the four round rubber feet to the top of
the pedestal. Peel the paper backer from each
foot, and press them into the shallow indenta-
tions on the cabinet surface.
Step 3: Install Metal Mounting Plate
Begin by attaching the metal mounting plate to
the pedestal base with two of the small (10-24)
screws and the #2 Phillips screwdriver. Note
that the notch in the metal plate should be fac-
ing downwards. Do not tighten them all the way
until the monitor is in position.
Gently place the Monitor on the pedestal top
with its back against the mounting plate. Make
sure that you have determined the proper tweet-
er orientation (see Section 3). Start the three
small screws (10-24) through the mounting plate
and into the threaded holes in the back of the
Monitor. Tighten all five screws until snug.
Gently place the monitor on the pedestal top
with back against the mounting plate. Make
sure that you have the proper tweeter orienta-
tion (see Section 3). Start 3 smaller bolts (10-
24) through the mounting plate and into the
threaded holes in the back of the monitor.
Tighten all five bolts until snug.