Step 2 frame a picture – Nikon COLLPIX L22 User Manual
Page 34
22
Bas
ic Ph
otography an
d Pl
ayba
ck
: E
asy
A
u
to
Mod
e
Step 2 Frame a Picture
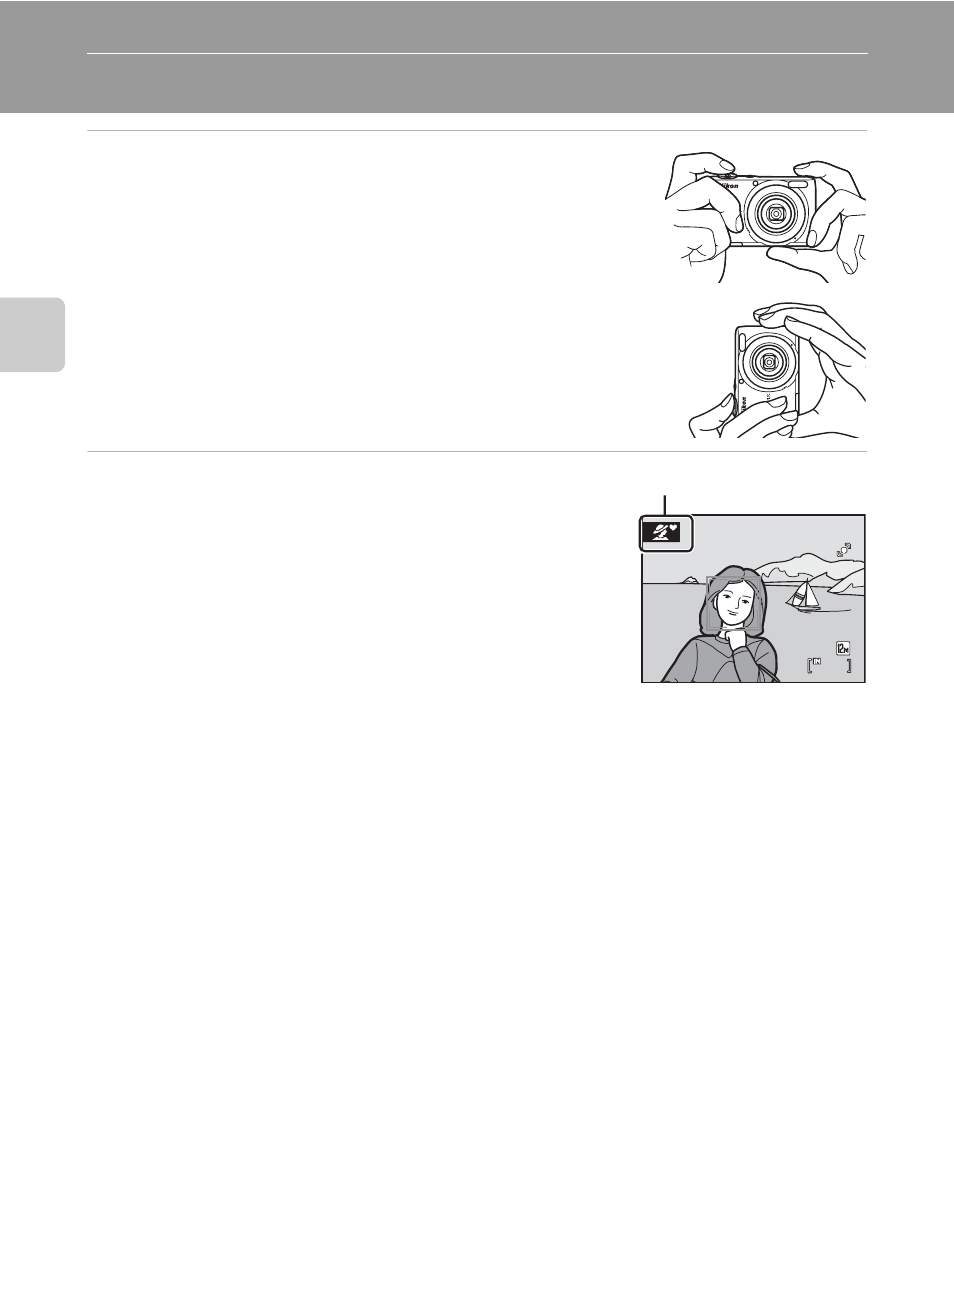
1
Ready the camera.
Hold the camera steadily in both hands, keeping your
fingers and other objects away from the lens, flash, self-
timer lamp and microphone.
When taking pictures in “tall” orientation, turn the camera
so that the built-in flash is above the lens.
2
Frame the picture.
• When the camera determines the scene mode, the
shooting mode icon will change (
• When the camera detects a human face, that face will
be framed by a yellow double border.
• Up to 12 faces can be recognized. If more than one
face is recognized, the face closest to the camera will
be framed in the focus area by a double border, and
the other faces will be framed by a single border.
• When shooting non-human subjects or when no faces are detected, focus will be in
the center of the monitor. Position the main subject near the center of the monitor.
4
4
Shooting mode icon
B
Easy auto mode
• The desired scene mode may not be selected in certain conditions. In this case, select another
shooting mode.
• When digital zoom is in effect, the shooting mode is U.