Porter-Cable D24938-044-2 User Manual
Page 22
22- ENG
D24938
d. It is now possible to remove
regulator.
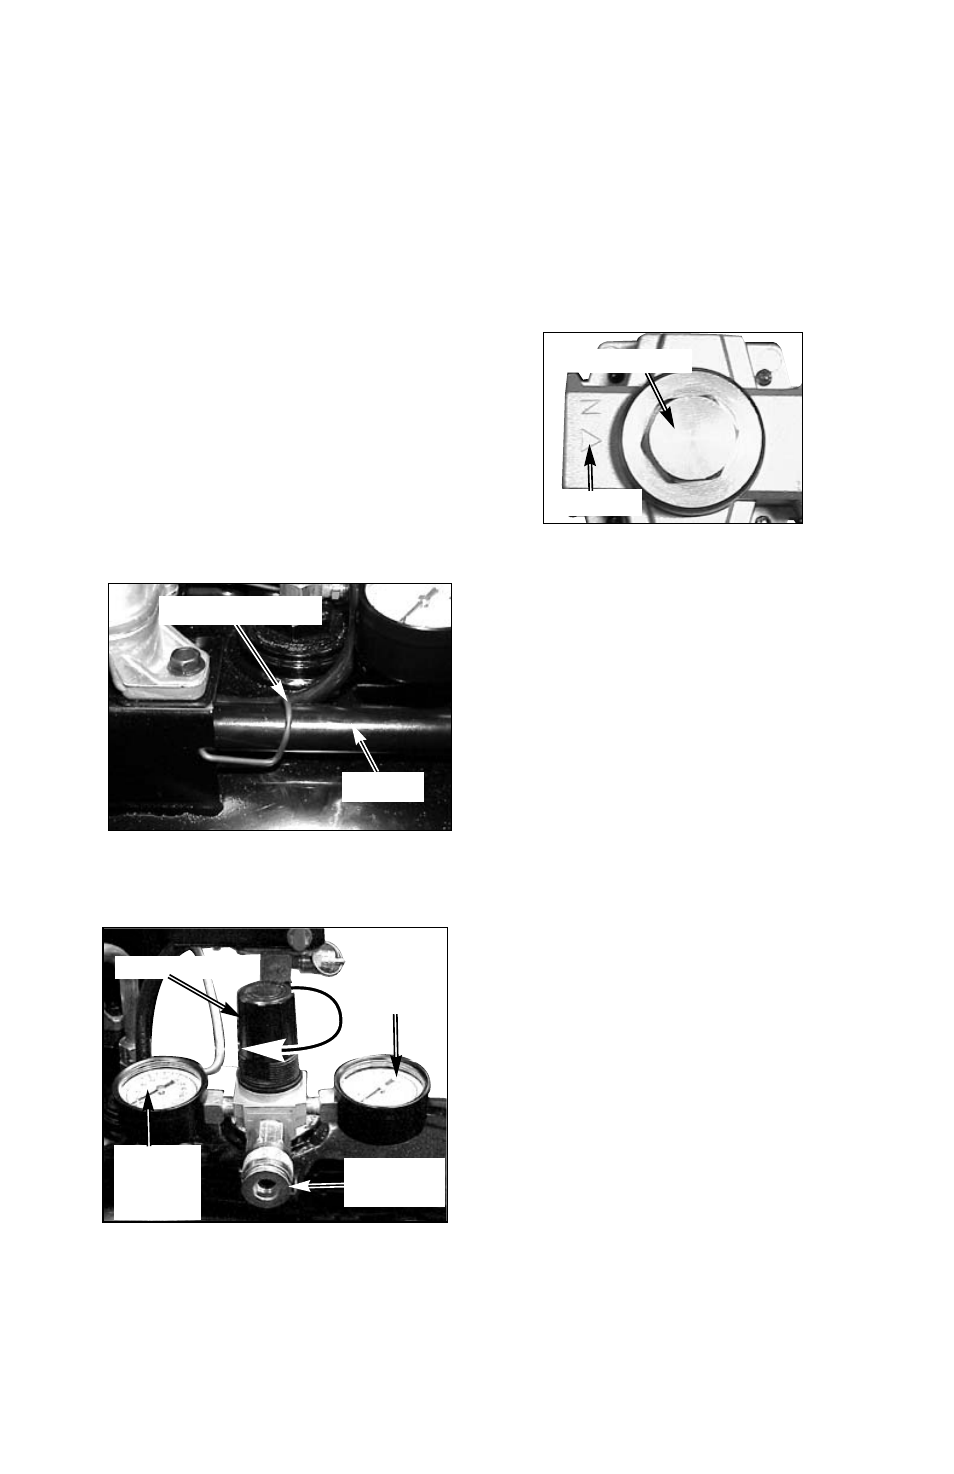
5.
Apply pipe sealant tape to the
nipple.
6.
Assemble the regulator and
orient as shown in figure.
NOTE: Arrow indicates flow of air.
Make sure it is pointing in the
direction of air flow.
7.
Reapply pipe sealant to outlet
pressure gauge, tank pressure
gauge, and quick connect.
8.
Reassemble outlet pressure
gauge, tank pressure gauge, and
quick connect. Orient outlet
pressure gauge and tank
pressure gauge to read correctly.
Tighten quick connect with
wrench.
9.
If necessary, rotate pressure
switch assembly into correct
position.
10. If necessary, tighten pressure
relief tube nuts at air tank and
pressure switch.
11. If necessary, replace handle.
Refer to Handle Assembly
paragraph in the Assembly
section.
To Replace Regulator
1.
Release all air pressure from air
tank. See "To Drain Tank" in the
Maintenance section.
2.
Unplug air compressor.
3.
Remove the outlet pressure
gauge, tank pressure gauge, and
quick connect (if equipped) from
the regulator.
4.
Remove the regulator. NOTE: If
regulator comes in contact with
tank and is unable to be
removed follow these steps:
a.
Using an adjustable wrench
loosen pressure relief tube
nut at air tank and pressure
switch.
b.
Lift retaining clip from handle
and remove handle.
c.
Using an adjustable wrench,
rotate the pressure switch
assembly as shown.
Outlet
Pressure
Gauge
Regulator
Tank
Pressure
Gauge
Quick
Connect
Arrow
Regulator
Retaining clip
Handle