Porter-Cable D24938-044-2 User Manual
Page 18
Oil
NOTE: Use an oil specifically
formulated for use in an air
compressor, such as Porter-Cable
PAS1 air compressor oil. Oil may be
found at the store where the air
compressor was purchased.
NOTE: Crankcase oil capacity is
approximately 16 fluid ounces.
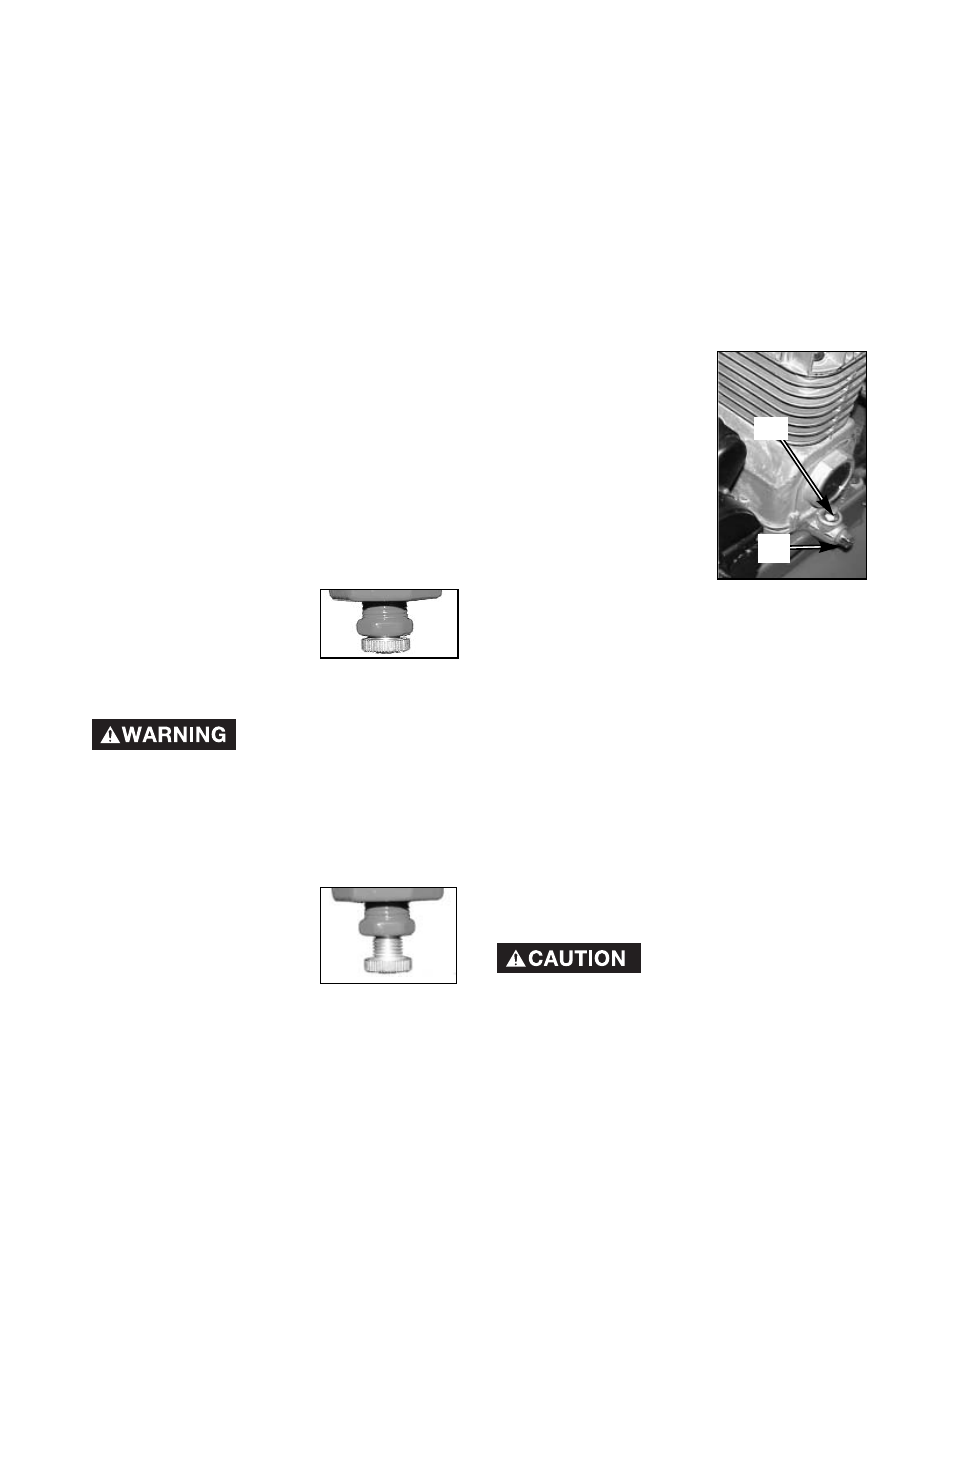
Checking
1.
Remove the oil fill
plug (A). The oil
level should be
even with the top
of the fill hole and
no lower than 6
threads from the
top of fill hole.
2.
If needed, slowly
add oil until it
reaches the top of fill hole.
Changing
1.
Remove the oil fill plug (A).
2.
Remove the oil drain plug (B) and
drain oil into a suitable container.
3.
Replace the oil drain plug (B) and
tighten securely.
4.
Slowly fill crankcase to the top of
the fill hole. NOTE: When filling
the crankcase, the oil flows very
slowly into the pump. If the oil is
added too quickly, it will overflow
and appear to be full.
Risk of Unsafe
Operation.
Overfilling with oil will cause
premature compressor failure. Do
not overfill.
5.
Replace oil fill plug (A) and
tighten securely.
18- ENG
D24938
A
B
To Drain Tank
NOTE: Operation of the air
compressor will cause condensation
to build up in the air tank. Always
drain tank on a washable surface or
in a suitable container to prevent
damaging or staining surfaces.
1.
Set the On/Auto/Off lever to
"Off".
2.
Pull the regulator knob out and
turn counterclockwise to set the
outlet pressure to zero.
3.
Remove the air tool or
accessory.
4.
Pull ring on safety valve allowing
air to bleed from the tank until
tank pressure is approximately
20 psi. Release safety valve ring.
5.
Drain water from
air tank by
opening drain
valve on bottom of
tank.
Risk of Bursting.
Water will
condense in the air tank. If not
drained, water will corrode and
weaken the air tank causing a risk
of air tank rupture.
6.
After the water has
been drained,
close the drain
valve. The air
compressor can
now be stored.
NOTE: If drain valve is
plugged, release all air pressure. The
valve can then be removed, cleaned,
then reinstalled.
Open Drain
Valve
Closed Drain
Valve