Radio, Station preset, Preset station calling – Panasonic CQ-CB9900U User Manual
Page 9: Continued), Text display
16
CQ-CB9900U
CQ-CB9900U
17
* Press and hold [SQ] (SCROLL) for more than
2 seconds to have an another circle scroll when
the text is displayed.
Note:
≥ If any of the following screens are displayed, the
display will not be switched even when the above
operation is performed.
·
Mode and Moving picture display/SA display
· Moving picture display/SA display
· Mode and clock display
· Display and light off
≥ There is a case that text is not always displayed
while a digital station is received.
Radio
(continued)
[SQ] (SCROLL)
[DISP] (Display)
6
4
9
7
5
Car Audio
SOURCE
MUTE
POWER
RAND
VOL
3
1
2
DISP
BAND
REP
6
5
SET
SEL
#
SCAN
MENU
NUMBER
8
0
[DISP]
(Display)
Note:
≥ When pressing [MENU] (pressing and hold
[MENU] for more than 2 seconds on the remote
control unit) in radio mode, the following display
appears.
This is because radio mode does not have any
menu settings.
Station Preset
Up to 6 stations can be stored in each of the FM1, FM2, FM3 and AM band selections.
Auto Preset Memory (APM)
Automatically save stations with good reception in
the preset memory.
1
Select a band (page 14).
2
Press and hold [BAND] (APM: Auto Preset
Memory) for more than 2 seconds.
[AUTO mode (Auto seeking)]
≥ The stations that broadcast digital signals
are stored in the memory in sequence with
the station featuring the best reception fi rst
and starting with the highest preset number
whereas the stations that broadcast only
analog signals are stored in the memory in
sequence starting with the lowest preset
number.
[AUTO mode (Digital seeking)]
≥ The stations that broadcast digital signals
are saved in sequence with the one featuring
the best reception fi rst. (This may take some
time.)
[ANALOG mode]
≥ The 6 stations with good reception will be
automatically saved in the memory under
preset number 1 to 6.
Once set, the preset stations are sequentially
scanned for 5 seconds each (scanning).
Manual Preset Memory
Manually save a station in the preset memory.
1
Select a band and frequency (page 14).
2
Press and hold [
"] or [#] until the preset
number blinks.
3
Press [
"] or [#] to select the preset number
(1 to 6).
4
Press and hold [
"] or [#] for more than
2 seconds to memorize.
≥ The display blinks once, and a receiving station
is saved in the memory.
1
Select a band and frequency
(pages 14-15).
2
Press and hold [1] to [6] for more than
2 seconds to memorize.
Preset Station Calling
1
Select a band (page 14).
2
Press [
"] or [#].
Press
[1] to [6].
Note:
≥ Analog sound is heard during scanning.
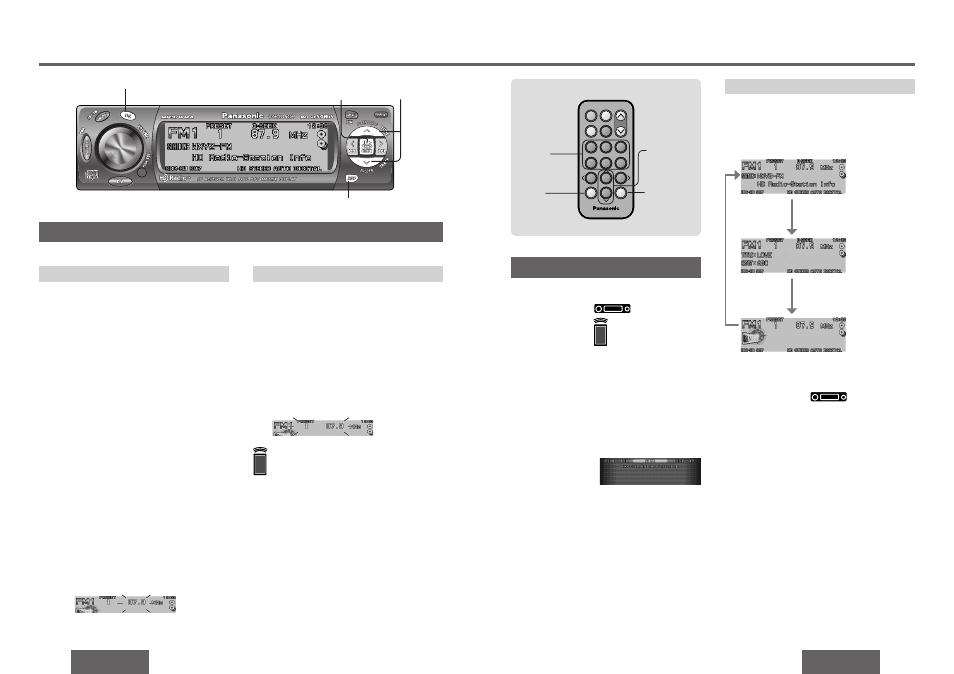
Text Display
While a digital station is received and the mode
display (page 13) is displayed, the display is
switched by one step as shown below each time
[DISP] (display) is held down for at least 2 seconds.
Station name*
(default)
Mode display
Song title*/
Artist name*
[BAND]
(APM: Auto Preset Memory)
[
"] [#]
(Preset
station)
[1] to [6]
(Preset station)
[BAND]
(Auto Preset
Memory)
[
"] [#]
(Preset station)