Setting and fastening the window – Pella Impervia 802Q0101 User Manual
Page 3
2
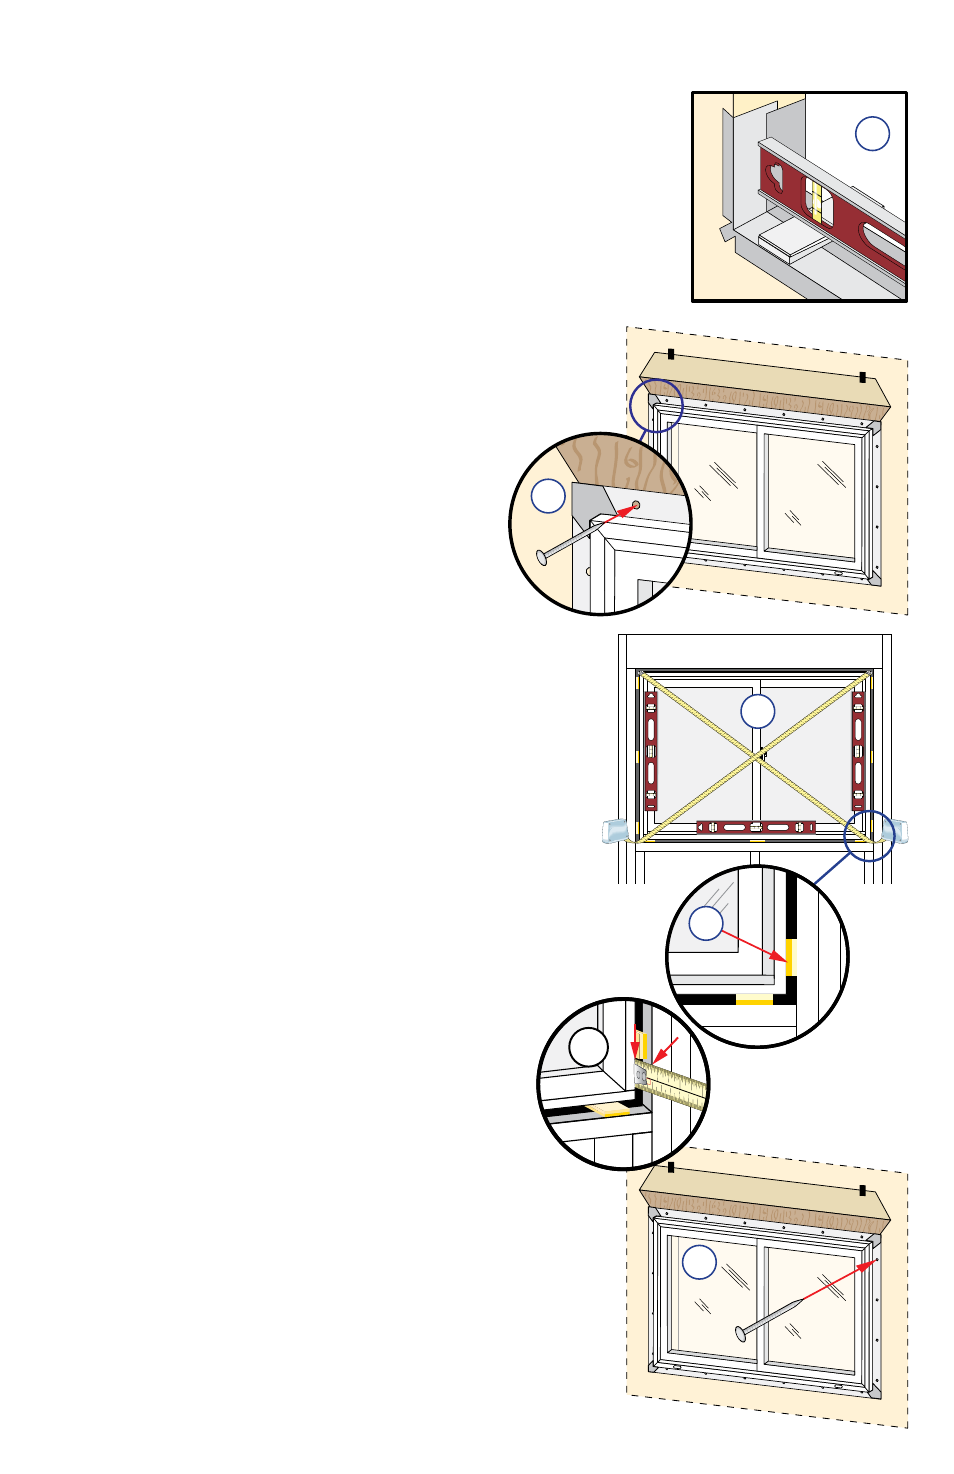
SETTING AND FASTENING THE WINDOW
A. Install and level sill spacers. Place 1" wide by 1/4" thick spacers
on the bottom of the window opening 1/4" from each side.
Spacers are also required at transition bars in multiple sash units.
Add shims as necessary to ensure the spacers are level. Once level,
attach spacers and shims to prevent movement.
Note: Improper placement of shims or spacers may result in
bowing the bottom of the window.
B. Remove plastic wrap and cardboard packaging from window.
DO NOT open the window until it is fully fastened.
Note: For best results, install the window with the sash
closed and locked with the shipping spacers in place.
TWO OR MORE PEOPLE WILL BE
REQUIRED FOR THE FOLLOWING
STEPS.
Note: If fins are to be installed to no fin
units, go to the Applying Installation Fin
instructions on the back before proceeding
to step C.
C. Insert the window from the exterior of the
building. Place the bottom of the window on the spacers
at the bottom of the opening, then tilt the top into
position. Center the window between the sides of the
opening to allow clearance for shimming and insert one
roofing nail in the first hole from the corner on each end
of the top nailing fin. These are used to hold the window
in place while shimming it plumb and square.
D. Plumb and square window. Place shims 1" from the
bottom and top of the window between the window and
the sides of the opening. Adjust the shims as required
to plumb and square the window in the opening. If the
frame height exceeds 53", place shims at the quarter
points of the window sides.
Note: DO NOT shim above the window or in the
space between the spacers at the bottom of the window.
DO NOT over shim.
E. Check the interior reveal. Make sure the
measurement from the interior face of the
window to the interior face of the wall is
equal at several points around the window.
F. Fasten the window to opening by driving 2”
galvanized roofing nails into each prepunched
hole in the nailing fin.
G. Check the window operation. Remove the plastic
spacers located between the bottom of the vent panel and
the frame sill. Open and close the window a few times to
check for proper operation. Close and lock the window.
Note: If there are any problems with the operations
of the window, recheck shim locations and adjust for
plumb and square.
2A
2C
Interior View
2D
2D
2E
1
2 0 3 0 40
5 0 6 0 70
2
3
INCHES
mm
2E