Rough opening preparation – Pella Impervia 802Q0101 User Manual
Page 2
1
ROUGH OPENING PREPARATION
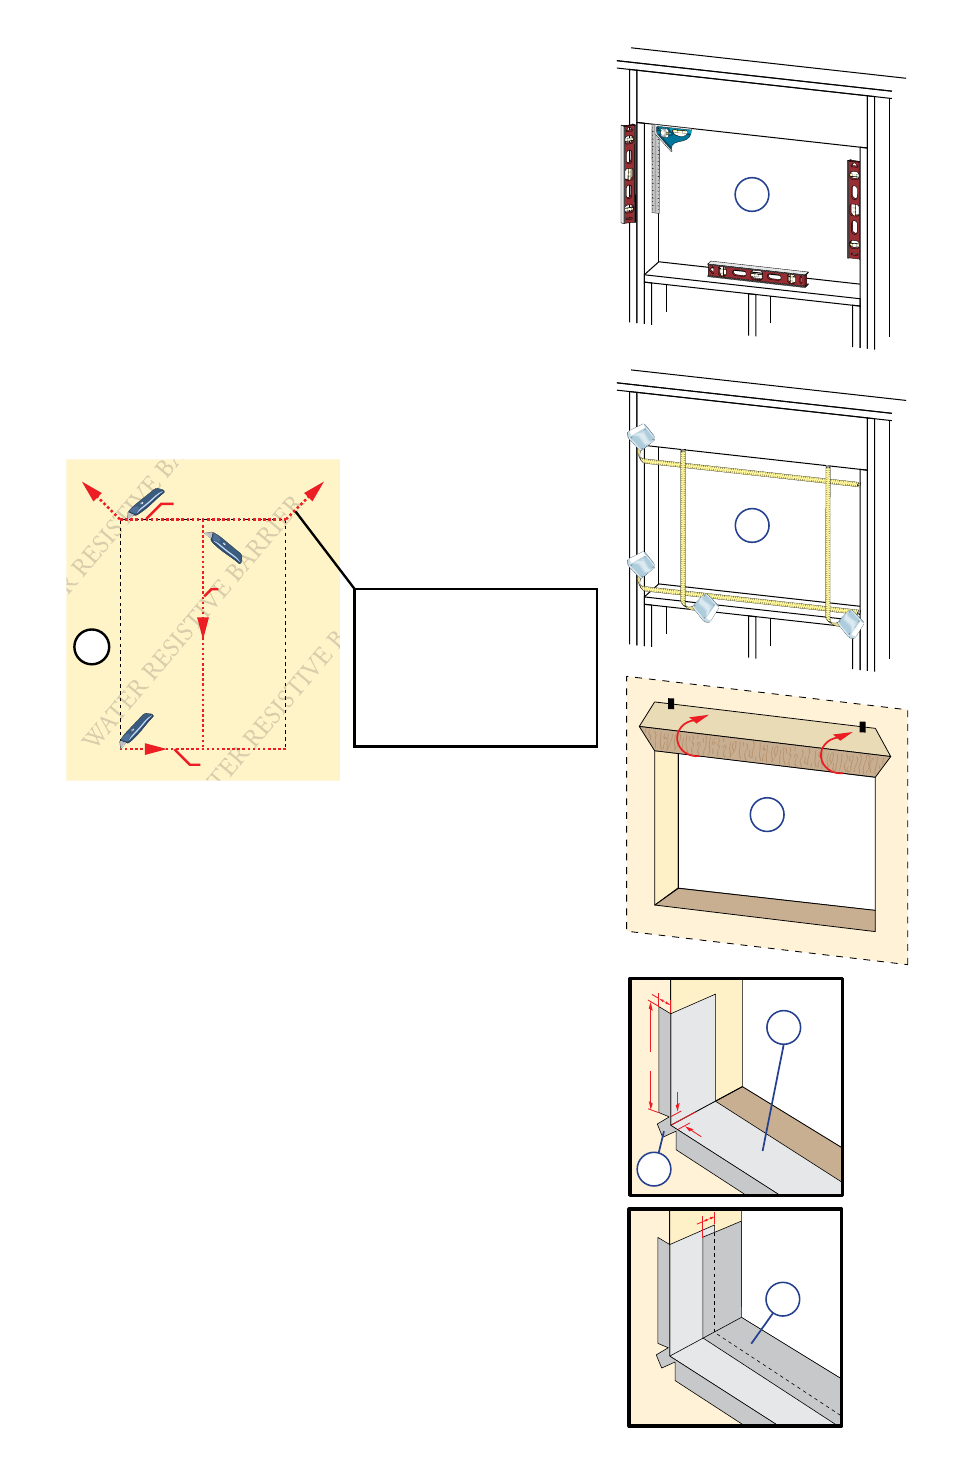
A. Confirm the opening is plumb and level.
Note: It is critical that the bottom is level.
B. Confirm the window will fit the opening. Measure all
four sides of the opening to make sure it is 1/2" larger
than the window in both width and height. On larger
openings measure the width and height in several places
to ensure the header or studs are not bowed.
Note: 1-1/2" or more of solid wood blocking is
required around the perimeter of the opening. Fix any
problems with the rough opening before proceeding.
C. Cut the water resistive barrier.
D. Fold the water resistive barrier. Fold side flaps into the
opening and staple to the inside wall. Fold the top flap
up and temporarily fasten with flashing tape.
E. Apply sill flashing tape #1. Cut a piece of flashing 12"
longer than the opening width. Apply at the bottom of
the opening as shown so it overhangs 1" to the exterior.
Note: The tape is cut 12" longer than the width
of the opening so that it will extend up each side
approximately 6".
F. Tab the sill flashing tape and fold. Cut 1" wide tabs at
each corner (1/2" from each side of corner). Fold tape
to the exterior and press firmly to adhere it to the water
resistive barrier.
G. Apply sill flashing tape #2. Cut a piece of flashing tape
12" longer than the opening width. Apply at the bottom,
overlapping tape #1 by at least 1". DO NOT allow the
tape to extend past the interior face of the frame.
Note: The flashing tape does not need to extend all the
way to the interior of the framing.
Interior
1A
Interior
1B
1st cut
2nd cut
3rd cut
Water Resistive Barrier
1C
4th cut:
Make an 8" cut up from
each top corner at a 45°
angle to allow the water
resistive barrier to be
lapped over the fin at the
head of the window.
1D
Exterior
1F
1"
1/2"
1/2"
6"
1E
1"
1G