Fixed sash removal (continued), Prepare the opening – Pella Precision Fit User Manual
Page 8
6
FIXED SASH REMOVAL (CONTINUED)
FIXED WINDOW REPLACEMENT
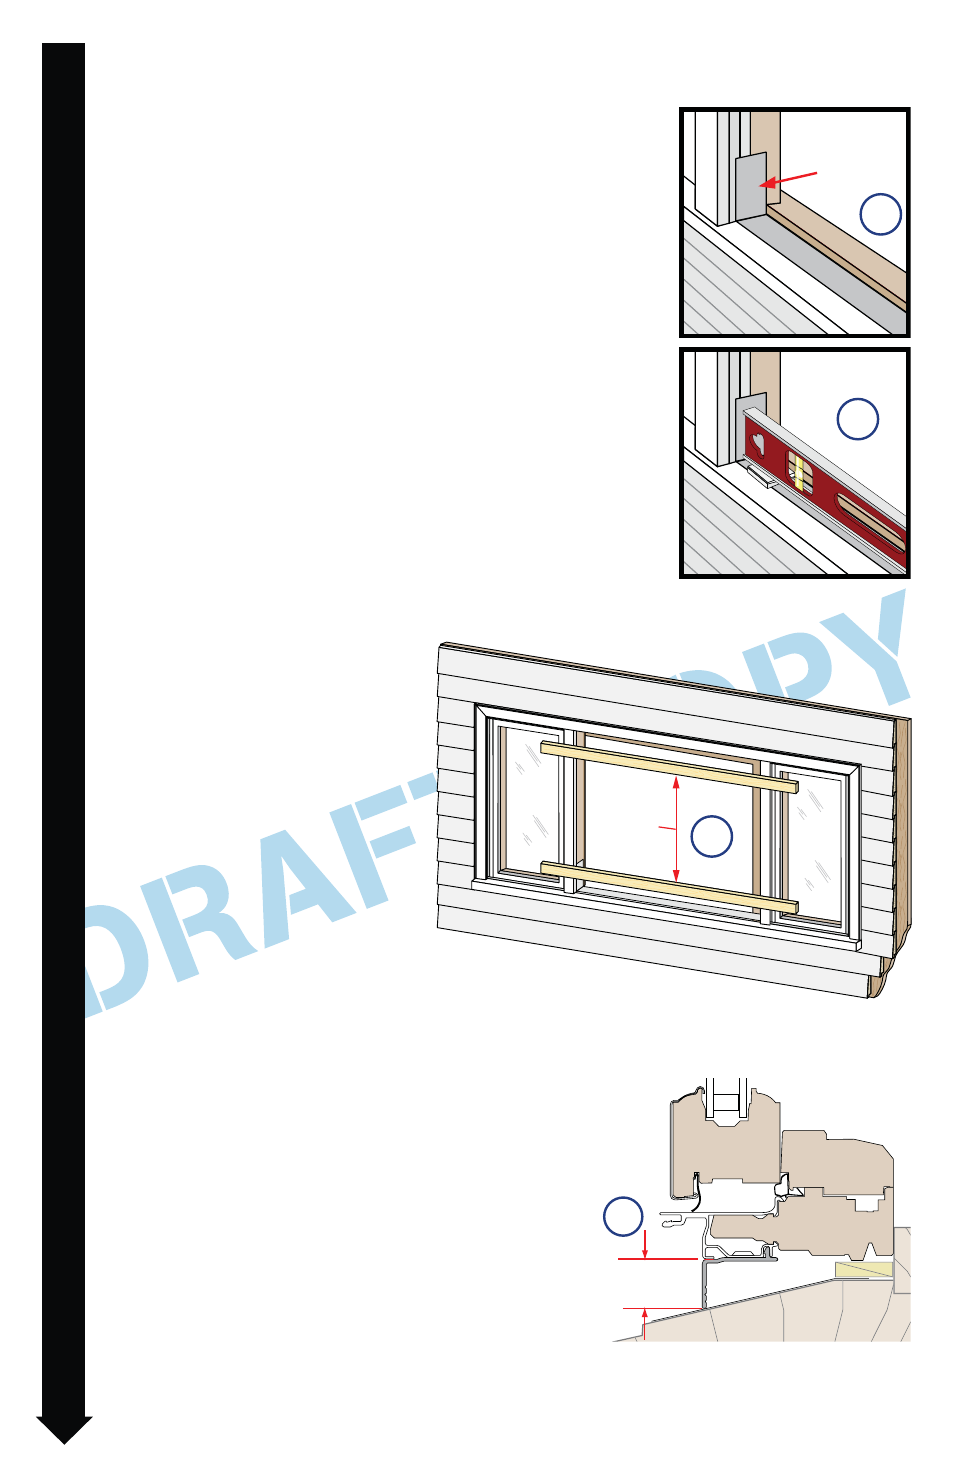
E. Apply sill flashing tape. Cut a piece of flashing tape 12"
longer than the opening width. Apply at the bottom of
the opening as shown (2A). Do not allow the flashing
tape to extend past the new window depth.
Note: The tape is cut 12" longer than the width so that
it will extend 6" up each side of the opening.
F. Check to ensure the existing sill is level. If necessary,
place shims on the bottom of the window opening 1/2"
from each side. Shim sill only at the jambs. Once level,
attach shims to prevent movement.
Note: Improper placement of shims may result in
bowing the bottom of the window.
Flashing
Tape
2A
2B
6E
6F
7
PREPARE THE OPENING
EXTERIOR
Bracing
2D
7B
A. Remove plastic wrap and
cardboard packaging from
window.
Remove the wood
spacers on the frame.
B. Attach bracing to the top
and bottom of the exterior
frame to prevent the
replacement window from
falling out of the opening
during installation.
C. Test fit the window. The window should be
approximately 1/2” smaller than the opening
in both width and height. Measure the
distance between the frame and the sloped
sill, this will be the height to which to cut
the sill adapter. Check to ensure the window
rests against the bracing applied in step 7B.
Confirm the installation screws will fasten
into solid wood. If not, repair the existing
frame to ensure there is solid wood at the
installation screw locations.
7C
Adapter Height
Proper Sill