Picture adjust, Stereo / sap / mono, Hdmi – Panasonic TC 22LR30 User Manual
Page 32: Audio leveler, Normal/normalize, Pic mode, Advanced adjust
32
For assistance, please call : 1-800-211-PANA(7262) or, contact us via the web at:http://www.panasonic.com/contactinfo
STEREO / SAP / MONO
• Red display : With signal
White display : No signal
White display (All modes) : MONO
• To change the mode using AUDIO button.
STEREO
Two channel Audio reception.
SAP
Second Audio Programming (typically used for bilingual
audio).
MONO
Use when stereo signal is weak.
HDMI
When using HDMI connection (p. 17), this feature will let you
switch between Analog Input and Digital Input.
AUTO
Automatically selects Analog / Digital signal.
DIGITAL
Digital Input only.
ANALOG
Analog Input only.
AUDIO LEVELER
You can adjust the volume level for each of the input mode (TV,
VIDEO1, VIDEO2, COMPONENT, HDMI and DVD/SD mode).
Picture Adjust
1
Press
MENU.
2
Press
◄► to select “ADJ.”
3
Press
▲▼ to select “PICTURE ADJUST” and press
ENTER.
M E N U
A D J .
S E T U P
F U N C .
P I C T U R E
P I C T U R E A D J U S T
P O S I T I O N / S I Z E
A U D I O
A U D I O A D J U S T
OK
PAGE
RETURN
SELECT
5
Press
◄► to adjust the setting watching the picture
behind the menu.
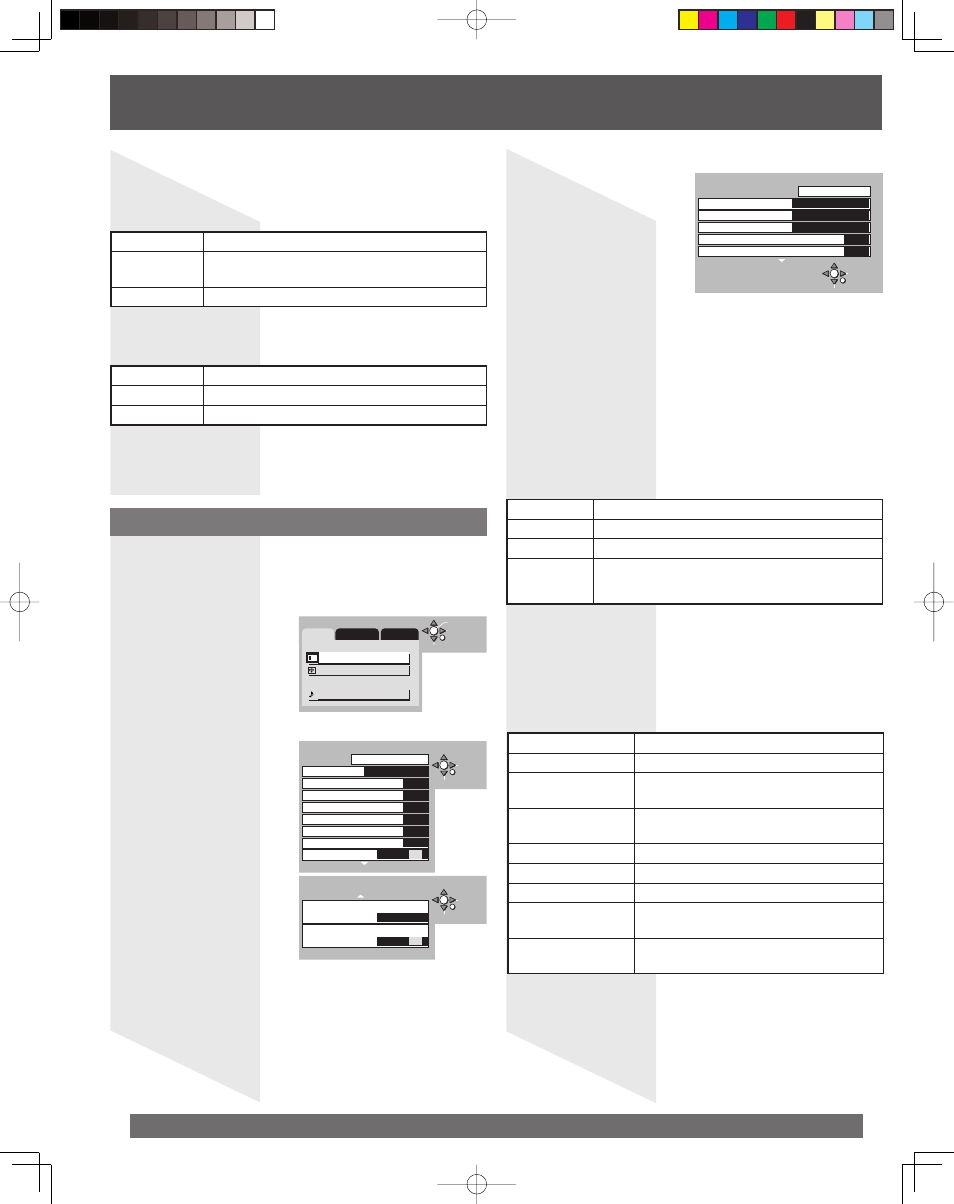
P I C T U R E A D J U S T P A G E 1 / 2
N O R M A L
P I C M O D E
V I V I D
B A C K L I G H T
0
P I C T U R E
0
B R I G H T N E S S
0
C O L O R
0
T I N T
0
S H A R P N E S S
0
A I P I C T U R E
O F F
O N
CHANGE
RETURN
SELECT
6
Press
▲▼ to select “ADVANCED ADJUST” and
press ◄► to select “ON.”
P I C T U R E A D J U S T P A G E 2 / 2
C O L O R T E M P
C O O L
A D V A N C E D A D J U S T
O F F
O N
CHANGE
RETURN
SELECT
ADJUST
RETURN
SELECT
A D V A N C E D A D J U S T
N O R M A L I Z E
E D G E T R A N S .
M I D
G R A Y E M P H A S I S
M I D
G A M M A A D J U S T
M I D
B L A C K E X T E N S I O N
+ 8
W H I T E C H A R C O R R
+ 8
7
Press
▼ to display the sub-menu.
NORMAL/NORMALIZE
Select “NORMALIZE” and press ENTER to return each PIC
MODE to the factory default setting.
Notes:
• “NORMAL” means the PIC MODE is in the factory default setting.
“NORMAL” changes to “NORMALIZE” when you change the setting of
BACK LIGHT, PICTURE, BRIGHTNESS, COLOR, TINT, SHARPNESS, AI
PICTURE, COLOR TEMP or ADVANCED ADJUST.
• You can normalize each PIC MODE separately.
PIC MODE
You can also change “PIC MODE” by pressing PICTURE MODE
on the Remote Control.
STANDARD
Displays a standard image.
CINEMA
Ideal for watching movies in a dark room.
VIVID
Displays a clear image with high contrast.
CUSTOM
You can customize the picture settings to suit your
preference. (Refer to “ADVANCED ADJUST” on page
33.)
• PIC MODE setting is stored separately for TV, VIDEO1, VIDEO2,
COMPONENT, HDMI and DVD/SD mode.
4
Press
▲▼ to select the sub-menu.
BACK LIGHT, PICTURE, BRIGHTNESS, COLOR,
TINT, SHARPNESS, AI PICTURE, COLOR TEMP
You can change the level of each Item (BACK LIGHT, PICTURE,
BRIGHTNESS, COLOR, TINT, SHARPNESS, AI PICTURE and
COLOR TEMP) for each MENU (STANDARD, CINEMA, VIVID
and CUSTOM) according to your personal preference.
Sub-menu
Function
BACK LIGHT
Luminance of the back light is adjusted.
PICTURE
Selects proper brightness and density for the
room.
BRIGHTNESS
Adjusts for easier viewing of dark pictures such
as night scenes.
COLOR
Adjusts the level of color.
TINT
Adjusts for flesh tone color.
SHARPNESS
Adjusts the degree of sharpness.
AI PICTURE
Displays black and white more accurately when
turned ON.
COLOR TEMP
(Color temperature)
Increases or decreases WARM (red) and COOL
(blue) colors to suit personal preference.
ADVANCED ADJUST
• “ADVANCED ADJUST” is
displayed only when PIC MODE is
set to CUSTOM.