Operating, E-21, Switch on the projector power – PLUS Vision KG-PS125X User Manual
Page 22: The projector is now capable of regular projection, ቢ turn the lens cover clockwise, Switch on the power of the connected equipment
E-21
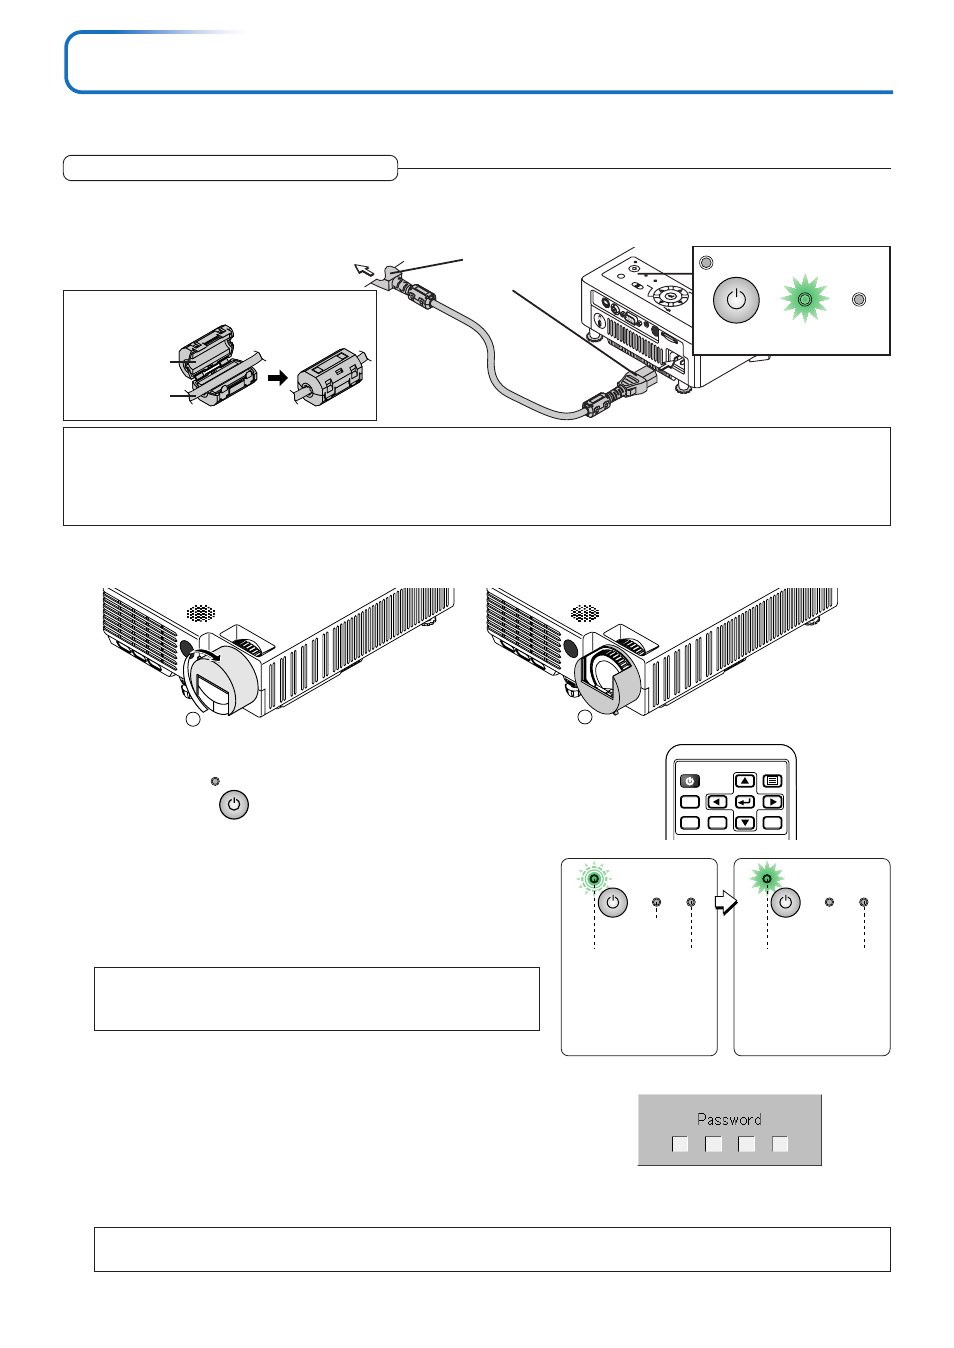
Power Cable Connections and Switching the Power On/Off
There is an order in which the power cable is connected and the power is switched on/off.
SO
UR
CE
KE
YS
TO
NE
AU
TO
KEYS
TON
E
POW
ER
STA
NDB
Y
STA
TUS
MEN
U
QUIC
K M
ENU
Firmly plug in
all the way.
To wall outlet
Operating
1
Connect the AC IN connector of the projector and the power outlet using the supplied power cable.
The STANDBY indicator will light in green, and the unit will enter the standby mode.
POWER
STANDBY STATUS
Lit green
Note:
• When the power plug will be unplugged from the power outlet, please place the projector near the power outlet so that it may be reached
easily.
• The included power cable is exclusively for use with this product. Never use it with other products.
• Press the POWER/STANDBY button after the STANDBY indicator is lit in green.
3
Switch on the projector power
Press the POWER/STANDBY button.
The first time the power is switched on after purchase, [Menu
Language Select] will be displayed. See Page E-22 for informa-
tion about language selection.
• When the power is turned on, the POWER indicator starts flashing
green, then stops flashing after about 60 seconds. If the STATUS
indicator lights green at this time, the lamp mode is set to “Eco”.
See E-28 and 49 for instructions on selecting.
Note:
While the POWER indicator is blinking, the power cannot be switched off.
Check that the POWER indicator is lit steadily, then switch off the power.
• If the power does not come on, see “When the STATUS Indicator is
Lit or Flashing” on Page E-55.
If the “Password” input window is displayed: See E-32.
A password is set for this projector.
The projector cannot be used unless the correct password is input.
To turn off the power: See E-23.
The projector is now capable of regular projection.
VIDEO
CANCEL
QUICK
MENU
ENTER
COMPUTER
POWER/
STANDBY
2
ቢ Turn the lens cover clockwise.
1
2
POWER
STANDBY STATUS
POWER
STANDBY STATUS
Blinking
green
(Approxi-
mately 60
seconds)
Lit green
Power is
on
Goes off
POWER
(button on main unit)
4
Switch on the power of the connected equipment
This
indicator is
also lit
green in
Eco-mode.
This
indicator is
also lit
green in
Eco-mode.
ባ When the lens cover stops with a click, the
projector is ready for projection.
Note:
The image can be muted quickly by closing the lens cover while the image is being projected.
Attaching the Ferrite Core
Cable
Ferrite core