Functional overview, Front panel rear panel, Front panel – Philips BDP5150/F7 User Manual
Page 9: Rear panel
9
EN
EN
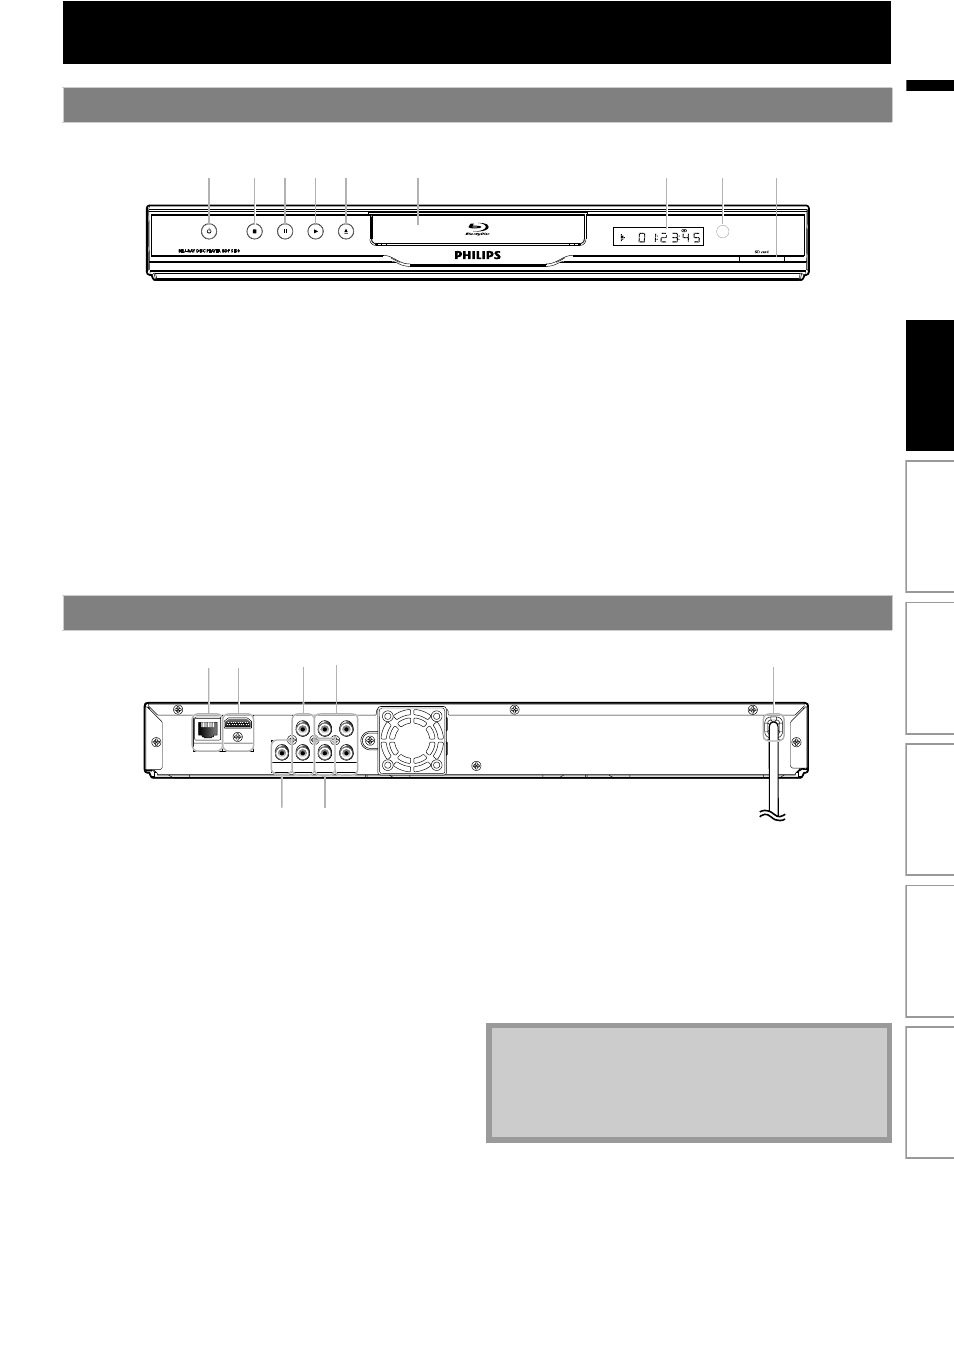
FUNCTIONAL OVERVIEW
* The unit can also be turned on by pressing these buttons.
1.
Q (standby-on) button
• Press to turn on the unit, or to turn the unit into the
standby mode. (To completely turn off the unit, you
must unplug the AC power cord.)
• Press and hold for 10 seconds to shut down the unit.
• This button lights up in red when the unit is in
standby mode and turns off when the power is on.
2. C (stop) button
• Press to stop playback.
3. F (pause) button
• Press to pause playback.
4. B (play) button*
• Press to start or resume playback.
5. A (open/close) button*
• Press to open or close the disc tray.
6. Disc tray
• Place a disc when opening the disc tray.
7. Display
• Refer to “Front Panel Display” on page 12.
8. Infrared sensor window
• Receive signals from your remote control so that you
can control the unit from a distance.
9. SD card slot
• Insert an SD Memory Card and play back the
contents in it.
1. LAN terminal
• Use to connect a telecommunications equipment
with LAN cable.
2. HDMI OUT jack
• Use to connect to a display with an HDMI compatible
port with an HDMI cable.
3. AUDIO OUT jacks
• Use to connect a TV monitor, an AV receiver /
amplifier or other device with an RCA audio cable.
4. COMPONENT VIDEO OUT jacks
• Use to connect a TV monitor with component video
inputs with an RCA component video cable.
5. AC power cord
• Connect to a standard AC outlet to supply power to
this unit.
• Unplug this cord from the AC outlet to completely
turn off the unit.
6. DIGITAL OUT (COAXIAL) jack
• Use to connect an AV receiver / amplifier, Dolby
Digital / DTS decoder or other device with a digital
audio coaxial input jack with a digital audio coaxial
cable.
7. VIDEO OUT jack
• Use to connect a TV monitor, an AV receiver /
amplifier or other device with an RCA video cable.
Front Panel
2
1
4* 5*
7
6
8
9
3
Rear Panel
P
R
/
C
R
P
B
/
C
B
Y
L
R
COMPONENT
VIDEO OUT
AUDIO
OUT
VIDEO
OUT
DIGITAL OUT
PCM / BITSTREAM
LAN
HDMI OUT
COAXIAL
1
6
3
7
4
5
2
Note
• Do not touch the inner pins of the jacks on the rear
panel. Electrostatic discharge may cause permanent
damage to the unit.
• This unit does not have the RF modulator.
Int
rod
uct
ion
Con
n
ec
ti
o
n
s
B
as
ic Setup
P
layb
ack
Others
Fu
nc
ti
on
Set
u
p