Urning, N the, Imer – Philips TP3684C1 User Manual
Page 11: Isplay
11
FEATURES
TIMER
TIME
ACTIVATE
CHANNEL
START TIME
DISPLAY
.
..
.
07:00 AM
OFF
30
12:00 PM
ON
5
4
SLEEP
POWER
AV
ON/OFF
POSITION
FREEZE
TV
VCR
ACC
SWAP
SOURCE
PIP CH
UP
DN
SMART
SOUND
SMART
PICTURE
MENU
SURF
VOL
CH
MUTE
CC
STATUS
CLOCK
A/CH
EXIT
TV/VCR
RECORD
MEDIA
INCREDIBLE
VCR
MULTI
1
3
2
FEATURES
TIMER
....
..
FEATURES
TIMER
FEATURES
TIMER
...
TIME
ACTIVATE
CHANNEL
START TIME
DISPLAY
.
.
..
FEATURES
REVIEW
PICTURE
SOUND
FEATURES
INSTALL
TIMER
SmartLock
NR
CONTRAST +
PIP
CLOSED CAP
..
.
TIMER
SmartLock
NR
CONTRAST +
PIP
CLOSED CAP
..
..
.
.
.
TIME
ACTIVATE
CHANNEL
START TIME
DISPLAY
FEATURES
TIMER
.
...
TIME
ACTIVATE
CHANNEL
START TIME
DISPLAY
.
..
....
..
.
.
.
.
.
REVIEW
PICTURE
SOUND
FEATURES
INSTALL
MOVIE RATING
– – – – – –
TV RATING
– – – – – –
BLOCK UNRATED OFF
NO RATING OFF
.
.
.
.
.
.
07:00 AM
OFF
30
12:00 PM
OFF
07:00 AM
OFF
30
12:00 PM
OFF
4
5
6
STEREO
.
O
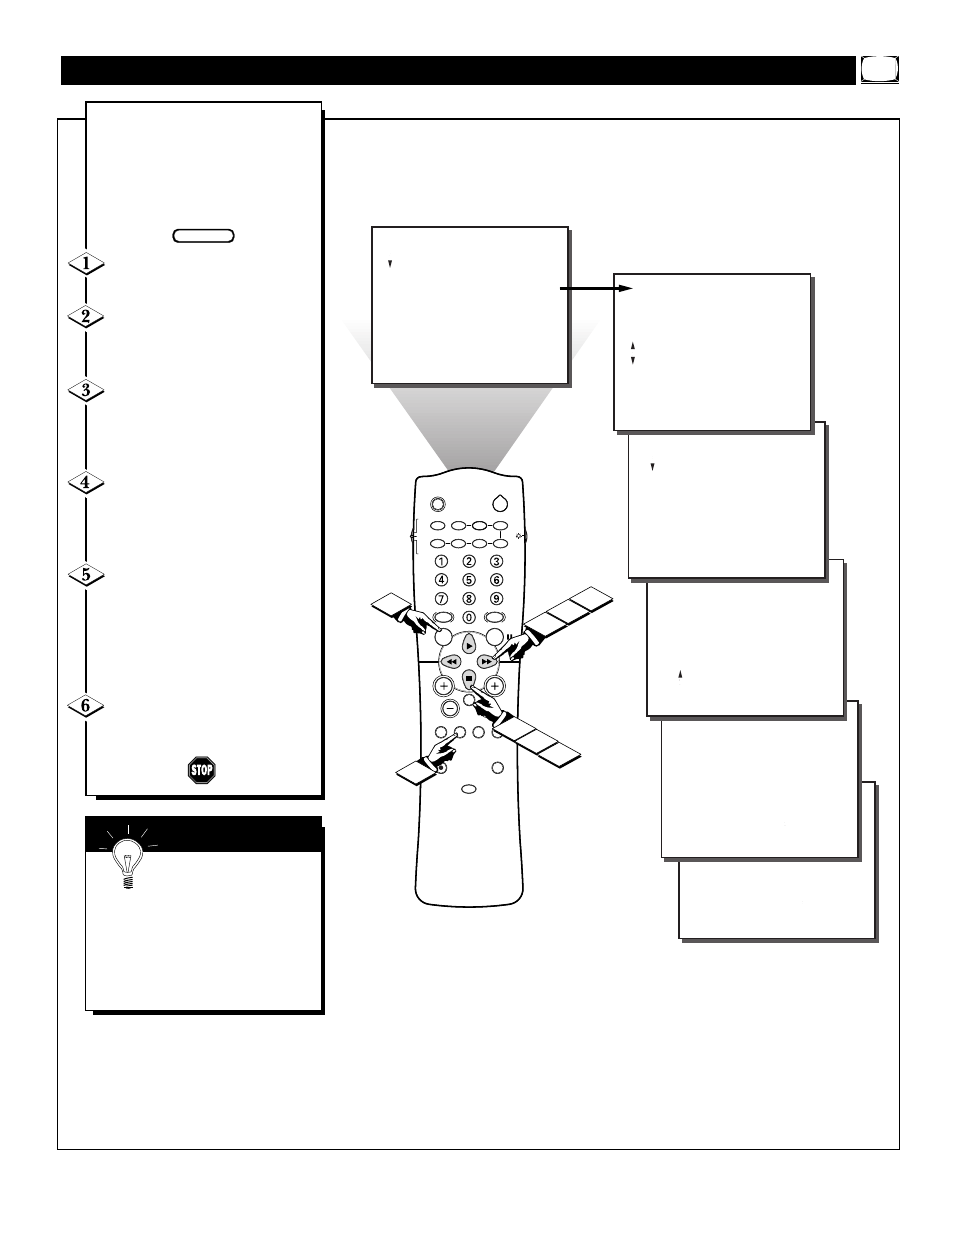
nce the television clock has
been set, you can use your
television as a clock. The Timer
DISPLAY control allows you to per-
manently display the time in the
upper right corner of the screen.
Press the MENU button on the
remote to show the on-screen menu.
Press the CURSOR DOWN ■
button three times to select the
FEATURES menu.
Press the CURSOR RIGHT
ᮣᮣ
button and the menu will
shift to the left to display the
TIMER controls.
Press the CURSOR RIGHT
ᮣᮣ
button again to shift the dis-
play left, then CURSOR DOWN ■
to highlight the DISPLAY control.
Press the CURSOR RIGHT
ᮣᮣ
button again to highlight the
DISPLAY control options. Then,
press the CURSOR UP
ᮣ
or CUR-
SOR DOWN ■ buttons to turn the
timer display ON or OFF.
Press the STATUS/EXIT but-
ton to remove the menu from the
screen.
T
URNING
O
N THE
O
N
T
IMER
D
ISPLAY
S
MART
H
ELP
Remember, be sure you
have set the television’s
clock with the correct current time.
(Refer to page 7 to set the clock
manually or page 3 of the Quick
Use Guide to set the clock auto-
matically using the SmartClock
feature.)
BEGIN