Remove the existing sash, Opening preparation – Pella 80WW0101 User Manual
Page 2
1
REMOVE THE EXISTING SASH
Note: Remove the new window from its packaging. Inspect
and measure the new window to confirm it will fit into the
opening prior to removing the existing window.
A. Remove the existing sash. This will vary per manufacturer
of the existing window. Removing the hinge and operator
fasteners will generally allow the sash to be removed from
the existing frame.
B. Remove operator hardware and all head, jamb, and sill
stops. This can usually be accomplished with a prybar.
2
OPENING PREPARATION
A. Inspect the existing window frame and repair or replace
any defective or rotted wood parts. Remove or seat any
nails.
B. Clean the opening of any dirt, debris, or excess old
paint before proceeding. Chisel off any high spots.
C. Apply one piece of sill flashing tape to the sill of the
existing window frame. Cut the tape 12" longer than the
existing window sill width. Apply the tape on the existing
sill 6" up each jamb and press down firmly. The tape
will not cover the sill depth completely under the new
window.
D. Install and level sill spacers. Place 1" wide by 3/8" thick
spacers on the bottom of the window opening 1/2" from
each side and 1/2" back from the interior surface of where
the new window will rest. Spacers are also required at
points where windows are joined in multiple window
combinations. Add shims as necessary to ensure the
spacers are level.
Note: Improper placement of shims or spacers may result
in bowing the bottom of the window.
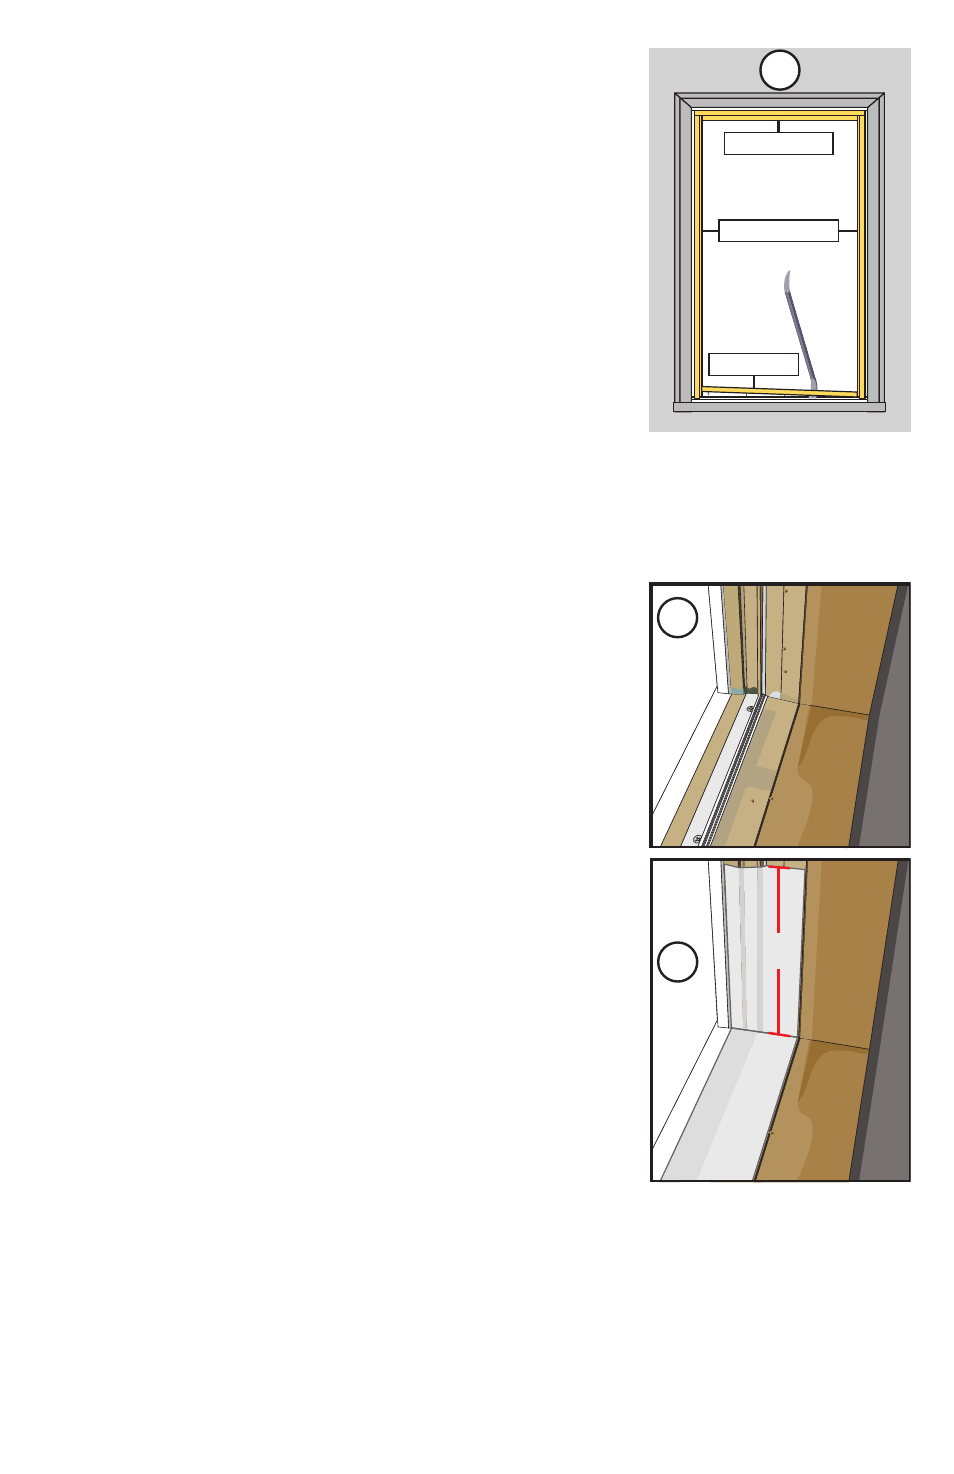
SILL STOP
HEAD STOP
JAMB STOPS
1B
2B
2C
6“
TWO OR MORE PEOPLE ARE REQUIRED FOR THE FOLLOWING STEPS.