Porter-Cable 987 User Manual
Page 7
7
CHARGING THE BATTERY
Before using your cordless tool for the first time, the battery pack should be
fully charged. If the battery pack is installed, remove it by following
instructions under “INSTALLING OR REMOVING BATTERY PACK”.
NORMAL CHARGING
Make sure that the power circuit voltage is the same as that shown on the
charger specification plate. Connect the charger to the power source. The red
and green lights will flash once to indicate that the power is connected properly
and the charger is ready for operation.
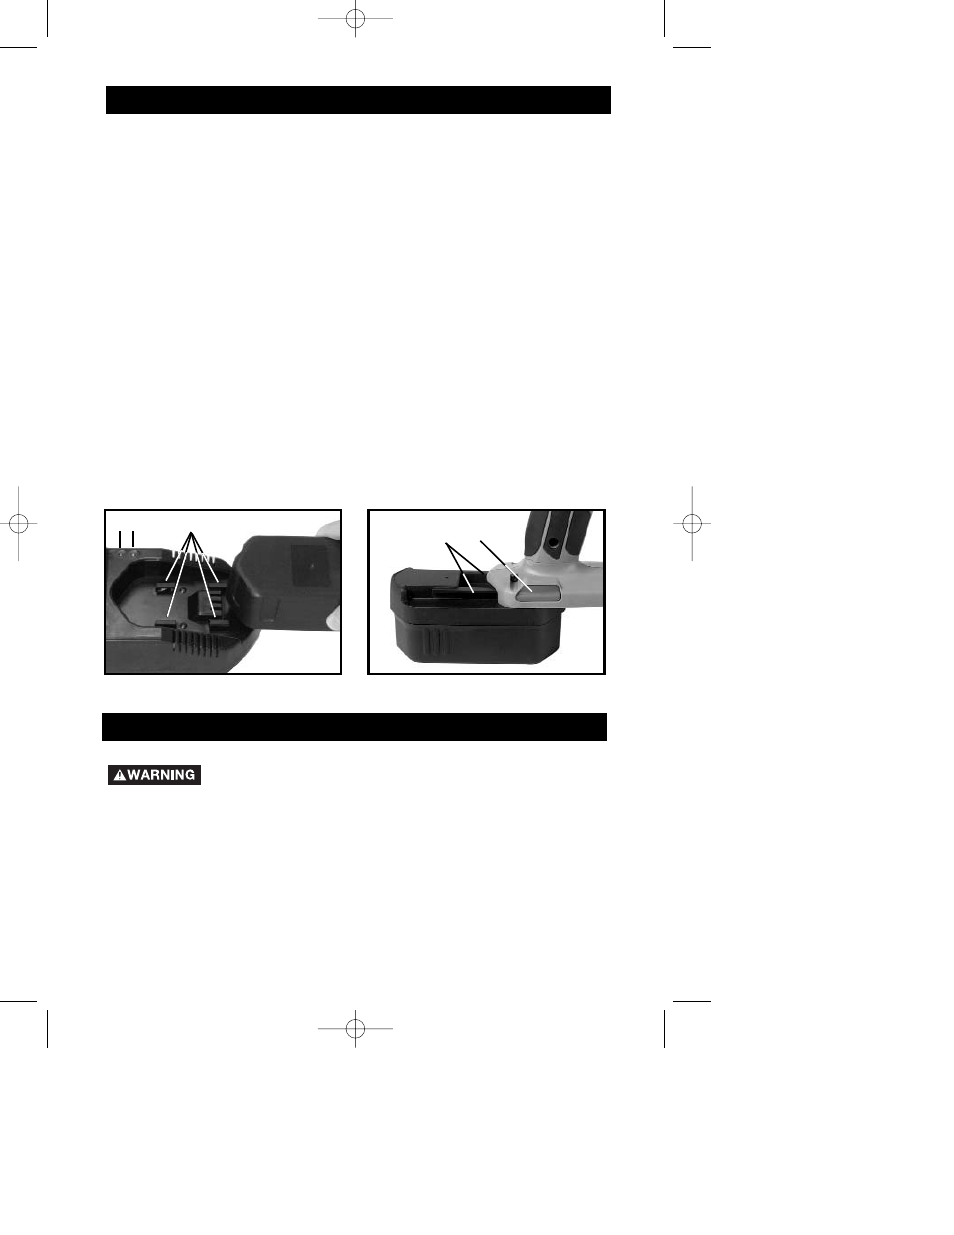
Position the battery pack on charger, align the rails on the battery pack (A) Fig.
2 with the four tabs (C) Fig. 1 on the charger. Slide the battery forward on
charger until it stops.
The green light (A) Fig. 1 should begin to flash rapidly indicating that the
battery pack is receiving a “fast charge”. (If the green light does not flash or if
the red light (B) illuminates, see DIAGNOSTICS”). After approximately one
hour, the “Fast Charge” indicator light should glow continually, indicating that
the battery pack is fully charged and that the charger is now in a
“Maintenance Charge” mode. The battery pack can be left on “Maintenance
Charge” until you are ready to use it.
Depending on room temperature, line voltage, and existing charge level, initial
battery charging may take longer than one hour.
Disconnect the charger from the power source when not in use.
Fig. 1
A B
C
Always set the trigger switch to the locked OFF position when
installing or removing the battery pack.
TO INSTALL BATTERY PACK: Align rails (A) Fig. 2 on battery pack with slots
on tool and push battery pack onto tool until it locks in place.
TO REMOVE BATTERY PACK: Depress the battery release button (B) Fig. 2,
and pull battery pack out of tool.
INSTALLING OR REMOVING BATTERY PACK
Fig. 2
A
B
984-987 - manual - 905273- 04-08-03.qxd 4/8/03 9:40 AM Page 7