First-time setup, Charge the built-in battery – Philips CAM110 User Manual
Page 8
8
Tip
See ‘Use your camcorder - Adjust settings’ for more
•
settings.
Select a scene
1
In viewfinder mode, press to enter the
window for scene selection.
2
Press +/- to select a scene.
3
Press
to confirm and go back to
viewfinder mode.
Or press
•
to cancel and go back to
viewfinder mode.
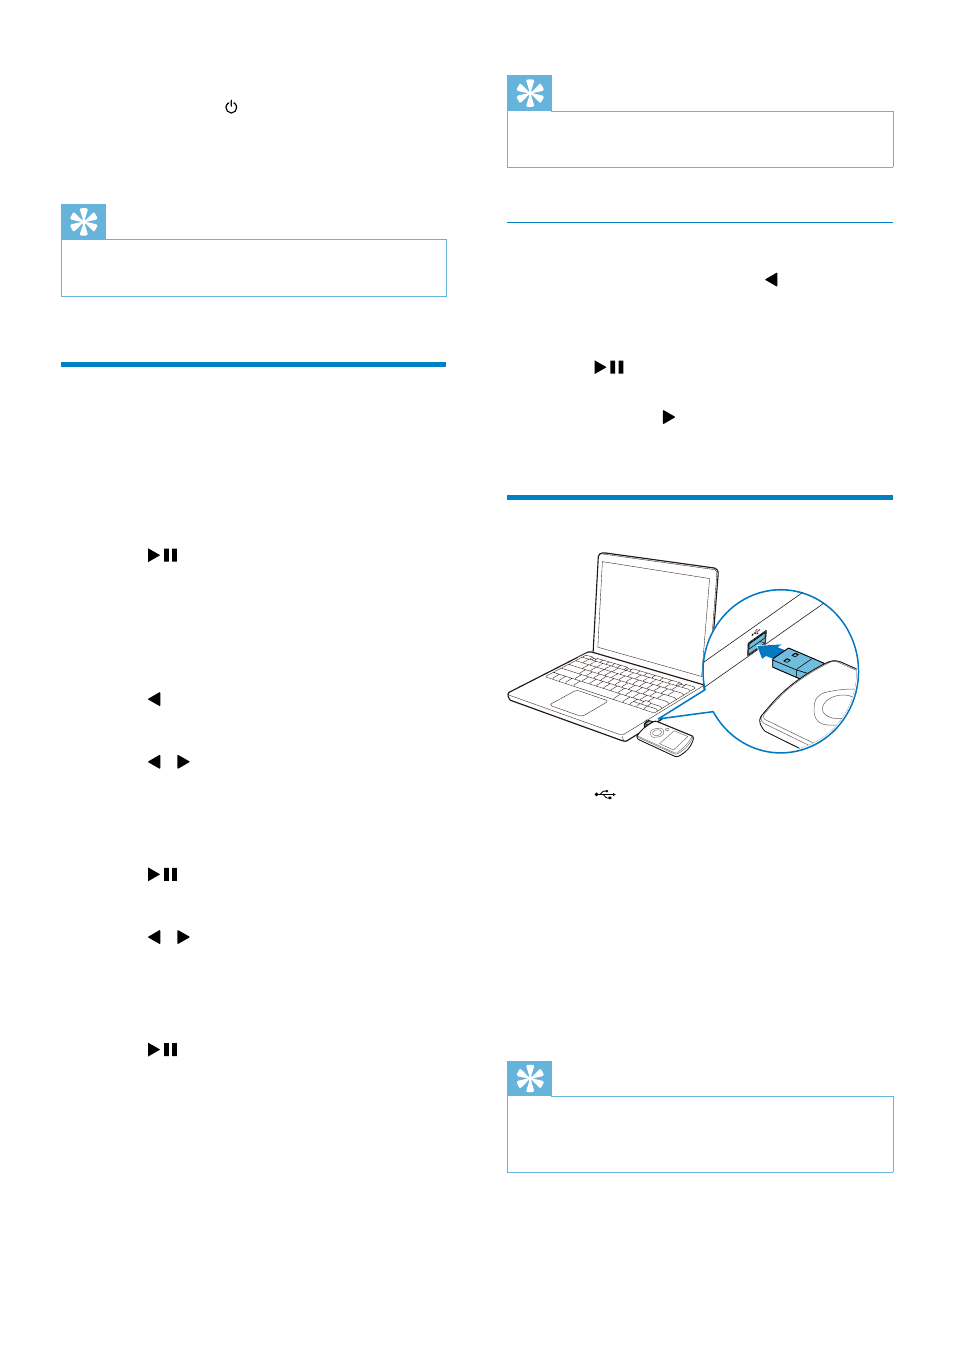
Charge the built-in battery
1
Press at the bottom of the camcorder
to eject the USB connector.
2
Connect the USB connector to a USB
socket on a PC.
The status indicator on the shutter
»
button starts flashing in orange.
3
Wait until the status indicator stops
flashing and turns to green steadily.
The built-in battery is fully charged.
»
Tip
The camcorder is fully charged for first-time use.
•
It takes about 3 hours to fully charge the built-in
•
battery via the PC.
To turn off the camcorder:
Press and hold
•
.
The backlight on the display panel
»
turns off.
Tip
To save energy, the camcorder turns off
•
automatically after being idle for 3 minutes.
First-time setup
When you turn on the camcorder for the first
time, a menu for OSD language selection is
displayed.
1
Press +/- to select a language.
2
Press
to confirm.
A welcome message is displayed
»
briefly.
An inquiry box for date and time
»
setting is displayed.
3
Press to highlight [Yes].
A date setting menu is displayed.
»
4
Press / to select the day, month and
year fields successively.
5
Press +/- to change the value of each
field.
6
Press
to confirm the date setting.
A time setting menu is displayed.
»
7
Press / to select the hour and minute
fields successively.
8
Press +/- to change the value of each
field.
9
Press
to confirm the time setting.
The first-time setup is complete.
»
The camcorder enters viewfinder
»
mode.
EN