Precision Power 355cs User Manual
Page 15
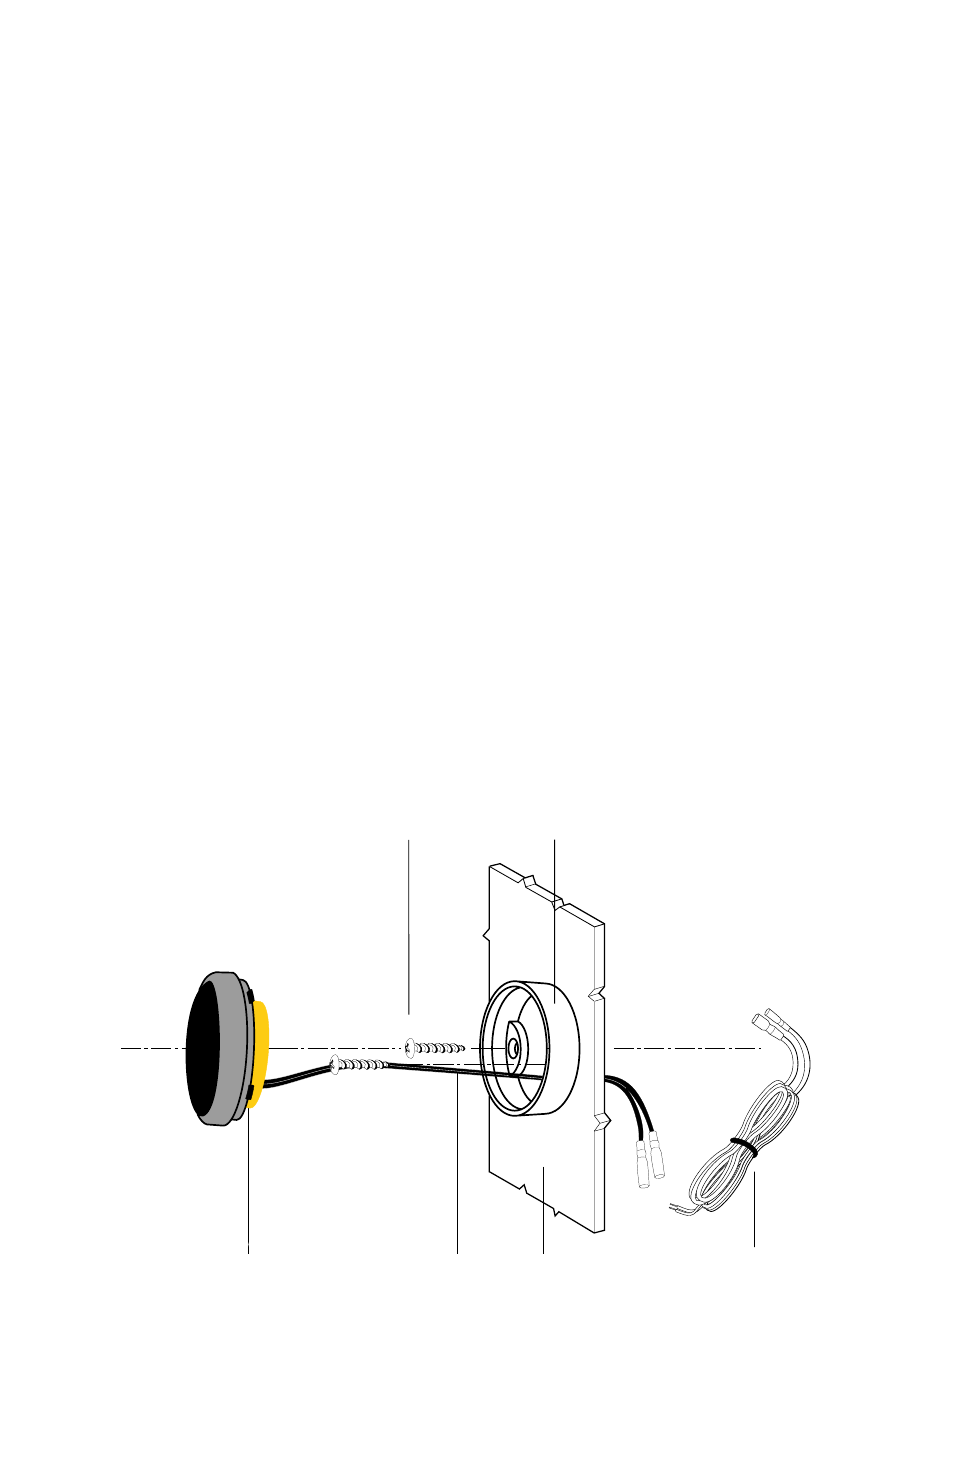
1
from the hole locations to prevent tangling of fibers in the saw blade .
Insert the two M4-0 .7 X 4-1/2 cm (1 .77 inches) flat head metal screws through the
mounting holes and just start the threads into the metal mounting bracket . With
the metal bracket attached to the mounting cup slide one end of the metal bracket
and then the other end into the mounting hole . Hold the mounting cup in its final
position and tighten, but do not over tighten the two mounting screws .
The tweeter is then slid into the mounting cup (tabs aligned with the mounting
slots), and turned counterclockwise to lock in place .
NOTE: The mounting cup is also supplied with an angled surface mounting cup
(not shown) . This allows the tweeter to be mounted at an optimum acoustic angle
for the listener . Follow the same procedure as above to mount and assemble the
tweeter in this housing .
tweeter mounting
route the wire from the crossover locations to the tweeter locations . Pull the wire
through the wire hole and attach crossover wires to the wires from the tweeters .
Connect the positive wire to the positive (+) terminal of the tweeter, which is
marked with the white trace . See the information in the speaker wiring section
of this manual and the wiring diagrams . Push the wire back into the area behind
the installation location and be sure it will not interfere with the speaker or with
anything behind the mounting panel . To attach the tweeter to the surface or flush
mount assembly, align the tabs in the mounting cup with the relieved areas in the
tweeter mount .
TWEETER
Wiring
Panel
Tweeter
Wiring
Tweeter
Mounting
Screws
Surface Mount Housing