Linksys Etherfast BEFSX41 User Manual
Page 61
EtherFast
®
Cable/DSL Firewall Router with 4-Port Switch/VPN Endpoint
115
Instant Broadband
®
Series
114
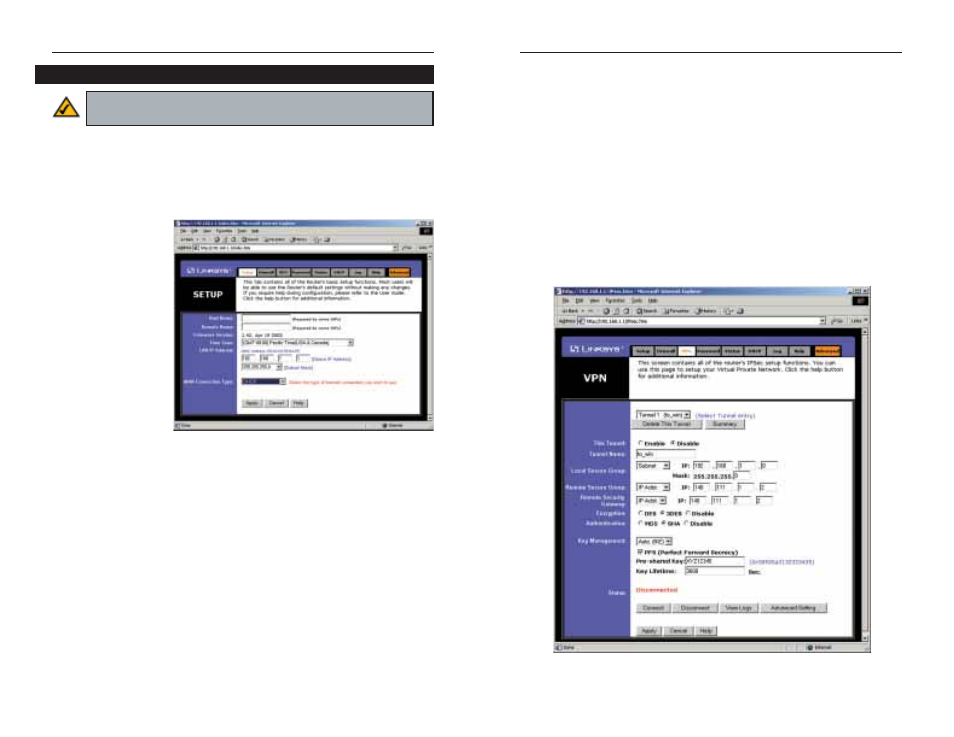
8. Select IP Addr. from the pull-down menu beside Remote Security
Gateway. This would be the IP Address of your Internet connection as seen
from the Internet. Enter this IP Address here.
9. Select a type of encryption and authentication for the tunnel your are
establishing.
10. Check PFS (Perfect Forward Secrecy) and enter the Pre-Shared Key and
Key Lifetime.
11. Click the Apply button followed by the Continue button.
12. Click the Connect button.
Your tunnel should now be established.
Figure C-29
1. Open your web browser, and enter 192.168.1.1 in the Address field. Press
the Enter key.
2. When the User name and Password field appears, skip the user name and
enter the default password admin. Press the Enter key.
3. From the Setup tab,
shown in Figure C-
28, click the VPN
tab.
4. From the VPN tab, shown in Figure C-29, select Enable beside This
Tunnel.
5. Enter a Tunnel Name. This name should be unique for this particular tun-
nel.
6. Select Subnet from the pull-down menu beside Local Secure Group. Then,
enter the IP Address for this group. This would be the IP Address of the
local endpoint, your endpoint.
7. Select IP Addr. from the pull-down menu beside Remote Secure Group.
Then, enter the IP Address for this group. This would be the IP Address of
the remote endpoint, the endpoint on the other side of the tunnel.
Figure C-28
Step Five: Create a Tunnel Through the Web-based Utility
Note: Further details on this step can be found in the VPN Tab section
in “Chapter 7: The Cable/DSL Firewall Router’s Web-based Utility”.