Lindy P16-IP User Manual
Page 42
Section 4
IP Access Configuration & Operation
41
Windows
To create the image file, use your favourite CD
imaging tool. Copy the whole contents of the disc
into one single image file on your hard disk.
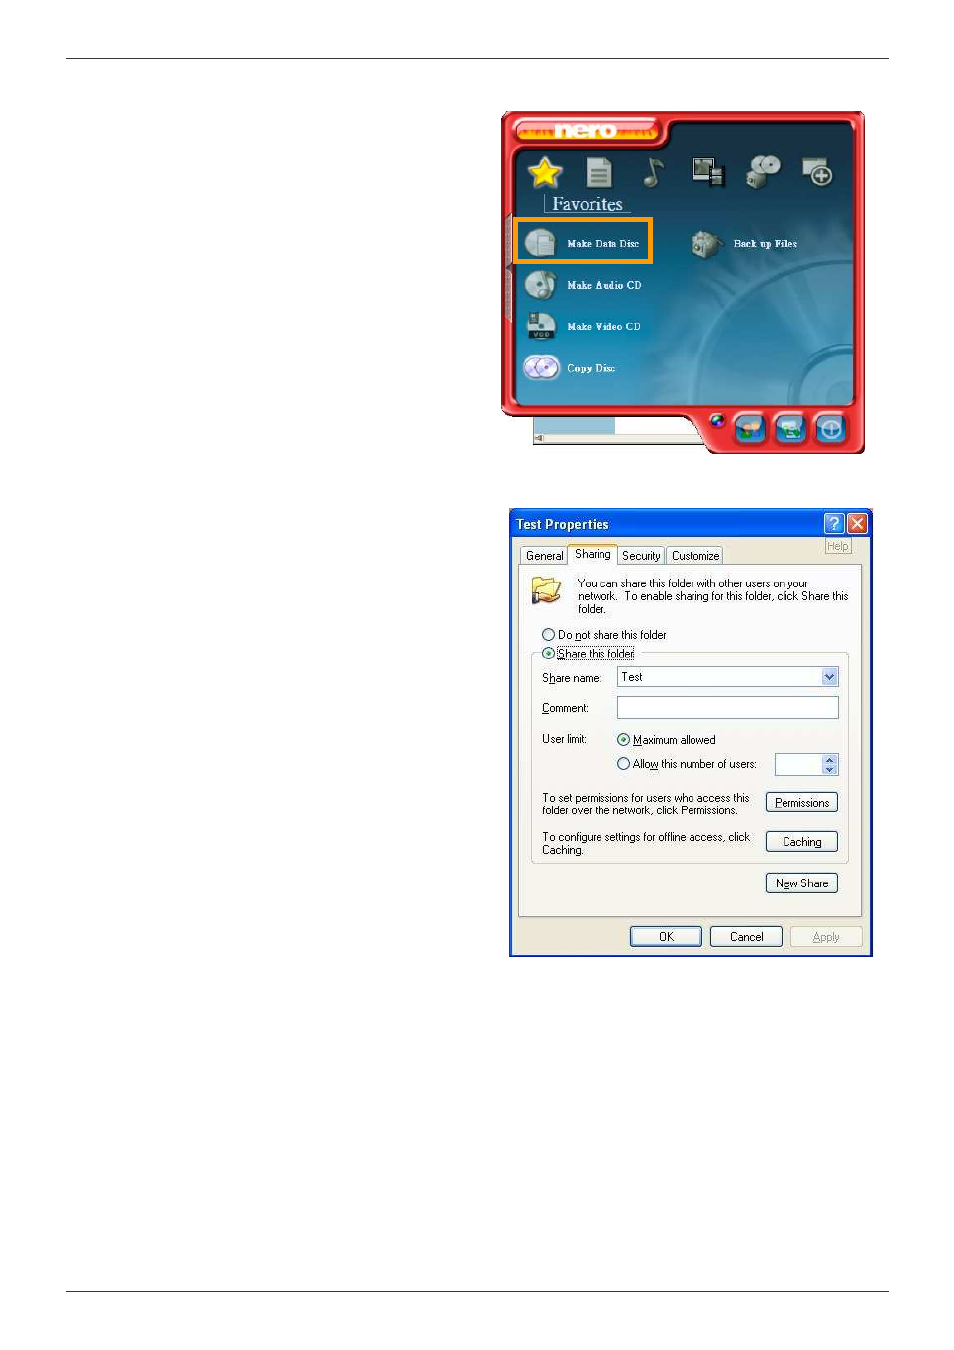
For example, with ‘Nero’ choose ‘Copy and
Backup’. Then, navigate to the ‘Copy Disc’
section. Select the CD ROM or DVD drive you
would like to create an image from. Specify the
filename of the image, and save the CD ROM
content in that file.
Example:
1. Create a CD image and name it image.iso
2. Create a folder on your client PC and name it
Test. Copy the file image.iso to the folder
Test.
3. Now you need to ‘share’ this folder. Right click
on the folder and select the option Sharing
and Security. Select Share this folder and
ensure the Share Name is set to Test. Click
Permissions to set permissions for users who
access this folder, according to your
requirements. Click Apply then OK to
complete.
4. Next you need to mount the image via a
Windows Share. In the P16-IP menu on the
left hand side of the browser select Virtual
Media and from the sub menu select CD-
ROM Image.
5. Input the following parameters:
Share host:
Enter the IP address of your Console PC here
(e.g. 192.168.2.103)
Share name:
Test
(The share name of the previously created folder)
Path to image:
image.iso
(the name of the CD image)
User:
super
(Your user name, the default is super)
Password:
pass
(Your password, the default is pass)
6. Click Set