Selecting a custom size – Lanier 5622 User Manual
Page 24
Preparations for Use as a Network Scanner
16
2
I
When all settings have been made,
press [Exit].
The display returns to the Scanner
Features screen.
J
Press [Exit].
The main menu is shown again.
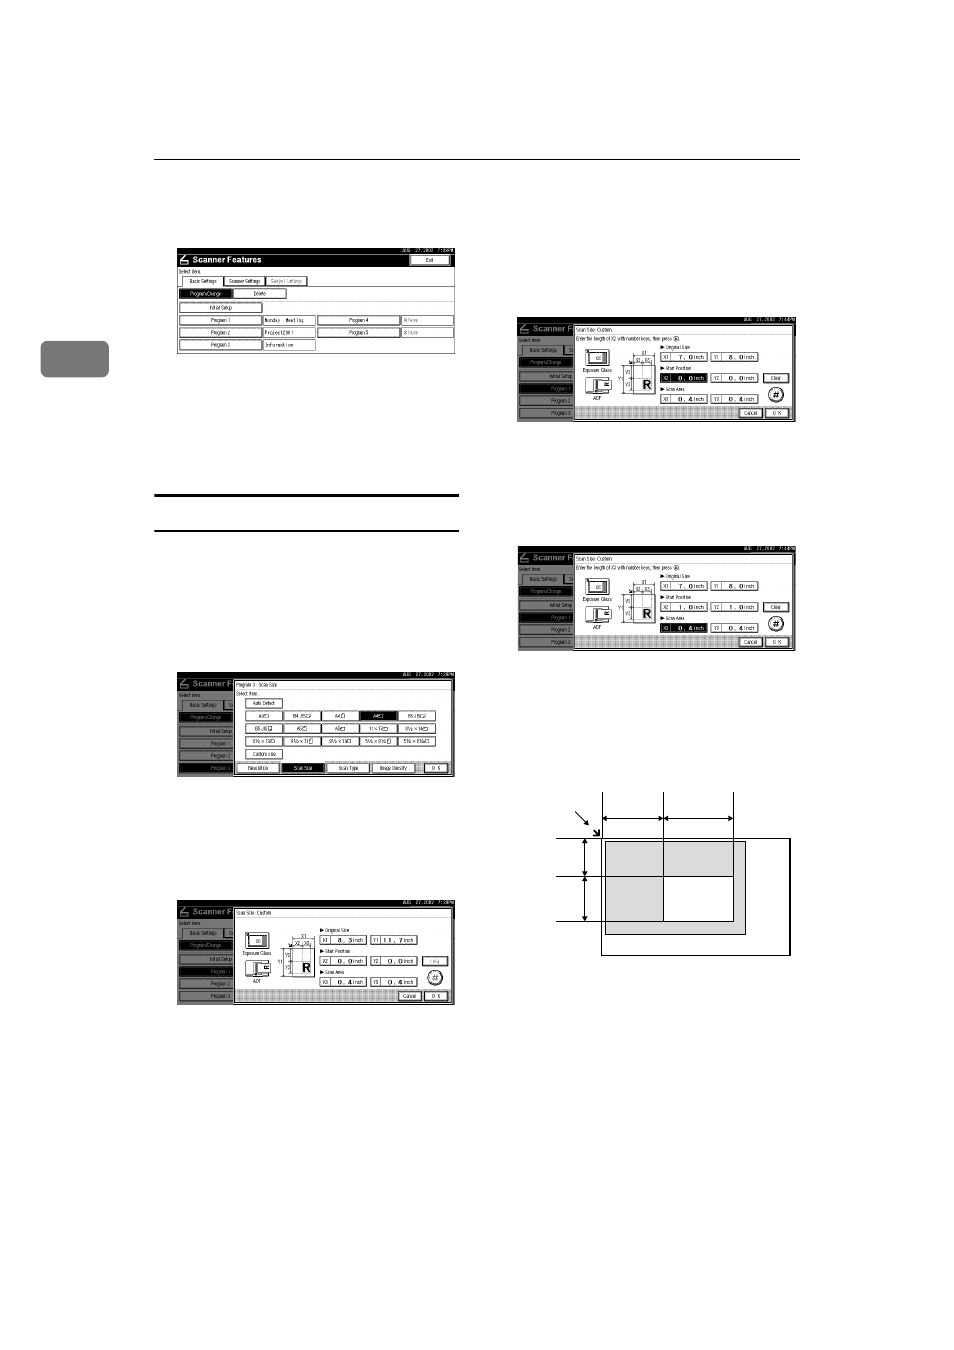
Selecting a custom size
When "Custom Size" is selected as the
scan size, follow the procedure be-
low.
A
Press [Custom size] on the Scan Size
setting screen.
B
Enter the original size with the
number keys.
Select [X1] or [Y1], enter the value,
and then press [#].
C
Use the number a scan starting
point other than the standard scan
starting point.
Select [X2] or [Y2], enter the value,
and then press [#].
D
Enter the scan size (area) with the
number keys.
Select [X3] or [Y3], enter the value,
and then press [#].
Depending on how the original is
positioned, the scan area will be as
follows:
A
When the original is placed on
the exposure glass
Start point,
horizontal (Y2)
Scan area
Start point,
vertical (X2)
Scan area,
vertical (X3)
Scan area,
horizontal (Y3)
Positioning mark
ZEKY030E