Installing an optional tape drive, Installing, Optional – Lenovo RD120 User Manual
Page 64: Tape, Drive, Sata, Inch, Model, Server
2.5-inch
drives
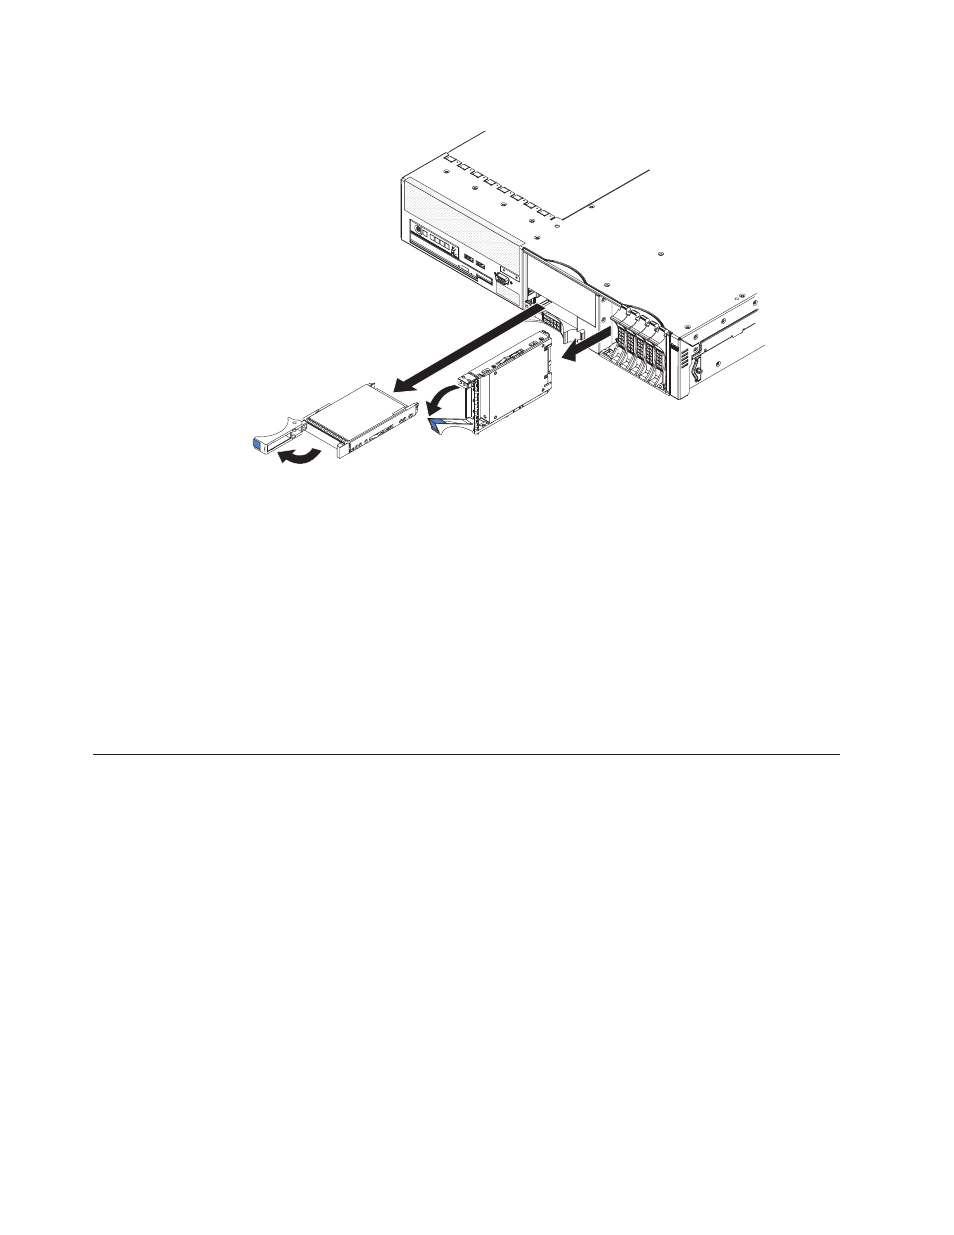
To
remove
a
hot-swap
hard
disk
drive,
complete
the
following
steps:
1.
Read
the
safety
information
that
begins
on
page
and
2.
Move
the
tray
handle
on
the
drive
to
the
open
position
(perpendicular
to
the
drive).
3.
Pull
the
hot-swap
drive
assembly
from
the
bay.
Note:
You
might
have
to
reconfigure
the
disk
arrays
after
you
remove
a
hard
disk
drive.
If
you
have
other
optional
devices
to
install
or
remove,
do
so
now.
Otherwise,
go
to
Installing
an
optional
tape
drive
Prepare
the
drive
according
to
the
instructions
that
come
with
the
drive,
setting
any
switches
or
jumpers;
then,
see
or
Installing
a
SATA
tape
drive
in
a
3.5-inch
model
server
Install
the
optional
SATA
tape
drive
in
the
two
bottom-left
hard
disk
drive
bays.
If
hard
disk
drives
are
installed
in
those
bays,
move
the
drives
to
other
bays.
The
cables
for
the
tape
drive
come
with
the
tape
drive.
50
ThinkServer
RD120
Types
6444,
6445,
6446,
and
6447:
User
Guide