Configuring network settings, Configuring remote access passwords – LOREX Technology LH330 EDGE2 User Manual
Page 65
47
Using the Main Menu
reconnect the power adapter to the DC 12V
port.
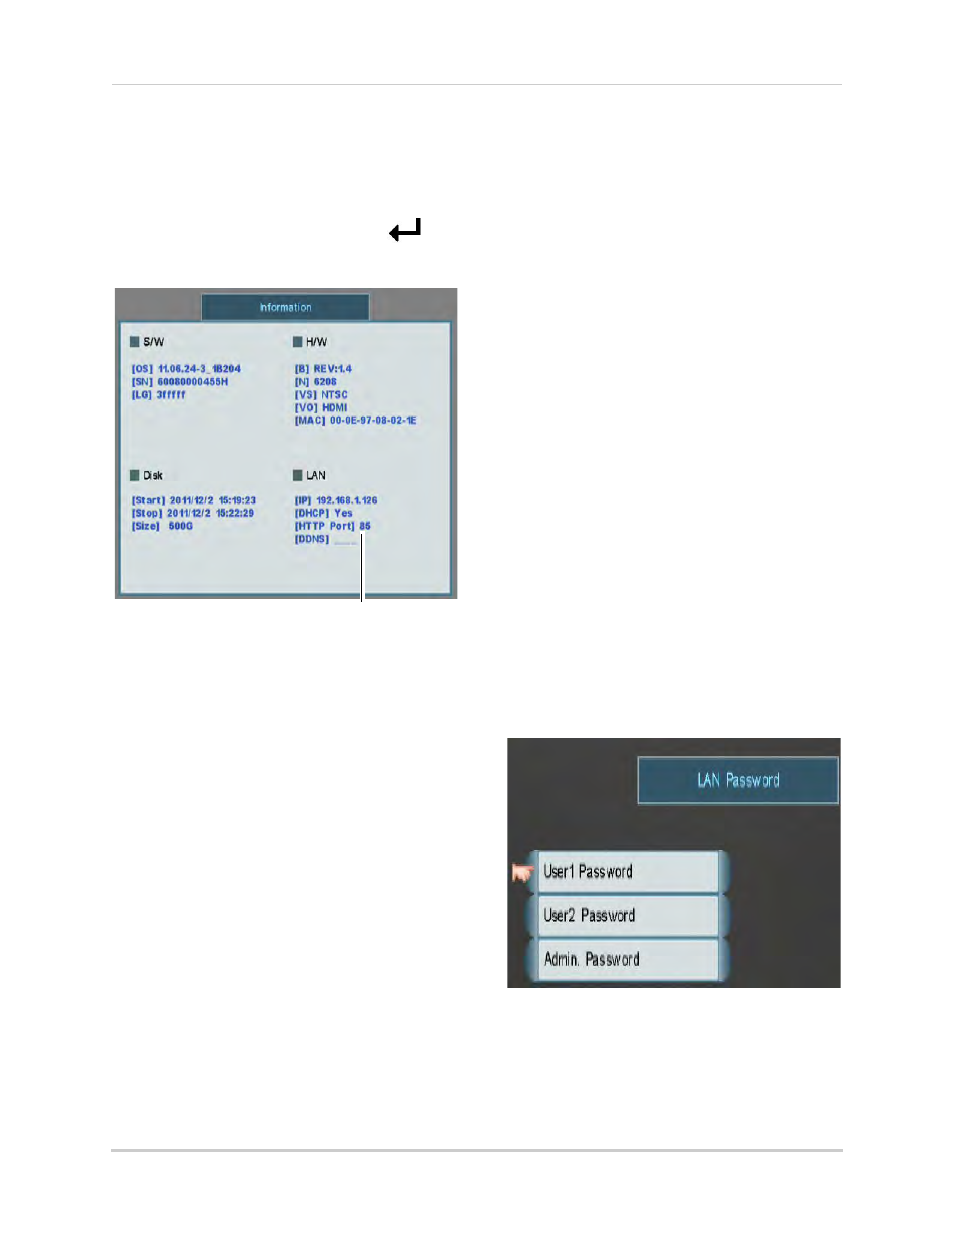
5
To confirm that the new port number is
saved on your system, press the
button on the front panel or remote control
to view System Information.
HTTP Port
You must update your DVR List in the
Client Software to use the new port.
Also, when logging into your DVR with
an Internet browser you must include a
colon and the HTTP port in the URL
after the DDNS address or IP address
(for example,
http://tomsmith.lorexddns.net:85
).
If you have already completed router
port forwarding, you will need to
re-configure your router to forward the
newly selected port.
Configuring Network Settings
The following steps are only required if
you need to enter a custom IP address,
subnet mask, gateway address, or DNS
server for your DVR. Consult your
router’s user guide for details.
1
Configure the following:
• IP: Configure a custom IP address for your
DVR. This address will only be used if
DHCP is disabled.
• Mask: Configure a custom subnet mask
for your DVR.
• Gateway: Configure a custom gateway
address for your DVR.
• DNS Server: Configure a custom DNS
server for your DVR.
• DHCP Enable: Scroll up / down and select
O to enable DHCP or X to enable a fixed IP
address.
2
Right-click to save your changes and
return to the Main Menu.
Configuring Remote Access
Passwords
Use the LAN Password Menu to control
Remote Access passwords for USER1,
USER2, and ADMIN profiles. The
Remote Access password is required
when accessing the DVR over the
Internet or a local network.
To change Remote Access passwords:
1
From the LAN Menu, select LAN Password
and enter the ADMIN user ID and
password if needed (By default, ID: 9;
Password: 3333).
LAN Password Menu
2
Select a user account, and use the
Password Wheel to enter the new Remote
Access password. Enter it again to
confirm.