Installing a tape drive, Installing, Tape – Lenovo 6446 User Manual
Page 31: Drive
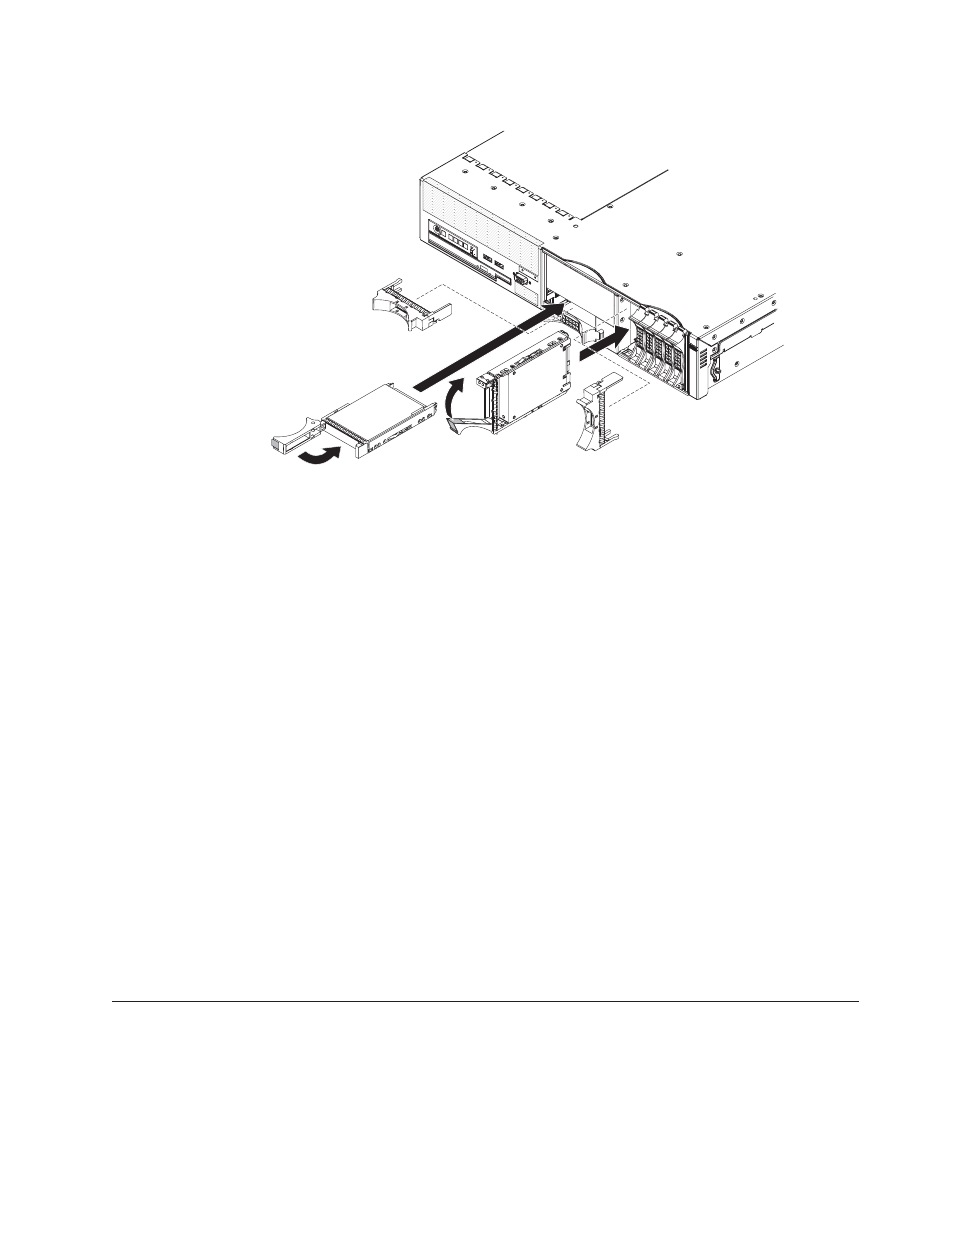
2.5-inch
drives
To
install
a
drive
in
a
hot-swap
bay,
complete
the
following
steps:
Attention:
To
maintain
proper
system
cooling,
do
not
operate
the
server
for
more
than
10
minutes
without
either
a
drive
or
a
filler
panel
installed
in
each
bay.
1.
Read
the
safety
information
that
begins
on
page
and
2.
Remove
the
filler
panel
from
one
of
the
empty
hot-swap
bays.
3.
Install
the
hard
disk
drive
in
the
hot-swap
bay:
a.
Make
sure
that
the
tray
handle
is
open
(that
is,
perpendicular
to
the
drive).
b.
Align
the
drive
assembly
with
the
guide
rails
in
the
bay.
c.
Gently
push
the
drive
assembly
into
the
bay
until
the
drive
stops.
d.
Push
the
tray
handle
to
the
closed
(locked)
position.
e.
Check
the
hard
disk
drive
status
LED
to
verify
that
the
hard
disk
drive
is
operating
correctly.
If
the
amber
hard
disk
drive
status
LED
for
a
drive
is
lit
continuously,
that
drive
is
faulty
and
must
be
replaced.
If
the
green
hard
disk
drive
activity
LED
is
flashing,
the
drive
is
being
accessed.
Note:
You
might
have
to
reconfigure
the
disk
arrays
after
you
install
hard
disk
drives.
See
the
RAID
documentation
on
the
ThinkServer
Documentation
DVD
for
information
about
RAID
controllers.
If
you
have
other
optional
devices
to
install
or
remove,
do
so
now.
Otherwise,
go
to
Installing
a
tape
drive
For
information
about
installing
an
optional
tape
drive,
see
the
User
Guide
on
the
ThinkServer
Documentation
DVD,
which
comes
with
the
server.
Chapter
2.
Installing
optional
devices
17