Lowrance electronic Lowrance iFINDER Explorer User Manual
Page 90
82
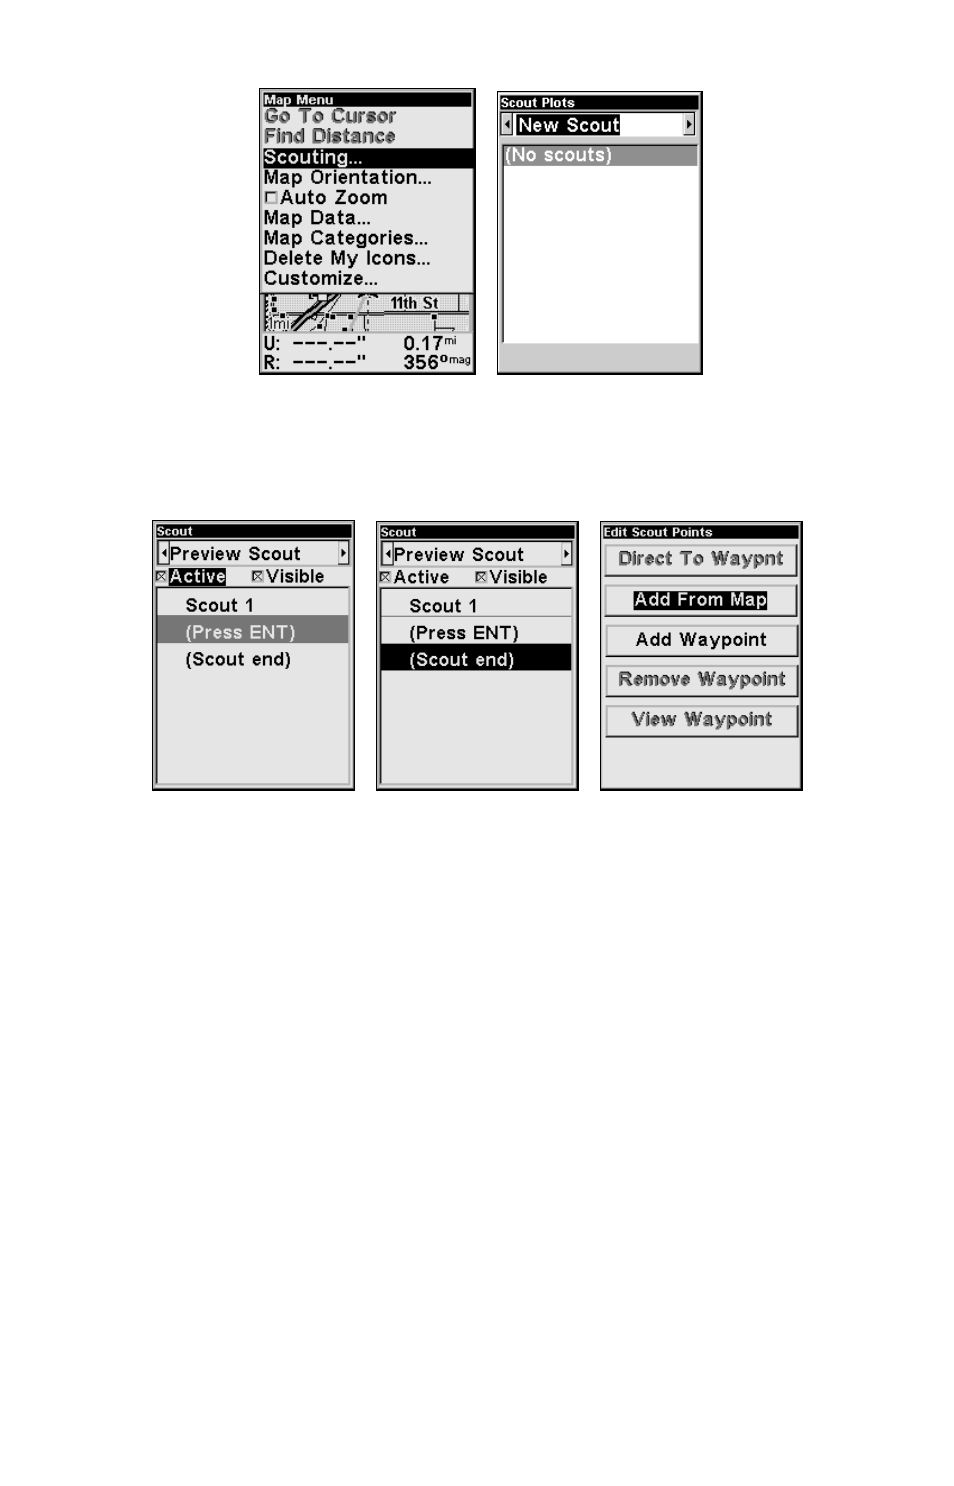
Scout Plot menus
3. The Scout menu appears. To make the scout active, highlight
A
CTIVE
and press
ENT
, then scroll down to
S
COUT
E
ND
and press
ENT
. The Edit
Scout points menu will appear. Select
A
DD FROM
M
AP
and press
ENT
.
An active scouting session (center), denoted by the checkbox next to
Active. Scout end selected on Scout menu (center). Add from Map high-
lighted on the Edit Scout points menu (right).
4. As you walk the perimeter of the area you are scouting, you will rec-
ord a series of scouting waypoints that will be used to draw the scout
plot boundary. You need to set enough points to roughly outline the
area's corners. For example, while scouting a square soybean field you
could record the field boundary by setting just four points.
To set the first point, press
ENT
and the new waypoint menu appears.
Choose a point and press
ENT
. The New Waypoint Name box will ap-
pear with Save Waypoint highlighted. Scroll down to
S
AVE
W
AYPOINT
and
press
ENT
to create your first point. After the point is created, the scout
point menu is cleared. Back on the Map Page, the message Scout 1 ap-
pears in the lower right corner, indicating a scouting session is under
way.
5. Repeat these steps for setting a point at every major corner of the
area you are scouting. The iFINDER will link the flag points and draw
the perimeter of the area you walked.