User-defined satellites, User-defined satellites, 31, User-defined satellites e – KVH Industries TracVision M5 User Manual
Page 30: Appendix
31
The satellite library in the TracVision antenna
includes two slots for user-defined satellites
(USER 1 and USER 2). You can program one or
both of these library slots for any satellite you
wish that is not already set up in the library.
Connect a Laptop to the Antenna
To program your user-defined satellite(s), you
first need to connect a Windows® laptop
computer to the TracVision system and start
Windows HyperTerminal.
TIP: If you are a KVH-authorized technician, you can
use the KVH Flash Update Wizard instead of
HyperTerminal. Enter commands in the wizard’s
“Antenna Comms” window. You do not need to flash
the antenna to enter commands.
1. Turn off the TracVision antenna.
2. Using the flash adapter cable supplied in the
kitpack, connect your laptop to the main flash
port (top right stereo jack) on the MCP (see
Figure 49).
NOTE: If your computer does not have a DB9 serial
COM port, you can use the USB-to-RS232 adapter
manufactured by IOGear (IOGear part number
GUC232A) or Belkin (Belkin part number F5U109).
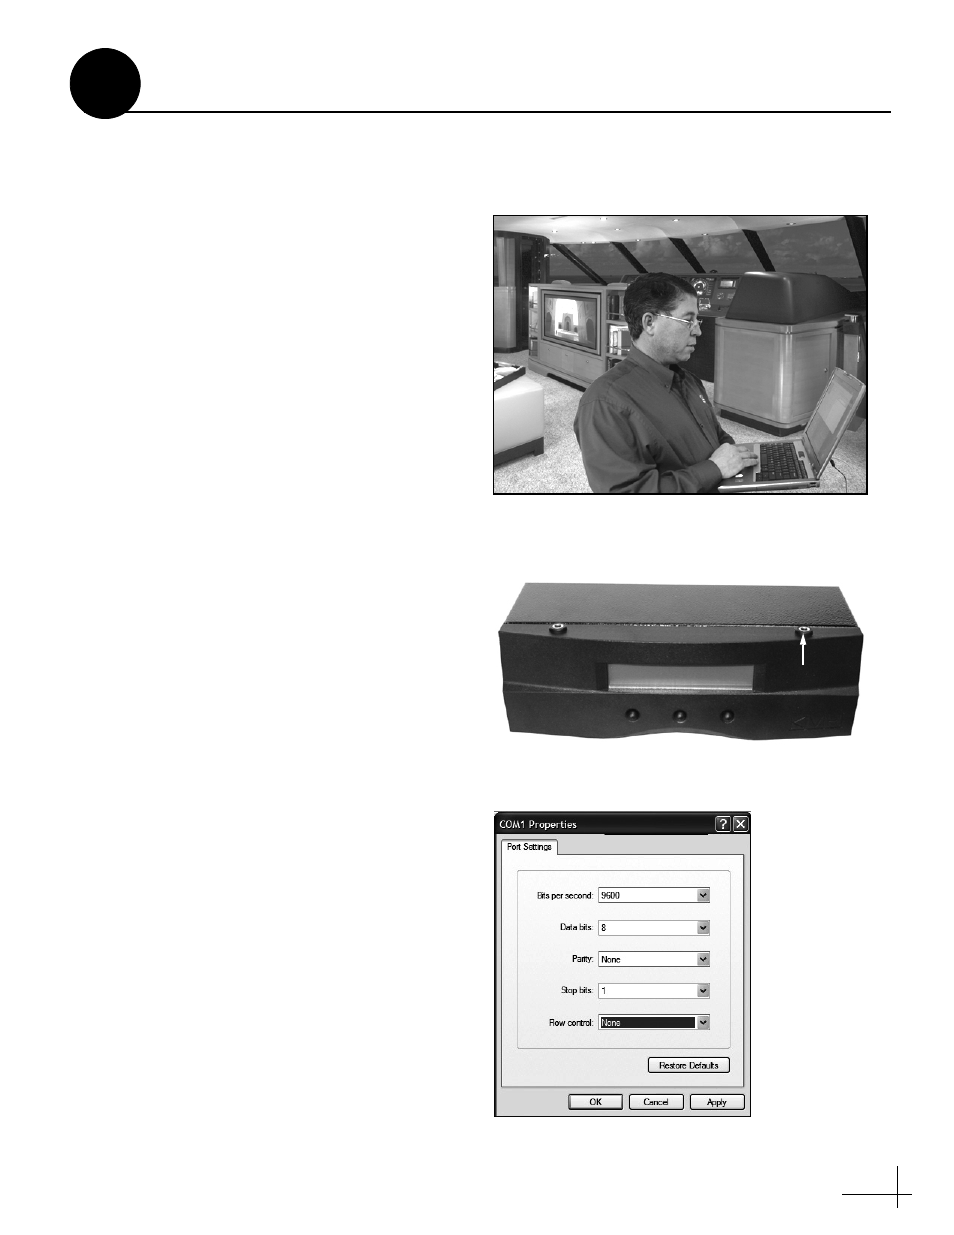
3. Open Windows HyperTerminal and establish
the following settings for your COM port (see
Figure 50):
• Bits per second: 9600
• Data bits: 8
• Parity: None
• Stop bits: 1
• Flow control: None
TIP: To view characters on the screen as you type, set
up HyperTerminal to echo typed characters. Select
“Properties” from the File menu; select “ASCII
Setup” at the Settings tab; then select “Echo typed
characters locally” at the ASCII Setup window.
Figure 48: Technician Programming the Antenna
Figure 49: Main Flash Port on MCP
Main Flash Port
Figure 50: HyperTerminal Settings
Maintenance Port
User-Defined Satellites
E
Appendix