Kidco G24 User Manual
Page 5
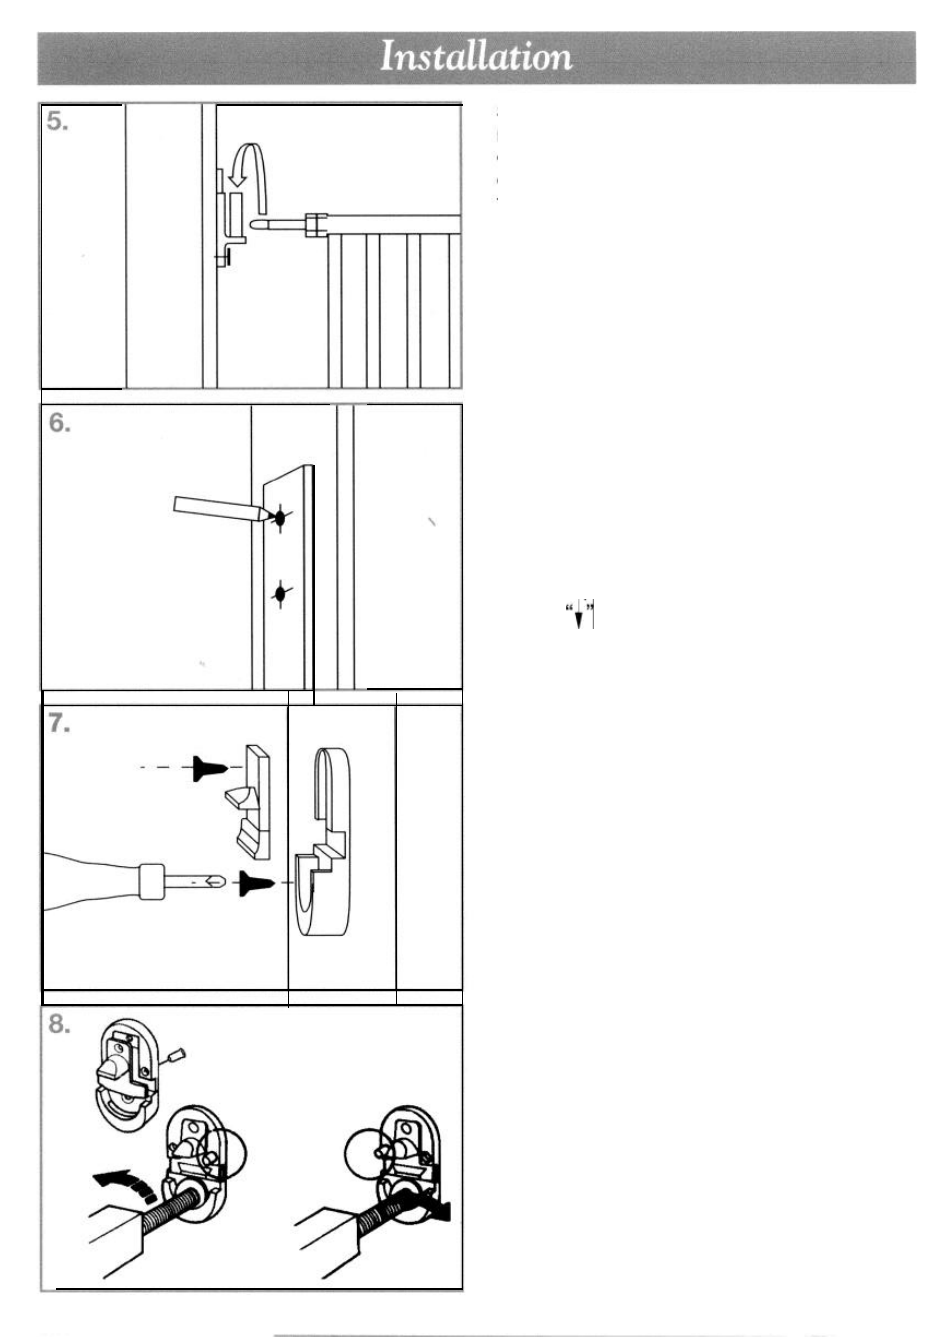
Screw hinge spindles (I) into top and bottom
rails of second section (o) until they are
extended equally. These will be adjusted to
correct length at a later stage so do not
tighten.
Mounting Locking Side
Screws provided are for mounting directly
into wood. If mounting into brick, drywall
or other surfaces, use appropriate hard-
ware. If installing into hardwood (i.e. oak)
drilling a pilot hole may be necessary.
Hold template (b) against mounting surface in
line with opposite hinges, making sure end
marked
is even with floor.
Mark 4 screw hole positions.
Remove template.
Fit a locking latch (e) into locking latch brac-
ket
(f)
and using 2 screws, screw into lower
set of screw holes.
Fit remaining locking latch (e) into remaining
locking latch bracket
(f).
Determine which direction gate should open.
For stairways, gate should never open out
over stairs.
As an added safety measure, a stop pin has
been provided. Inset-t stop pin (r) from behind
locking latch bracket into hole opposite gate
opening direction.
Using 2 wood screws,screw into upper set of
screw holes.
Push bottom latch spindle (m) into lower rail
of main gate section (n).
5