English, Part names, Internal setup and connections – KORG DIGITAL PIANO E F G 1 User Manual
Page 3: Connecting the power, Turning the micropiano, Adjust the volume
1
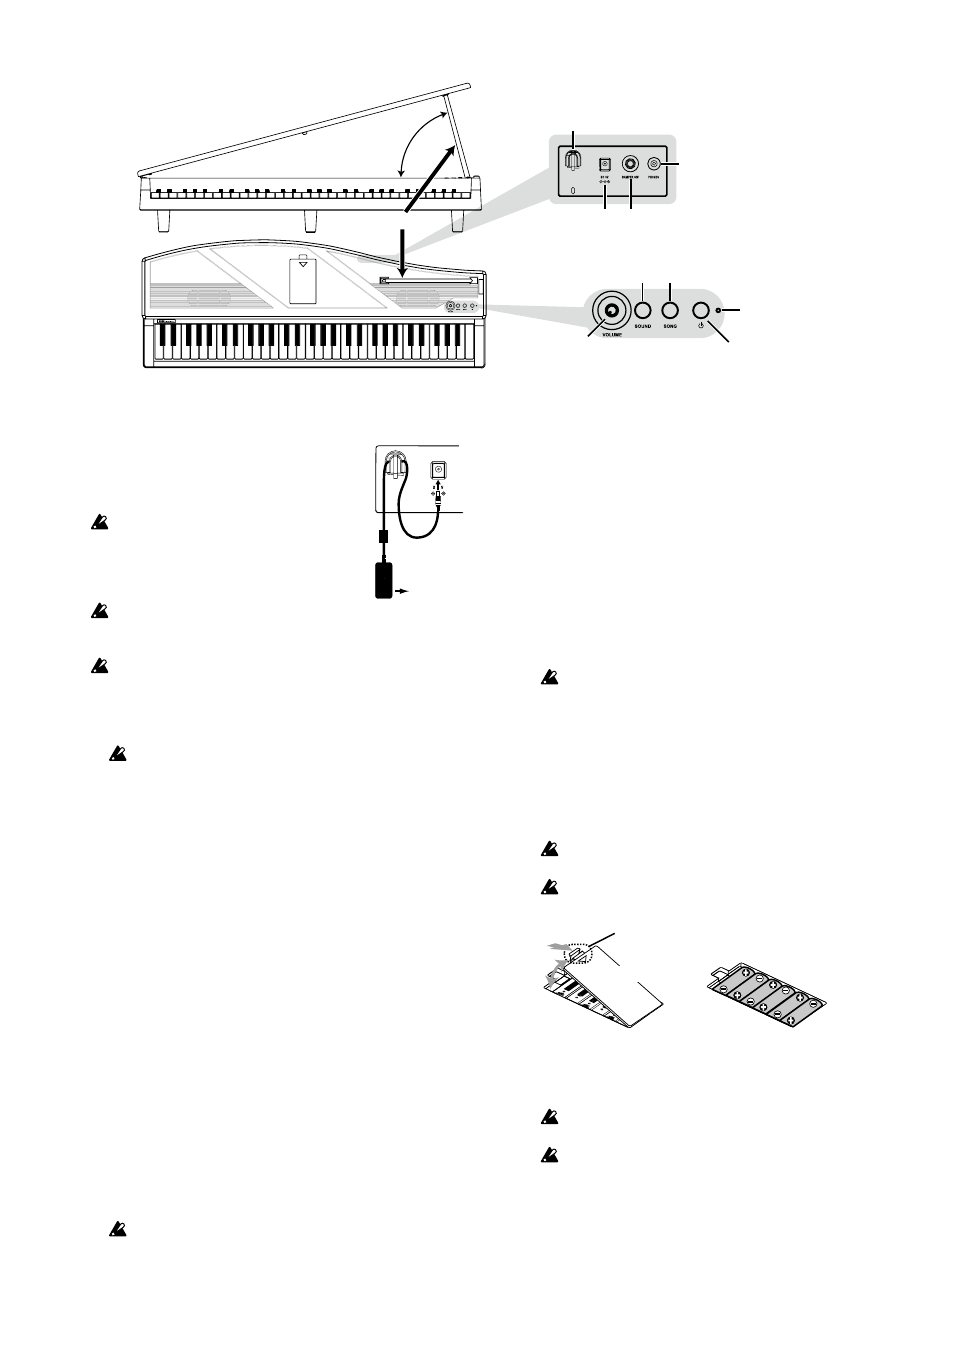
Part Names
Power switch
DC9V jack
SOUND button SONG button
Cord hook
Headphone jack
Damper pedal jack
Lid
Top panel
Volume knob
Power LED
Lid prop
Top panel
Battery
case
cover
Internal Setup and Connections
1. Connecting the Power
Connect the DC plug of the supplied AC
adapter to the DC9V jack on the rear panel,
then connect the AC adapter to an AC outlet.
Pass the AC adapter cord through the
cord hook so that the plug won’t be re-
moved from the jack accidentally. When
you unhook the cord, don’t pull the cord
with force.
Be sure to use the AC adapter that’s in-
cluded. Using other AC adapters may
cause the unit to malfunction.
Be sure to plug the unit into an AC outlet of the appropriate
voltage.
2. Turning the microPIANO
• Lift the lid and securely support it using the lid prop.
Be careful not to pinch your fingers when you prop up
or close the lid.
• Press the power switch located on the front right of the top
panel to turn on the power.
The power LED will light up.
• To turn the power off, press the power switch again.
The power LED and the power to the unit will turn off.
To take advantage of the acoustic characteristics of the mi-
croPIANO, we recommend that you use the unit with the lid
propped up.
3. Adjust the volume
• Rotate the VOLUME knob clockwise to raise the volume
level. Rotate it counter-clockwise to lower the level.
The VOLUME knob controls the output level of the built-in
speakers and the headphones jacks.
■ Using headphones
When you plug in the headphones, the built-in speakers
will be muted. This is useful when you want to play the
keyboard in the evening without bothering your family or
neighbors.
Insert the stereo headphone plug into one of the PHONES
jacks on the rear panel.
If your headphones feature a standard-to-mini adapter plug,
be sure to hold the adapter plug when you connect or dis-
connect the headphones.
To protect your hearing, do not listen to loud, high-
volume sounds for a long period of time through the
headphones.
■ Using a Damper Pedal
You can use an optional KORG PS-1 or PS-3 pedal as a
damper pedal by connecting it to the DAMPER SW jack on
the rear panel.
While you press down on the pedal, the note will sustain
as it would on a traditional piano, creating a rich, lingering
sound.
You can also use an optional DS-1H damper pedal. The
pedal’s half-damp function can be used only for the Grand
Piano preset sound.
■ Connecting audio components
You can use the PHONES jack as a line-out to connect the
microPIANO to powered speakers or audio components. For
such connections, use commercially-available cables that are
appropriate for the components that you’re using.
Before connecting the audio components, make sure that
you turn off the power to the unit as well as the audio
components. Otherwise, malfunctions or damage to the
unit or components may occur.
■ Using the unit with batteries
Remove the battery case cover that’s located in the center
of the top panel, then insert six AA alkaline batteries (or
NiMH batteries) into the battery case in the correct orienta-
tion as shown in the figure below.
Please note that batteries are not included in the pack-
age.
Do not mix new batteries with old or different types of
batteries.
Battery case cover
When you replace the battery cover, be sure
to push this part firmly until it clicks and locks.
Replacing batteries
A flashing power LED indicates that the batteries are nearly
exhausted. Replace the batteries with new ones.
If battery power decreases, sounds from the microPIA-
NO may become distorted.
Remove old batteries immediately. Otherwise, battery
leakage may occur, resulting in a malfunction. If you
don’t think that you’ll be using the unit for a long period
of time, remove the batteries.
To AC
outlet
AC adapter
DC
plug