Projection (prj) mode, Setup – Sharp DT-500 User Manual
Page 20
Setup
19
300"
200"
100"
80"
60"
261"Ч147"
174"
Ч
98"
87"
Ч
49"
70"
Ч
39"
52"
Ч
29"
29'9
"–34'
5"
(9.1 m
– 10.5 m)
19'10
"–22'11
"
(6.0 m
– 7.0 m)
9'11
"–11'6
"
(3.0 m
– 3.5 m)
7'11
"–9'2
"
(2.4 m
– 2.8 m)
5'11
"–6'11
"
(1.8 m
– 2.1 m)
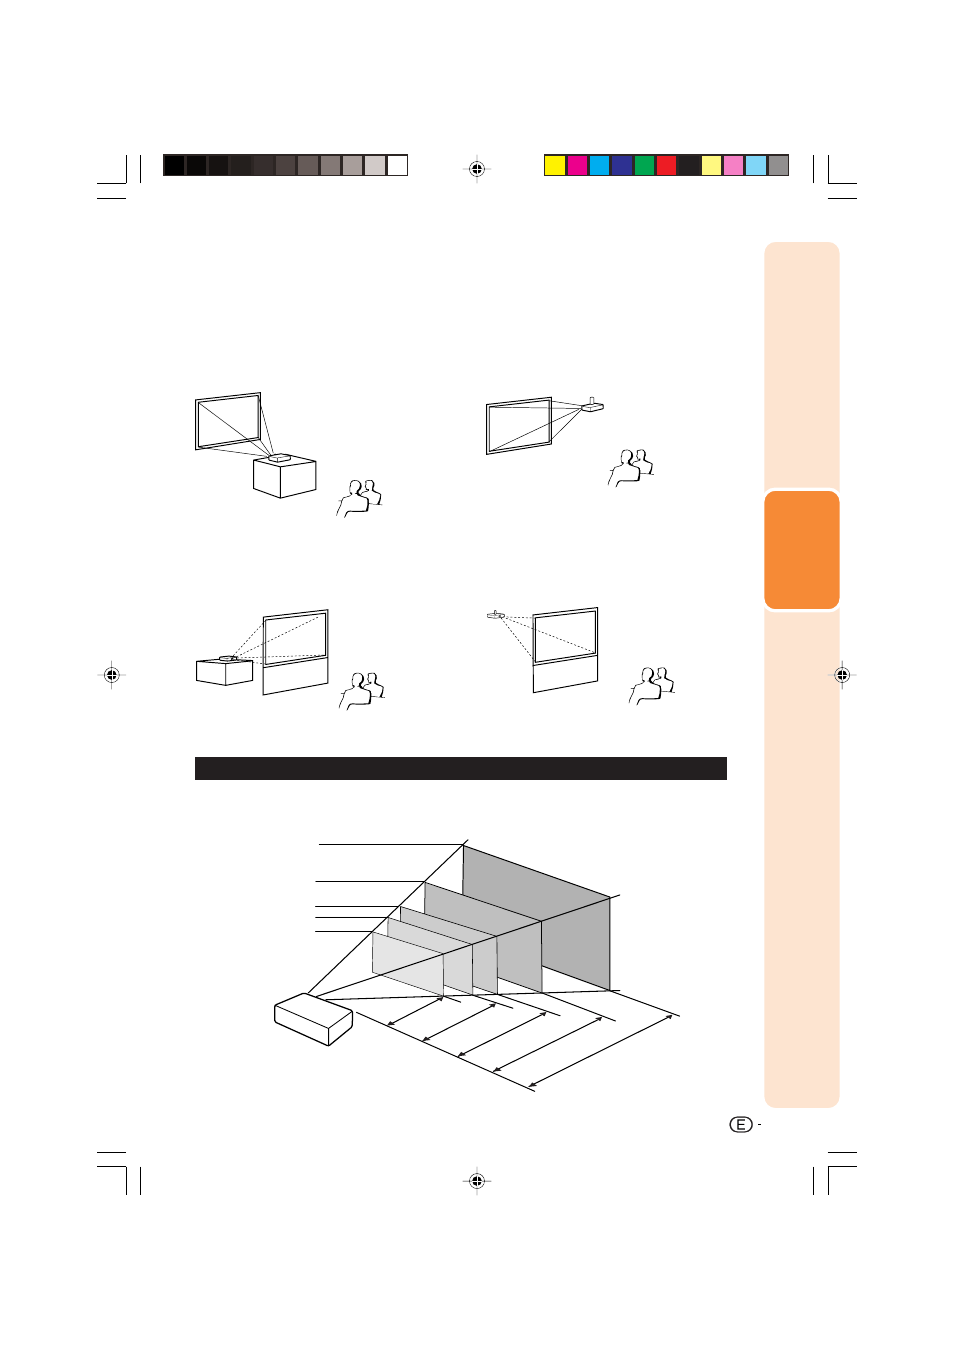
Projection (PRJ) Mode
The projector can use any of the 4 projection modes, shown in the diagram below. Select the mode
most appropriate for the projection setting in use. (You can set the PRJ Mode in “Options2” menu.
See page 49.)
■ Table mounted, front projection
■ Ceiling mounted, front projection
Menu item
➞ “Front”
■ Table mounted, rear projection
(with a translucent screen)
Menu item
➞ “Ceiling + Front”
■ Ceiling mounted, rear projection
(with a translucent screen)
Menu item
➞ “Rear”
Menu item
➞ “Ceiling + Rear”
Indication of the Projection Image Size and Projection Distance
Picture (Screen) Size
Projection
Distance
Refer to page 20 for additional information concerning “Picture (Screen) Size and Projection Distance”.
Example: When using a wide screen (16:9)
DT-500_EN_f
06.2.16, 9:58 AM
19