Schumacher XC6 User Manual
Page 7
•
4
•
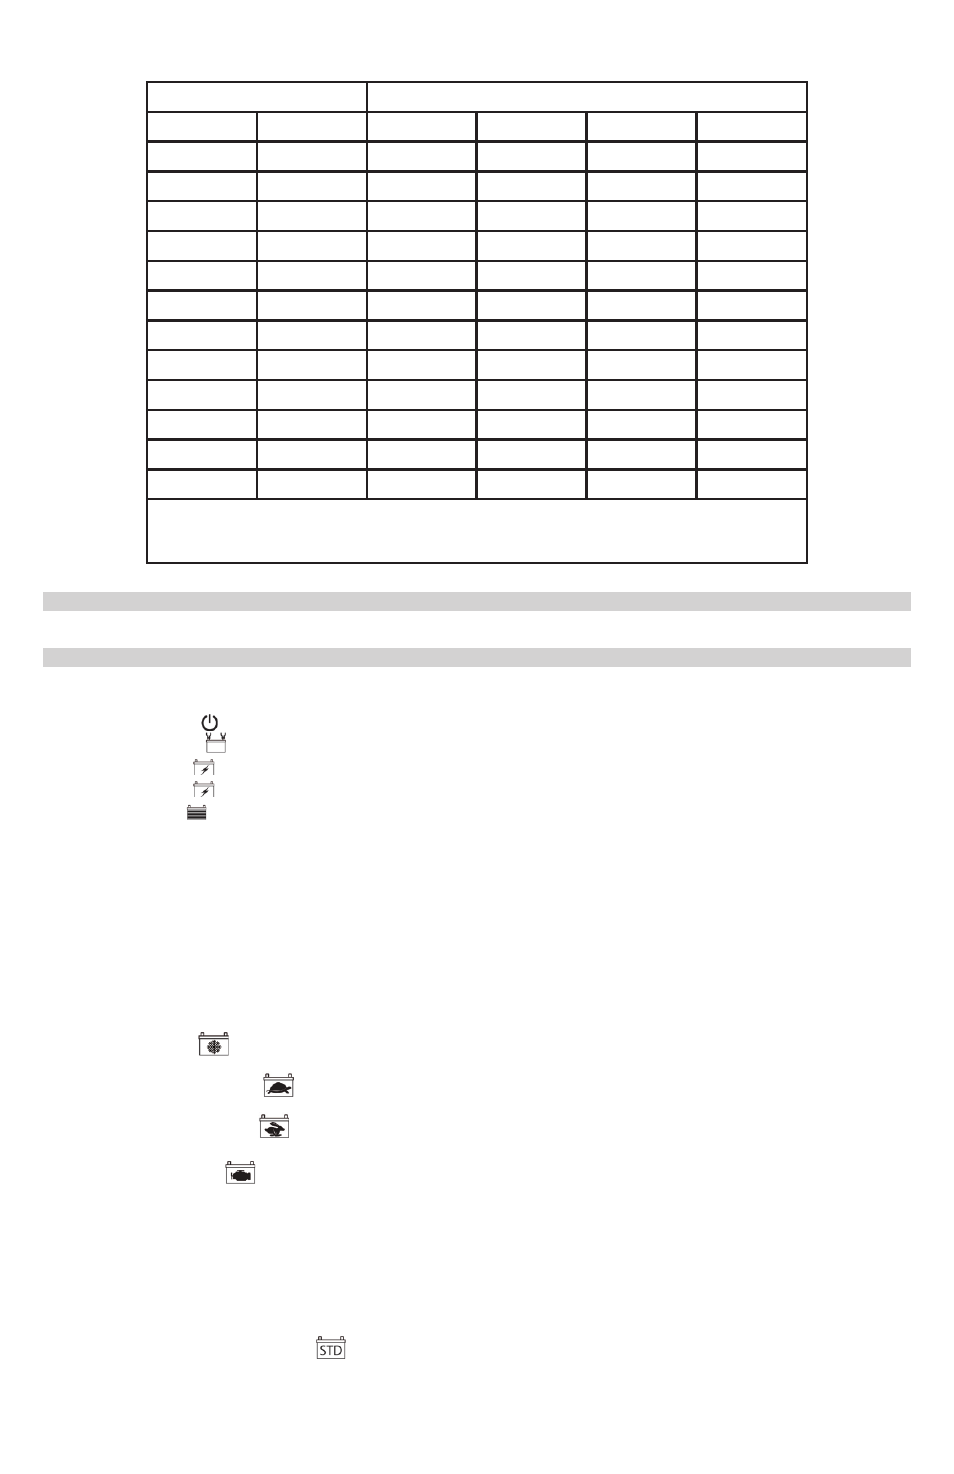
Recommended minimum AWG size for extension cord:
8.3
AC input rating, amperes*
AWG size of cord / Length of cord, feet (m)
At least
But less than
25 (7.6)
50 (15.2)
100 (30.5)
150 (45.6)
0
2
18
18
18
16
2
3
18
18
16
14
3
4
18
18
16
14
4
5
18
18
14
12
5
6
18
16
14
12
6
8
18
16
12
10
8
10
18
14
12
10
10
12
16
14
10
8
12
14
16
12
10
8
14
16
16
12
10
8
16
18
14
12
8
8
18
20
14
12
8
6
*If the input rating of a charger is given in watts rather than in amperes, the corresponding ampere
rating is to be determined by dividing the wattage rating by the voltage rating - for example:
1200 watts/120 volts = 10 amperes
ASSEMBLY INSTRUCTIONS
9.
Remove all cord wraps and uncoil the cables prior to using the battery charger.
CONTROL PANEL
10.
NOTE: Not all controls are available on all models.
LED Indicators
A.C. POWER (red) LED lit: Indicates that there is AC power supplied to the battery charger.
CONNECTED
(red) LED lit: Indicates that the charger is properly connected to the battery.
CHARGING
(yellow) LED lit: Indicates the charger has detected a battery and is charging it.
CHARGING
(yellow) LED flashing: Indicates the charger is in abort mode.
CHARGED (green) LED lit: Indicates the battery is fully charged and the charger is in maintain mode.
NOTE: See the Operating Instructions section for a complete description of the charger modes.
Digital Display (models XC12 and XCS15)
The display will show the battery VOLTAGE when the charger is not charging a battery. When it goes into charging mode, the
display will automatically change to ON (to show charging has started) and then show the percent-of-charge of the battery
being charged and either 6 or 12 (the voltage the charger determined the battery is). If you manually stop the charging
process (by pressing the CHARGE RATE button) before the battery is fully charged the display will show OFF.
Battery % –
•
The Digital Display shows an estimated charge percent of the battery connected to the charger battery clips.
Voltage –
•
The Digital Display shows the voltage at the charger battery clips in DC volts, or the voltage the charger
determines the battery is depending on what mode the charger is in.
Charge Rate Button
Use this button to set the maximum charge rate. Press the button until the desired charge rate is selected.
Maintain
•
- Used to keep stored, lead-acid batteries charged. Charges and maintains small batteries. Maintains
large batteries.
Slow Charge Rate
•
– Intended for charging small batteries such as those commonly used in garden tractors, snow
mobiles and motorcycles. Also used to completely charge deep cycle batteries.
Fast Charge Rate
•
- Use for charging automotive, marine and light truck batteries. Not intended for industrial
applications.
Engine Start
•
– Provides high amperage for cranking an engine with a weak or run down battery. Always use in
combination with a battery.
NOTE: See the CALCULATING CHARGE TIME section for the actual amp ratings.
NOTE: Once the charger has started charging the battery; if you press the Charge Rate button once, the output current is
shut off. If you press the Charge Rate button again, the current will go back on at the same setting it was when it was turned
off. For example: The charger is charging a battery at the fast charge rate setting. If you press the Charge Rate button, the
output is turned off. If you press the Charge Rate button again, the output will turn back on at the fast charge rate setting.
Battery Type Button (models XC10, XC12 and XCS15)
Use this button to set the type of battery to be charged.
Regular
•
– Set the button to
. This battery type is usually used in cars, trucks and motorcycles. These batteries have
vent caps and are often marked “Low Maintenance” or “Maintenance-free”. This type of battery is designed to deliver
quick bursts of energy (such as starting engines) and have a greater plate count. The plates will also be thinner and have
somewhat different material composition. Regular batteries should not be used for deep cycle applications.