Special remote control keys, English – Sim2 Multimedia LUMIS HOST C3X User Manual
Page 21
ENGLISH
C3X Lumis HOST
19
SPECIAL REMOTE CONTROL KEYS
OSD DISPLAY TIMEOUT
Determines the On Screen Display timeout after the last event
(adjustment using remote control or keypad). The adjustment
is made using the
◀
(decrease) and
▶
(increase) keys within
a 6-200 second timeframe.
OSD POSITION
Positions the On Screen Display in a particular area of the
projected image. The OSD can be positioned using the arrow
keys for fine adjustments or keys 1...9 on the remote control
to select one of 9 preset positions.
The main picture parameters can be saved in discrete sets
of values called Memories so that they can be subsequently
applied as a group using a single command.
There are 6 separate Memories (Memory 1, Memory 2.... -6)
for each of the 14 signal types handled.
The following image parameters can be saved/recalled by
the Memory Management system:
Some of these parameters may not be available for certain
inputs or certain input signals, as indicated in Tables 4 and
5.
The Memory Management function menu page is activated
by pressing the key on the remote control.
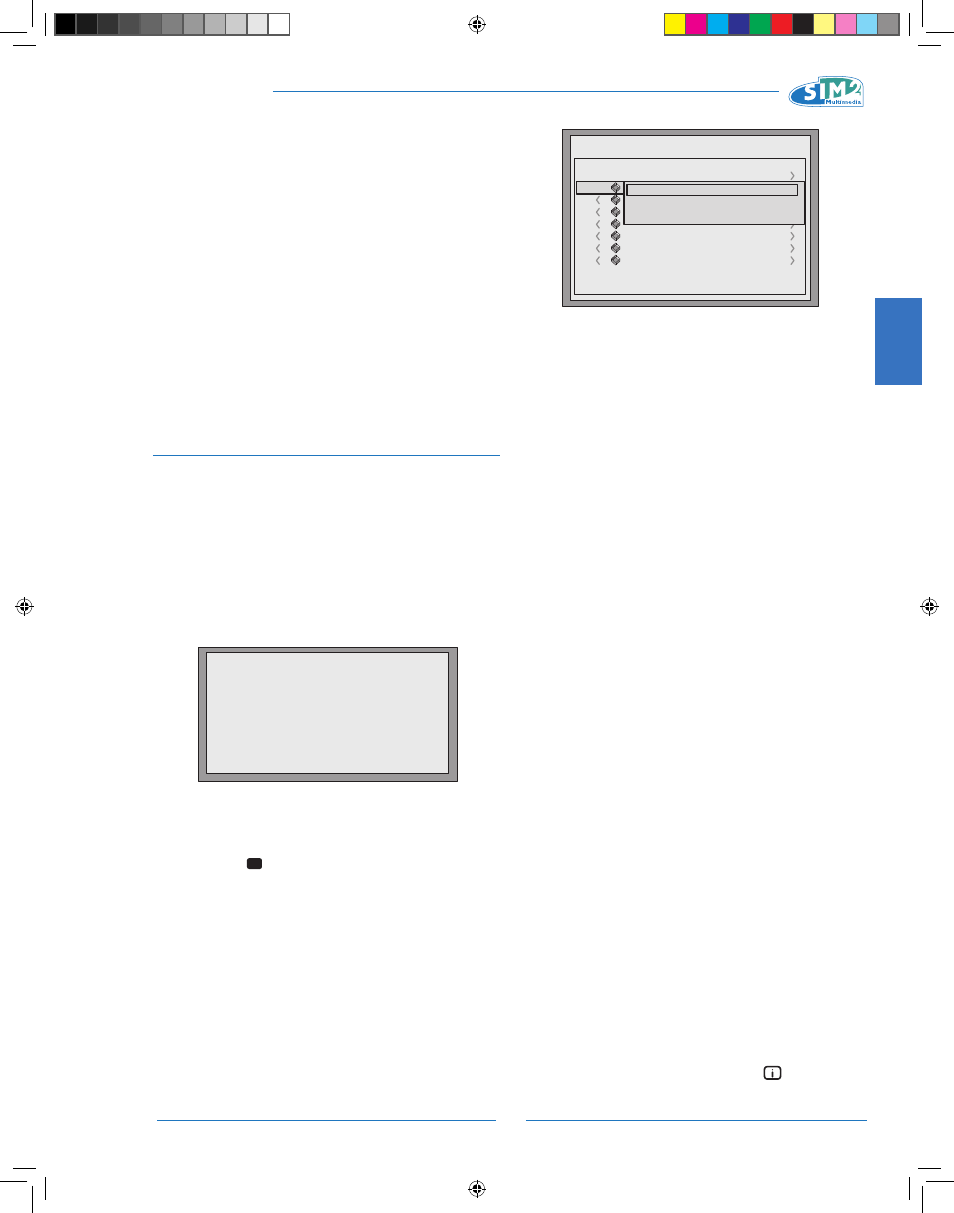
SAVING A MEMORY
MEMORIES
To save the current image settings in Memory 1, move the
cursor to line 1 using the
▼
and
▲
keys and open the drop-
down menu by pressing the
◀
key. Select the “Save current
settings” line. The message “Current settings saved” will
be shown at the bottom of the display to confirm that the
operation has been completed. Repeat the operation to save
other image settings in new memories.
USING A MEMORY
To use a Memory, select the line in question and press the
▶ key. The settings stored in the memory you have selected
will be applied to the projected image, while a message will
confirm that Memory has been applied. The memory will be
associated with the particular source and signal type and will
be automatically applied whenever that particular combina-
tion of source and signal type is selected.
RESTORING INITIAL SETTINGS FOR A MEMORY
When you need to restore the initial settings in a Memory that
has previously been modified, select the line referring to the
Memory in question and open the corresponding pull-down
menu (key ◀). Then select the “Save initial settings” line.
A message stating “Initial settings saved in Memory 1” will
appear at the bottom of the display.
RENAMING A MEMORY
All Memories can be named. To assign a name (with a maxi-
mum length of 12 alphanumeric characters) to a Memory,
select the Rename option from the corresponding pull-down
menu. Enter the text as described in the paragraph Text
Entry.
RESTORING CURRENT SETTINGS
When you enter the MEMORIES menu a copy of the current
settings is saved in a temporary memory (marked 0 - AUTO).
Once one or more memories have been recalled, you can
restore the settings that were effective at the moment the
Memories menu was accessed by selecting Memory 0 (0 -
AUTO). Note that this operation must be performed before
the Memories menu page disappears (30 seconds after the
last operation with the remote control or keypad). The next
time it appears, in fact, the temporary memory will contain
new information that takes account of any Memories se-
lected on the last time but one that the MEMORIES page
was accessed.
Memory 0 can be used even when you do not wish to enable
Memories management for the signal in use. In fact, once
Memory 0 has been selected, when a source is chosen,
the settings that were effective at the time the Memory was
previously recalled will be automatically applied.
INFO
Displays the current operating status of the projector and
information concerning the projected video/graphic signal.
This function is displayed by pressing the
key on the re-
Image
Picture
BRIGHTNSS
ASPECT
CONTRAST
COLOR TEMPERATURE
COLOUR
OVERSCAN
TINT
GAMMA CORRECTION
SHARPNESS
FILTER
NOISE REDUCTION
1 MEMORY 1
0
2 MEMORY 2
3 MEMORY 3
4 MEMORY 4
5 MEMORY 5
6 MEMORY 6
7 MEMORY 7
Memorie
Save current settings
Save initial settings
Rename
1
C3X Lumis HOST_ EN.indd 19
11-02-2009 14:40:35