Sanus Systems JFBD1 User Manual
Page 5
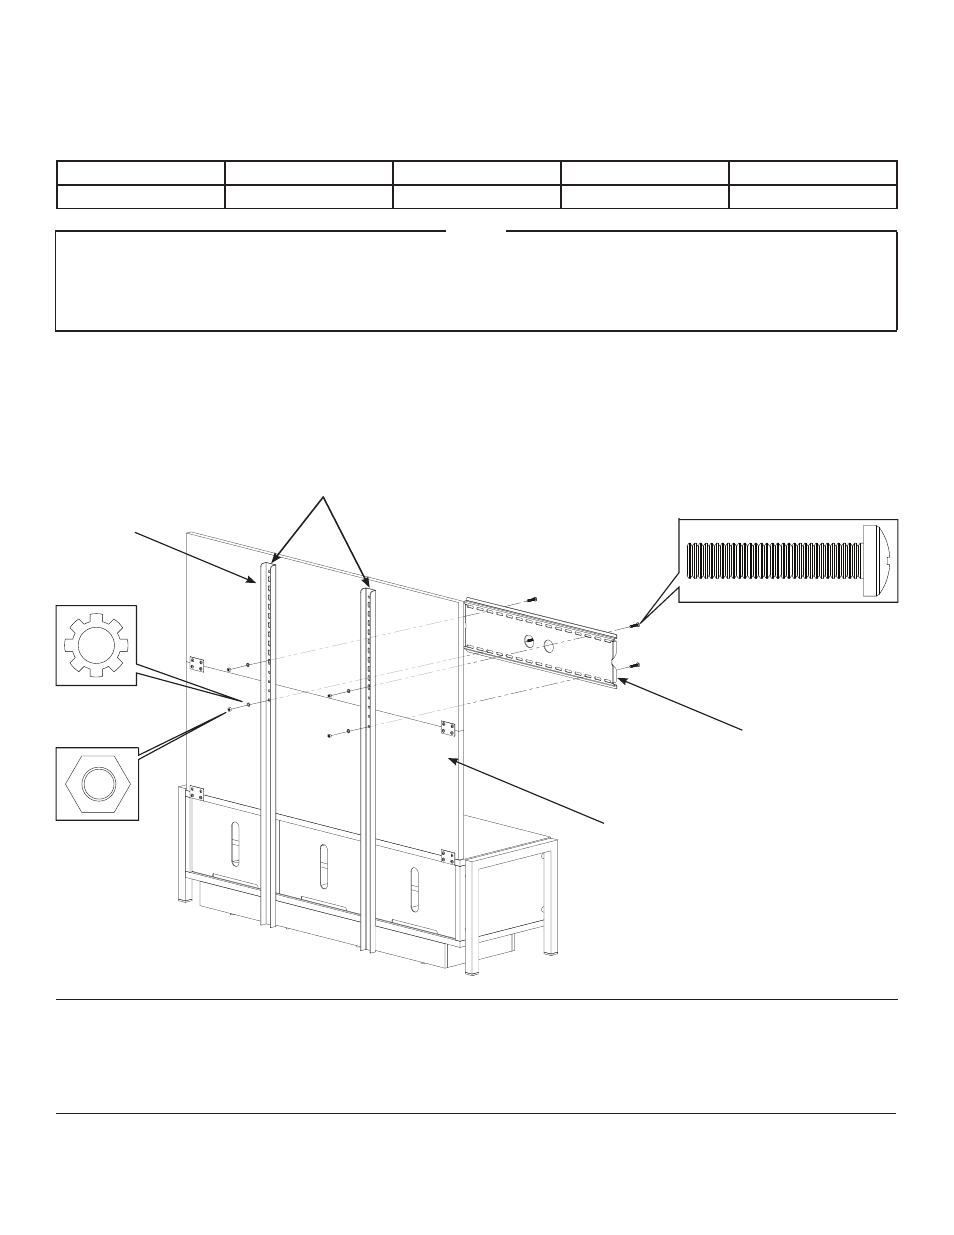
Step 4: Attach wall Plate Provided with VMPL50, VMPL250, VMPL, VMPL2, or VMPL3
Decide where you would like the Wall Plate and mark the position of the two bottom holes through the slots in the Mounting
Rails. Use Table 1 below to correctly locate the position of the two upper slots in the Mounting Rails.
Table 1: Vertical(↕) Distance Between Wall Plate Slots
VMPL50
VMPL250
VMPL
VMPL2
VMPL3
4.5 in (114.3 mm)
4.5 in (114.3 mm)
6.5 in (165.1 mm)
6.5 in (165.1 mm)
6.0 in (152.4 mm)
NoTeS
Place a piece of tape over the areas where the drill bit will come through the Backboards (A and B). This
helps to prevent chipping of the wood surface. Remove the tape after the holes are drilled.
Use the M8 x 40 Screws (D). The Mounting Rail and Backboards (A and B) are too thick for the M8 x 16 mm
Screws provided with the Flat Panel TV Rails.
Drill through the selected slots with a 5/16″ drill bit. Drill from the back to the front of the Backboards
(A and B).
Attach the Wall Plate to the Backboards
(A and B) with four M8 x 40 mm Screws (D), M8 Lock Washers, and M8 Nuts, as
shown in Figure 5. The M8 Lock Washers and M8 Nuts are provided with the Flat Panel TV Rails. Make sure that all the
Screws are tight.
Figure 5
wall Plate
Mounting Rails
CSAV, Inc. and its affiliated corporations and subsidiaries (collectively, “CSAV”), intend to make this manual accurate and complete. However, CSAV makes no claim that the information contained herein
covers all details, conditions, or variations. Nor does it provide for every possible contingency in connection with the installation or use of this product. The information contained in this document is subject to
change without notice or obligation of any kind. CSAV makes no representation of warranty, expressed or implied, regarding the information contained herein. CSAV assumes no responsibility for accuracy,
completeness or sufficiency of the information contained in this document.
Step 5: Attach VMPL50, VMPL250, VMPL, VMPL2, or VMPL3 wall Mount
Attach the Wall Mount according to the assembly instructions provided with the unit.
Screw (D)
M8 Lock
washer
M8 Nut
Top Backboard
(A)
Bottom
Backboard (B)