Stanton S-700 User Manual
Page 9
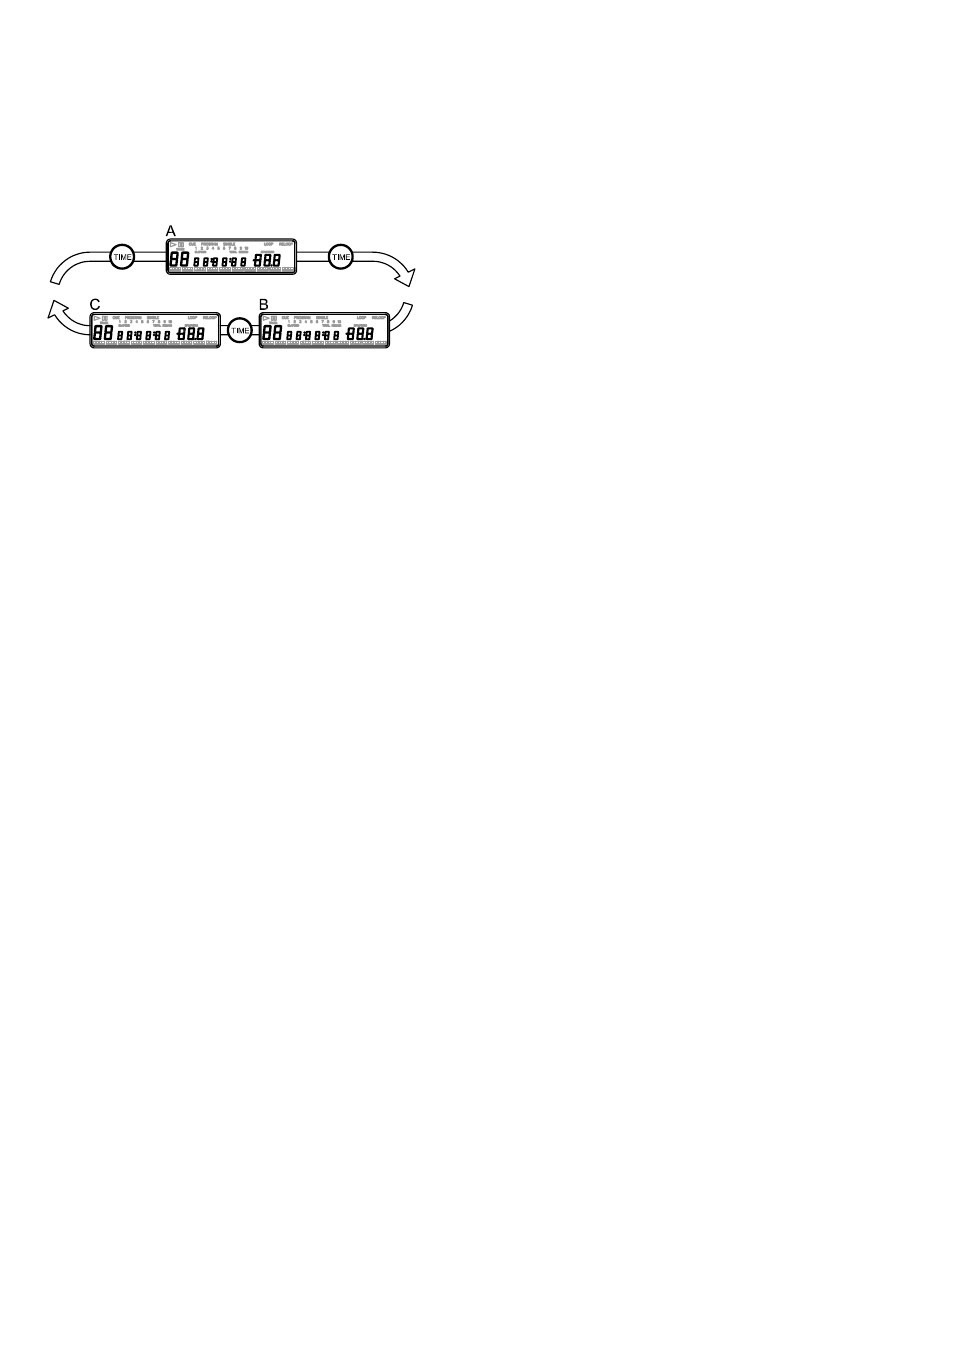
14.Time Display
During normal play, each time you press TIME
button(2), the display changes as in the following
information.
A=Elapsed playing time
B=Remaining time in a selection
C=Total remaining time of the disc.
15.Pitch Bending
The speed increases or decreases respectively while
the PITCH BEND+(5) or PITCH BEND-(5) button is
pressed. The extent to which the speed changes is
proportionally to the amount of time the button is
pressed. For example, if the PITCH BEND+ button is
held in continuously, the speed increases continuously.
The pitch changes within a range of +/- 16%.
The jog wheel will temporarily bend the pitch of the
music if the song is already playing by rotating the
wheel clockwise to speed up or counterclockwise to
slow down. The speed that you rotate the JOG Wheel
determines the percentage of pitch bend.
16.Program play
Press PROG. Button(1) to make the unit enter the
program mode and stop condition.
The PROGRAM indicator lights.
Select Track using NUMBER button(4) or TRACK
SEARCH button(24) press PROG. again.
Repeat this up to 30 times.
Press PLAY button(22) to begin playing programmed
tracks.
To cancel Program press and hold PROG. Button(1)
more than 2 sec.
17.Memory Cueing (setting a cue point)
Press the MEMORY button(3) to make the unit enter
cue memory mode, then press the desired
numerical button(4) at the desired cue point to
memorize. The numeral(10) on the display will flash
twice then lit steadily to indicate the cue memory
has been set.
Press the RECALL button(9) to make the unit enter
cue recall mode, then press the desired numerical
button(4) to recall the desired cue memory point. A
new cue point will be set.
To clear all the cue memory, just press and hold the
MEMORY button(3) for more than 2 seconds. All the
cue memory will be clear.
18.Fader Start Playback
When the player’s CONTROL jack is connected to any
mixer with FADER start control, moving the mixer’s
crossfader from side to side causes the player’s
standby mode to be released, starting playback
instantly. The player’s fader start operation can also be
used to produce cross-fader effects. Restoring the
fader position returns the player to its cue point (back
cue) automatically.
The following operations are performed on the DJ
Mixer.
Set CROSS FADER switch to ON.
Set FADER START switch to ON.
When “A” is in standby mode at cue point, move
the CROSS FADER slider from right to left to
automatically starting playback instantly. The
player’s fader start operation can also be used to
produce cross-fader effect.
When “B” is in standby mode at cue point, move
the CROSS FADER slider from left to right to
automatically start playback on “B”. (“A” will
simultaneously be back cued (returns to cue
point)).
19. Relay Play using two players
How to set the Relay function:
a. By either the both player’s CONTROL jack are
connected to each other without pressing the RELAY
button; when the both player’s CONTROL jack are
connected to each other, the relay-play effects can be
produced. The relay play is explained as below.
Set both players to single play mode (the SINGLE
indicators(6) will lit in the displays).
Begin playback on the first player.
When the currently playing track ends, playback
will begin automatically on the standby player.
The first player will enter standby mode at the
beginning of the next track on its disc.
By repeating this operation, the two players can
be used to perform continuous relay play.
By loading new discs on the standby player, you
can construct a continuous program of whatever
tracks you wish.
By setting a cue point on the standby player, you
can perform relay to any desired cue point on the
selected track.
NOTE:
Relay play may not work properly if the audio out jacks
on the two players are not connected to the same
audio amplifier.
b. or press the RELAY button(19) on the front plane of
Controller.
1. The default has no Relay function when power on.
2. Pressing the RELAY button to enable Relay function.
3. While the Relay is enabled, the LED will light on.
4. In the single mode, the CD player will be paused at
the next track when finish playing current track;
5. And only the other side of CD player that is standby
in pause mode will start playing automatically.
6. There is no Fader start function when in the Relay
mode.
To disable the Relay:
1. Pressing the RELAY button(19) to disable Relay
function.
2. The LED will light off when Relay is disabled.
3. The Fader Start function can be worked.
20. STUTTER EFFECT
It can create a sound similar to a CD skipping. The
STUTTER Effect can be created in 2 ways.
(1) By rapidly pressing the CUE BUTTON (14)
a. Press PLAY/PAUSE BUTTON (22) so that music
is playing. PLAY/PAUSE LED will light (figure 9).
b. Next, rapidly press the CUE BUTTON (14) in
sync with the music (figure 10).
(2) By Hitting The DIRECT TRACK ACESS BUTTONS
(4)
8