Lcd display, Operating instructions – Stanton S-700 User Manual
Page 7
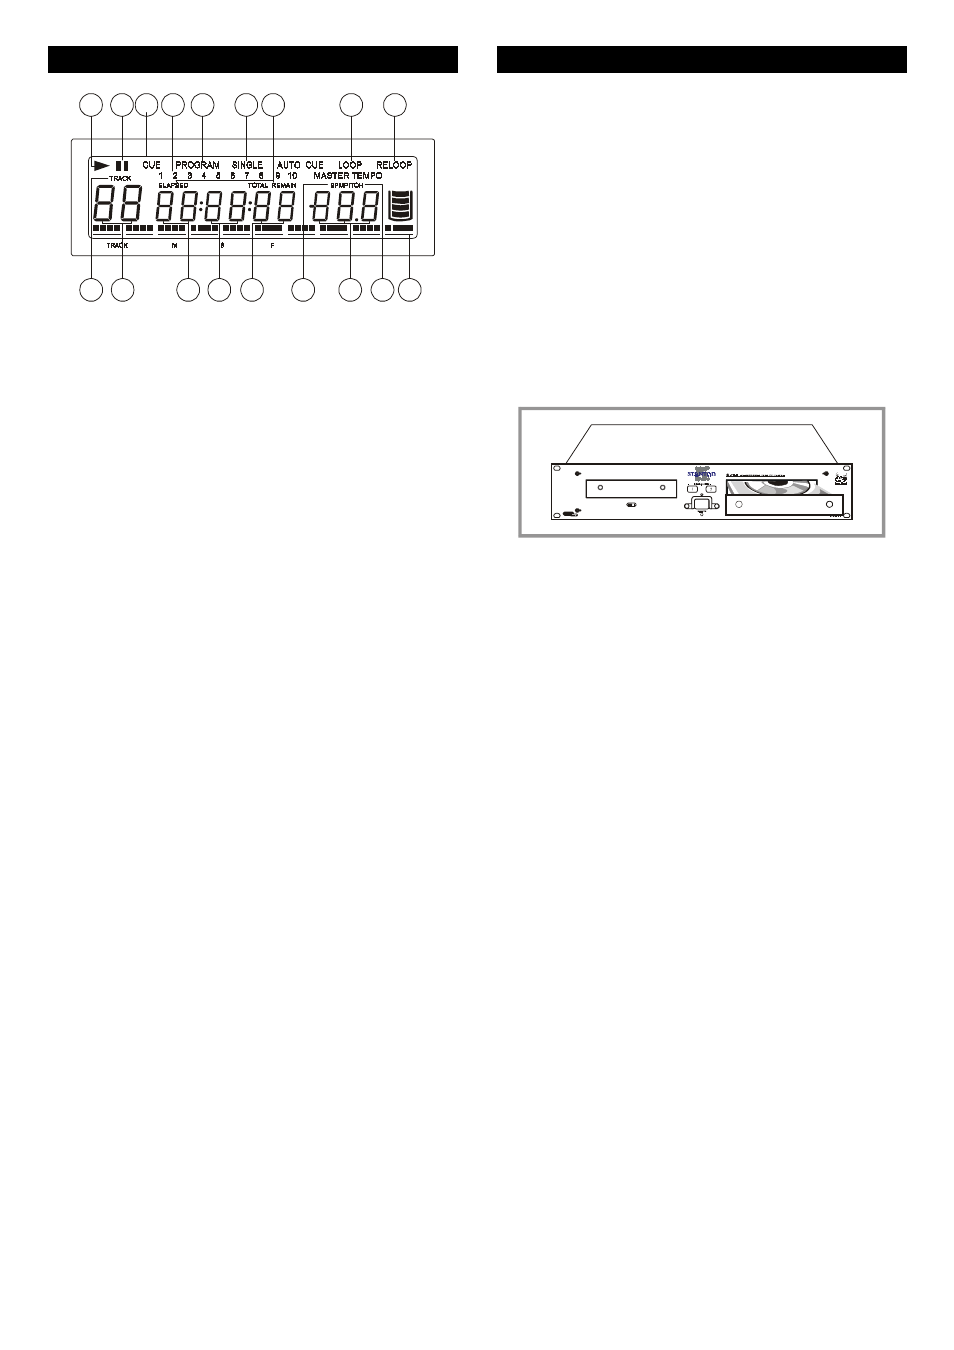
LCD DISPLAY
7
1
2 3
9
4
5
13
12
14
15
16 17 18
10 11
8
6
1. PLAY
– lit while the unit is playing a CD.
2. PAUSE - Lit during pause or cue mode.
3. CUE
– Lit when the unit is at a cue point.
4. CUE MEMORY CALENDAR - The numeral on the
cue memory calendar shows to indicate which cue
memory is set previously. It will flash while the cue is
being set or recalled.
5. PROGRAM – Lit when program mode is set or
played.
6. SINGLE - Lit when the unit is set to play just one
track at a time. When this is not lit the CD will play
continuously through all tracks. The function is
controlled by the SGN/CTN BUTTON.
7. ELAPSED, TOTAL REMAIN - These indicate that the
time shown on the display is the ELAPSED, TOTAL
REMAINING or single song remaining time.
8. LOOP - Lit when the CD is repeating a particular area
with the music on the CD.
9. RELOOP
– Lit when the CD has had a loop set
previously and can go back to loop again.
10. TRACK – shows the track that is currently playing.
11. ~ 14. TRACK, MINUTE, SECOND, FRAME These
displays indicate information on the current track and
time
15. BPM - Lit when BPM button is engaged
16. PITCH/BPM – Shows either the percentage change in
pitch or the BPM of the song depending on the mode
selected with the BPM BUTTON.
17. PITCH - Indicator light shows percentage of pitch is
displayed.
18. ANTI SHOCK AND BUFFER INDICATOR – The
memory status is represented on the display by a
bucket being filled or emptied. The bucket itself
represents the instant start function (which works by
buffer ). If the bucket is not lit, the instant start is not
available. Each bar within the bucket represents 5
seconds of anti shock protection. There is up to 20
seconds of anti shock available. In Playback Mode, It
takes 20 seconds to enable the Anti Shock. In Pause
Mode, It will take only 10 seconds to enable the Anti
Shock.
OPERATING INSTRUCTIONS
1. OPENING AND CLOSING the Disc Tray and Loading
Discs
a)Opening and closing the disc tray
This operation only works when the power is on.
Press the OPEN/CLOSE button(8) to open or close the
disc tray. OPEN/CLOSE button(8) are provided on
both the main unit and control unit.
Press PLAY button to automatically close tray.
If tray is not closed after 60 seconds it will close
automatically and pause.
The disc trays cannot be opened during playback to
prevent playback from being interrupted if the
OPEN/CLOSE button is pressed accidentally. Stop
playback, then press the OPEN/CLOSE button(8).
2. Loading discs
Hold the disc by the edges and place it in the disc tray.
Do not touch the single surface (the glossy side).
When using 12cm discs, place the disc in the outer tray
guides.
CAUTION:
Do not play foreign objects in the disc tray, and do not
place more than one disc in the disc tray at a time.
Doing so may result in malfunction.
Do not push the disc tray in manually when the power is
off, as this may result in malfunction and damage the
player.
3. Selecting Tracks
Select desired track using NUMBER Button(4) or press
the TRACK Buttons once to move to one higher or lower
track or Hold the TRACK buttons(24) in to change
tracks continuously at a higher speed.
When a new track is selected during playback, playback
begins as soon as the search operation is completed.
4. Starting Playback
Press the PLAY/PAUSE button(22) during the pause or
cue to start playback.
The PLAY indicator lights when playback starts.
5. Stopping Playback
There are two ways to stop playback.
1)Press the PLAY/PAUSE button(22) during playback to
pause at that point
2) Press the CUE button(14) during playback to return
to the position at which playback started(Back Cue).
6. Pausing
Press the PLAY/PAUSE button(22) to switch between
play and pause.
The PAUSE indicator lights when the pause mode is set.
6