Using the photo (jpeg) list, Zooming-in – Samsung BN68-00990V-03 User Manual
Page 35
English - 35
y.
.
n).
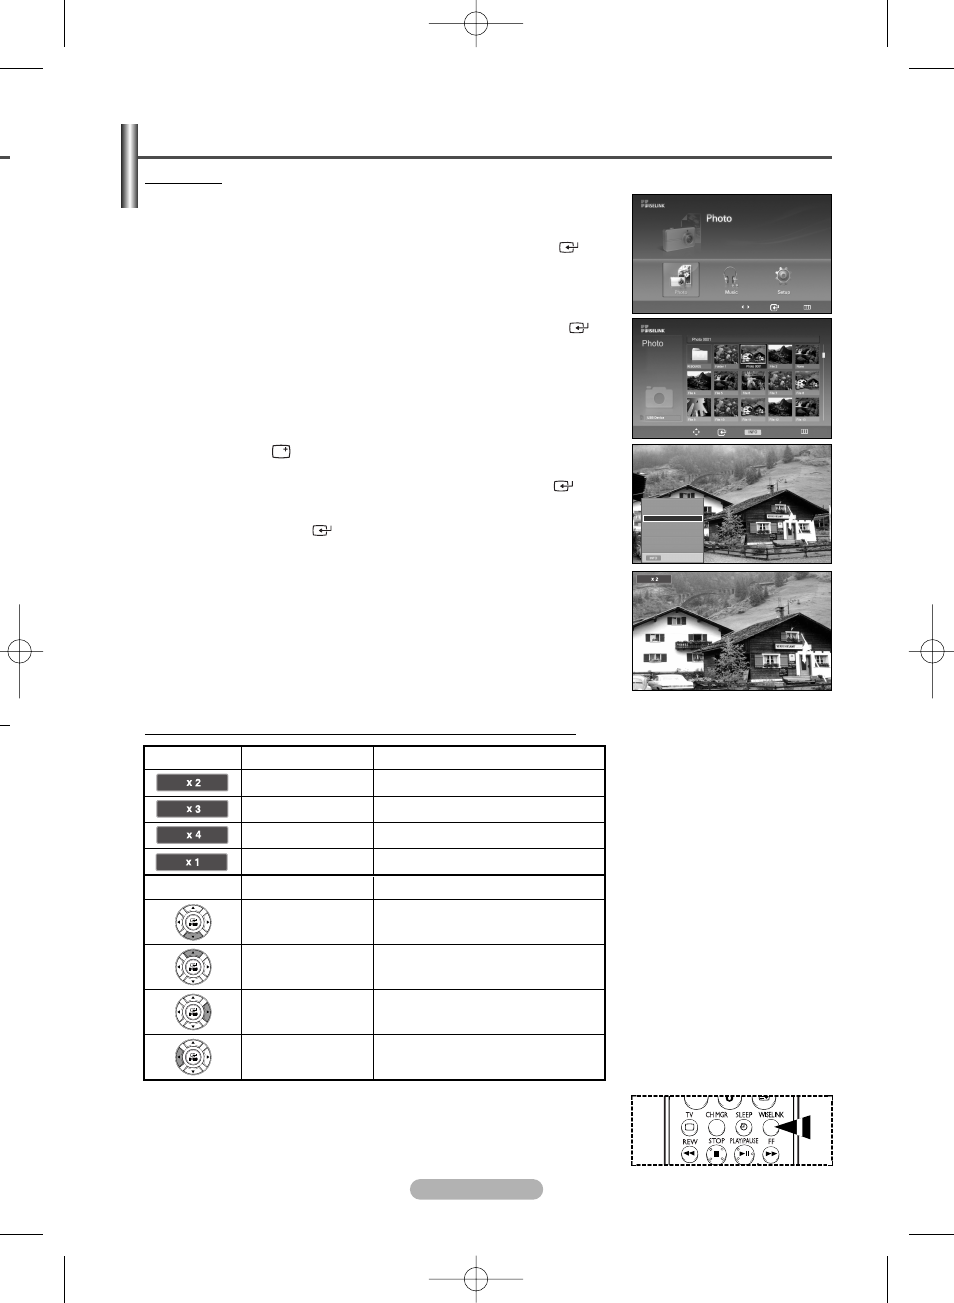
Using the Photo (JPEG) List
Zoom function information icon (Displayed at the top left of the screen).
Zoom (x 1)
Restore a photo to its original size.
Zoom-in to a photo x2.
Current OSD
Icon
Zoom (x 2)
Zoom-in to a photo x3.
Zoom (x 3)
Zoom-in to a photo x4.
Zoom (x 4)
Function
Pan down to view the lower
part of a zoomed-in photo.
Button
Pan Down
Function
Zooming-In
1
After switching the mode to WISELINK, select a memory device that you
have installed. (Refer to page 29)
2
Press the œ or √ button to select Photo, then press the ENTER (
)
button. JPEG files and existing folders are displayed.
3
Press the …/†/œ/√ buttons to select a file, then press the ENTER (
)
button.
Pressing the button over a photo icon shows the currently selected photo in
full screen.
4
Press the INFO (
) button to display the option (Slide Show, Rotate,
Zoom
, Copy, Delete, Print, List).
Press the … or † button to select Zoom, then press the ENTER (
)
button.
Each time the ENTER (
) button is pressed, the photo size increases.
(X1
X2
X3
X4)
• X2: Zoom-in to the photo X2.
• X3: Zoom-in to the photo X3.
• X4: Zoom-in to the photo X4.
• X1: Restore the photo to its original size.
To move the enlarged photo image up/down/left/right, press the …/†/œ/√
buttons.
To exit WISELINK mode, press the WISELINK button on the remote control.
Exit
Slide Show
Rotate
Zoom
Copy
Delete
List
Move
Enter
Return
Move Enter
Photo
Menu
Return
219x171
6 KBytes
May 05,2006
3/130
œœ 1/10 Page √√
K
➢
Press the WISELINK button on the remote control to turn on the WISELINK
mode.
Pan up to view the upper part of a
zoomed-in photo.
Pan Up
Pan right to view the right side of a
zoomed-in photo.
Pan Right
Pan left to view the left side of a
zoomed-in photo.
Pan Left
BN68-00990V-03Eng_0824 8/26/06 4:25 PM Page 35