Channel list (changing/disabling the channels), Clock, Press enter and go to step 4 – Sony RDR-GX3 User Manual
Page 80: Press enter to confirm the setting, Press system menu repeatedly to exit the menu, Press m / m to select “clock,” then press enter, Press m / m to select “on,” then press, Settings (basic settings)
80
Settings (Basic Settings)
A Follow steps 1 to 3 of “Using the Setup
Displays” (page 77) to select “Settings” in the
Setup Display.
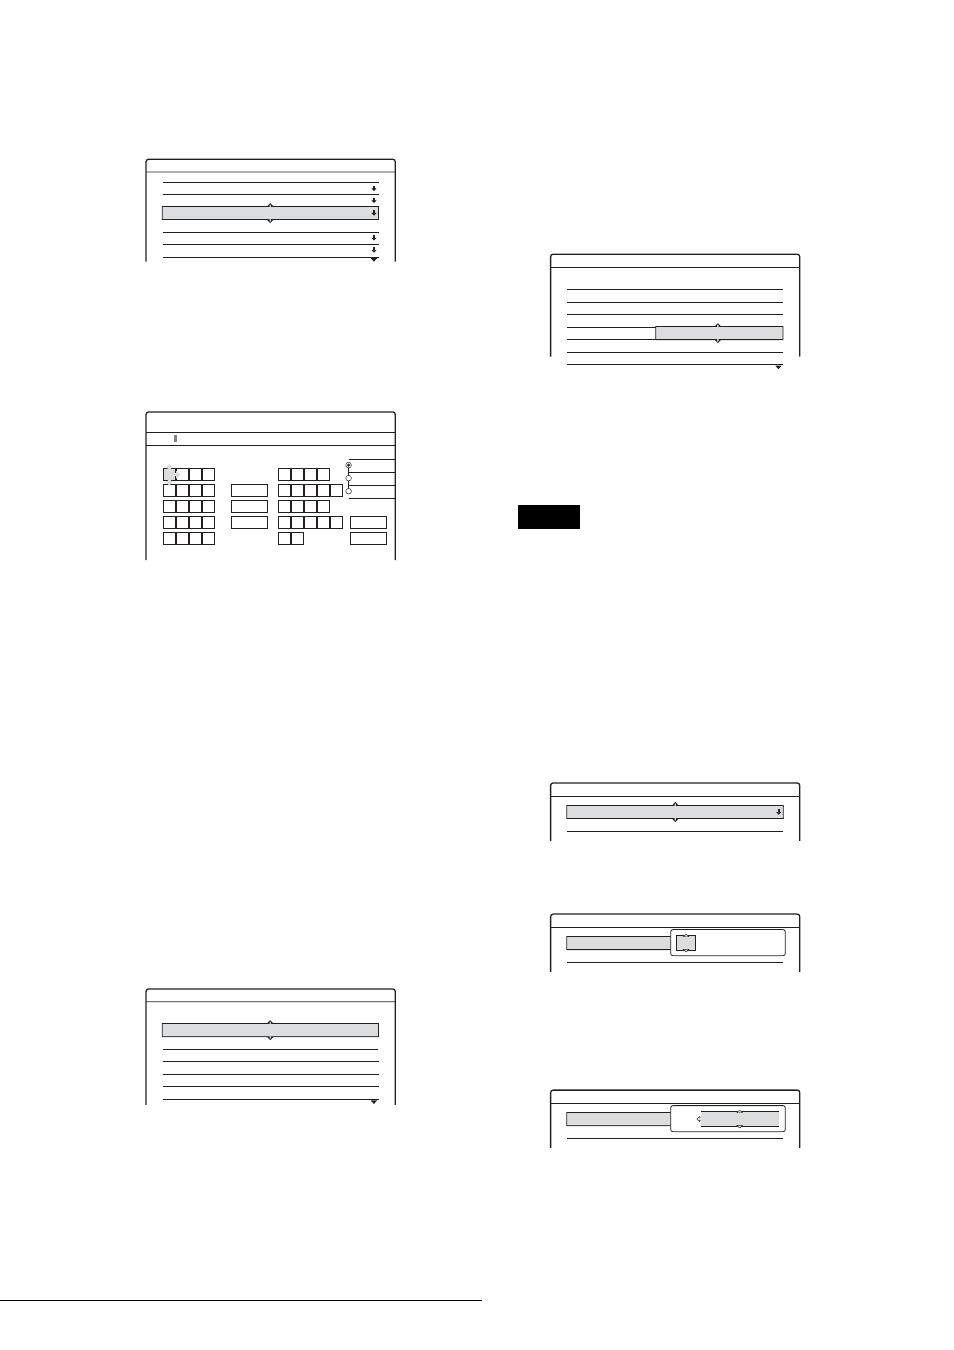
B Press M/m to select “Channel Setting,” then
press ENTER.
C Press PROG +/– to select the programme
position for which you want to change or enter
a station name.
D Press M/m to select “Station Name,” then press
ENTER.
The display for entering characters appears.
To enter characters, see page 34.
E Press </M/m/, to select “Finish,” then
press ENTER.
F Press SYSTEM MENU repeatedly to exit the
menu.
• To use the PAY-TV/CANAL+ option
See page 28.
Channel List (Changing/Disabling the
channels)
After setting the channels, you can change the programme
positions. If any programme positions are unused or contain
unwanted channels, you can disable them.
You can also change station names. If the station names are not
displayed, you can enter them manually.
1
Follow steps 1 to 3 of “Using the Setup Displays”
(page 77) to select “Settings” in the Setup Display.
2
Press
M/m to select “Channel List,” then press
ENTER.
3
Press
M/m to select the row containing the
programme position you want to change or
disable.
• To change
Press ENTER and go to step 4.
• To disable
Press CLEAR and go to step 6. The disabled
positions will be skipped when you press the
PROG +/– buttons.
To display other pages for programme positions 7 to
99, press
M/m repeatedly.
4
Press
M/m until the selected channel row moves to
the desired programme position.
The selected channel is inserted at the new
programme position.
5
Press ENTER to confirm the setting.
6
To change or disable the programme position of
another station, repeat steps 3 through 6.
7
Press SYSTEM MENU repeatedly to exit the
menu.
Note
Be sure to correctly select the programme position you want to disable.
If you disable the wrong programme position by mistake, you need to
reset that channel manually.
Clock
◆Auto Adjust
Turns on the Auto Clock Set function when a station in your
local area broadcasts a time signal. Sets the programme number
that broadcasts the time signal.
1
Follow steps 1 to 3 of “Using the Setup Displays”
(page 77) to select “Settings” in the Setup Display.
2
Press
M/m to select “Clock,” then press ENTER.
3
Press
M/m to select “Auto Adjust,” then press
ENTER.
4
Press
M/m to select “On,” then press ,.
5
Press
M/m repeatedly until the programme
position of the station that carries a time signal
appears, then press ENTER.
If the recorder does not receive a time signal from
any station, “Auto Adjust” returns to “Off”
automatically and the menu for setting the clock
manually appears on the screen.
Settings - Channel Setting
Prog. 1
System :
Normal / CATV :
Channel Set :
Station Name :
Pay - TV / CANAL+ :
Audio :
BG
Normal
C3
AAB
Off
NICAM
AAB
"A"
"a"
Symbol
Cancel
Finish
Space
Clear All
Back
,
.
-
1
B
A
C
2
E
D
F
3
H
G
I
4
K
J
L
5
1
2
3
4
5
N
M
O
6
Q
P
R
S
U
T
V
8
X
W
Y
Z
7
9
0
6
7
8
9
0
Input Station Name:
Settings - Channel List
Prog
1
2
3
4
5
6
Channel
Name
AAB
FGH
PQR
C3
C5
C12
C21
C23
C24
Settings - Channel List
Prog
1
2
3
4
5
6
Channel
Name
AAB
FGH
PQR
C3
C12
C21
C5
C23
C24
Settings - Clock
Auto Adjust : Off 1
Present Time : Sun 14. 9. 2003. 21:39
Settings - Clock
Auto Adjust : Off 1 ARD
Present Time : Sun 14. 9. 2003. 21:39
Off
1
Settings - Clock
Auto Adjust : Off 1 ARD
Present Time : Sun 14. 9. 2003. 21:39
On
1