Service, Table stop switches – Woodstock W1737 User Manual
Page 28
-26-
W1737/W1738 Owner's Manual (Mfg. 10/09+)
SE
RV
IC
E
Table Stop Switches
The table stop switches prevent the table lift
motor from driving the table into the sanding drum.
Periodically check and adjust (if required) the table stop
switches to protect the conveyor.
To adjust table stop switches, do these steps:
1. Supply air to the sander and tension the sanding
belt.
2. Push the down arrow key and lower the table until
you achieve six inches between the sanding drum
and the conveyor table surface (see
Figure 34).
3. Loosen the mounting bolt for the table-down stop
switch and slide the switch so the switch plunger
depresses against the stop block and you hear the
switch click (see
Figure 35).
4. Re-tighten the mounting bolt.
5. Push the up arrow key and raise the table until you
achieve an
1
⁄
8
inch between the sanding drum and
the conveyor table surface.
6. Loosen the mounting bolt for the table-up stop
switch and move the switch so the switch plunger
depresses against the stop block and you hear the
switch click (see
Figure 35).
7. Re-tighten the mounting bolt.
8. Use the up and down buttons to test the table
operation and make sure the switches shut the table
lift motor
OFF
when the table is at the minimum
and maximum distance from the sanding drum.
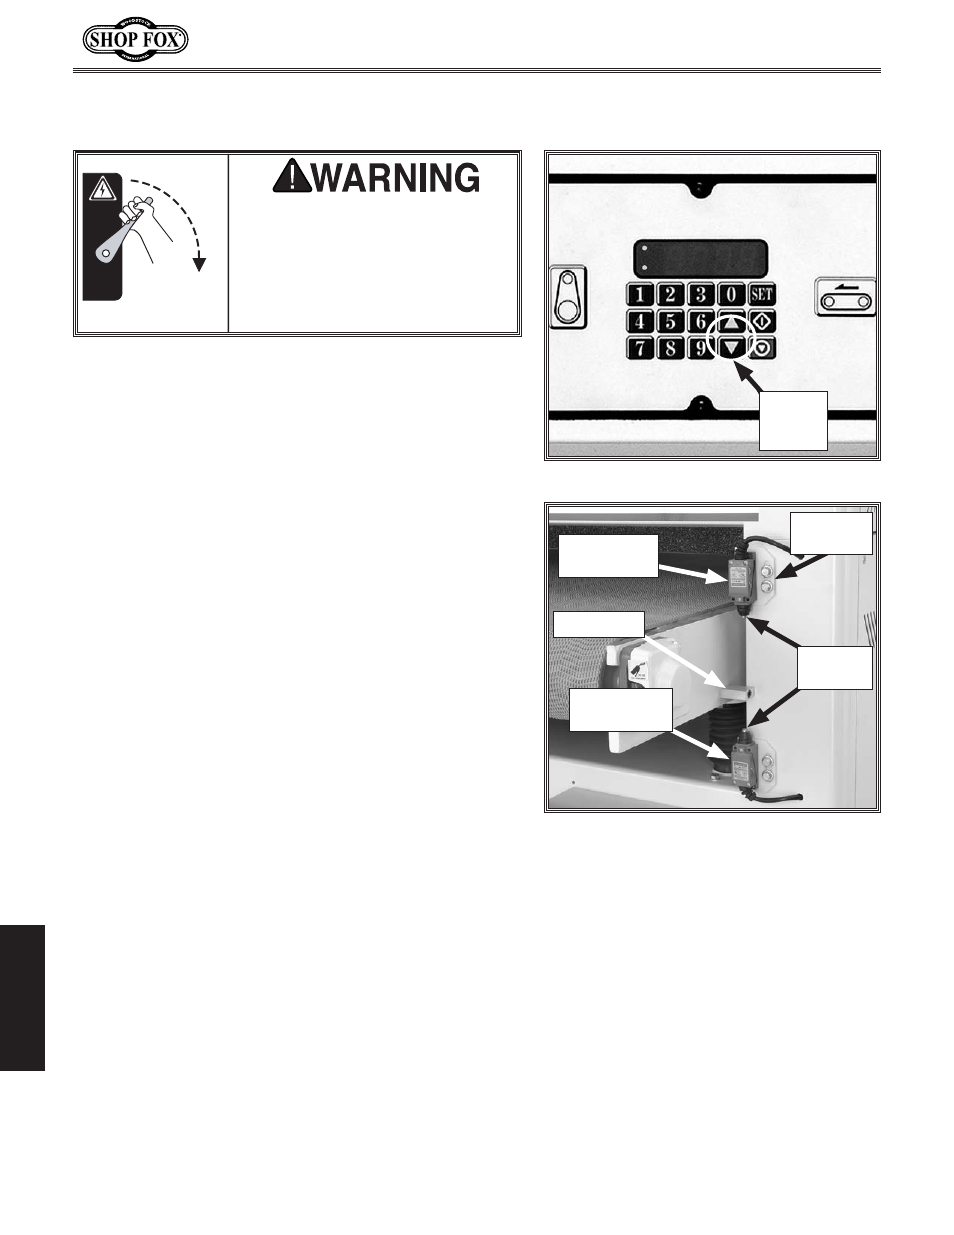
Figure 34. Key pad table-lift controls.
Figure 35. Table stop switch adjustment
locations.
Table Down
Stop Switch
Table Up
Stop Switch
Stop Block
Up and
Down
Key
Switch
Plungers
Mounting
Bolt
SERVICE
TURN OFF and LOCK the master
power switch when doing service
so no power is available to the
sander! If you ignore this warning
serious electrical shock or
accidental start may cause injury
or death!
OFF