Emergency stop, Keypad and display calibrating the table – Woodstock W1737 User Manual
Page 21
-19-
W1737/W1738 Owner's Manual (Mfg. 10/09+)
O
PE
R
ATIO
NS
Emergency Stop
Figure 20. Digital display and key pad.
Figure 21. Table height handwheel.
When pushed, the emergency stop plate shown in
Figure
19 stops the electricity to the motors and also applies
an air-disc brake to stop the sander immediately.
To use the emergency stop, do these steps:
1. Push the bottom of the emergency stop plate.
2. Hold the emergency stop plate until the sander has
come to a complete stop.
Figure 19. Emergency stop plate.
KEEP the sanding drum drive belts correctly adjusted.
Otherwise, the sanding drum pulley will slip when
the emergency brake is applied and not immediately
stop the machine in the event of an emergency!
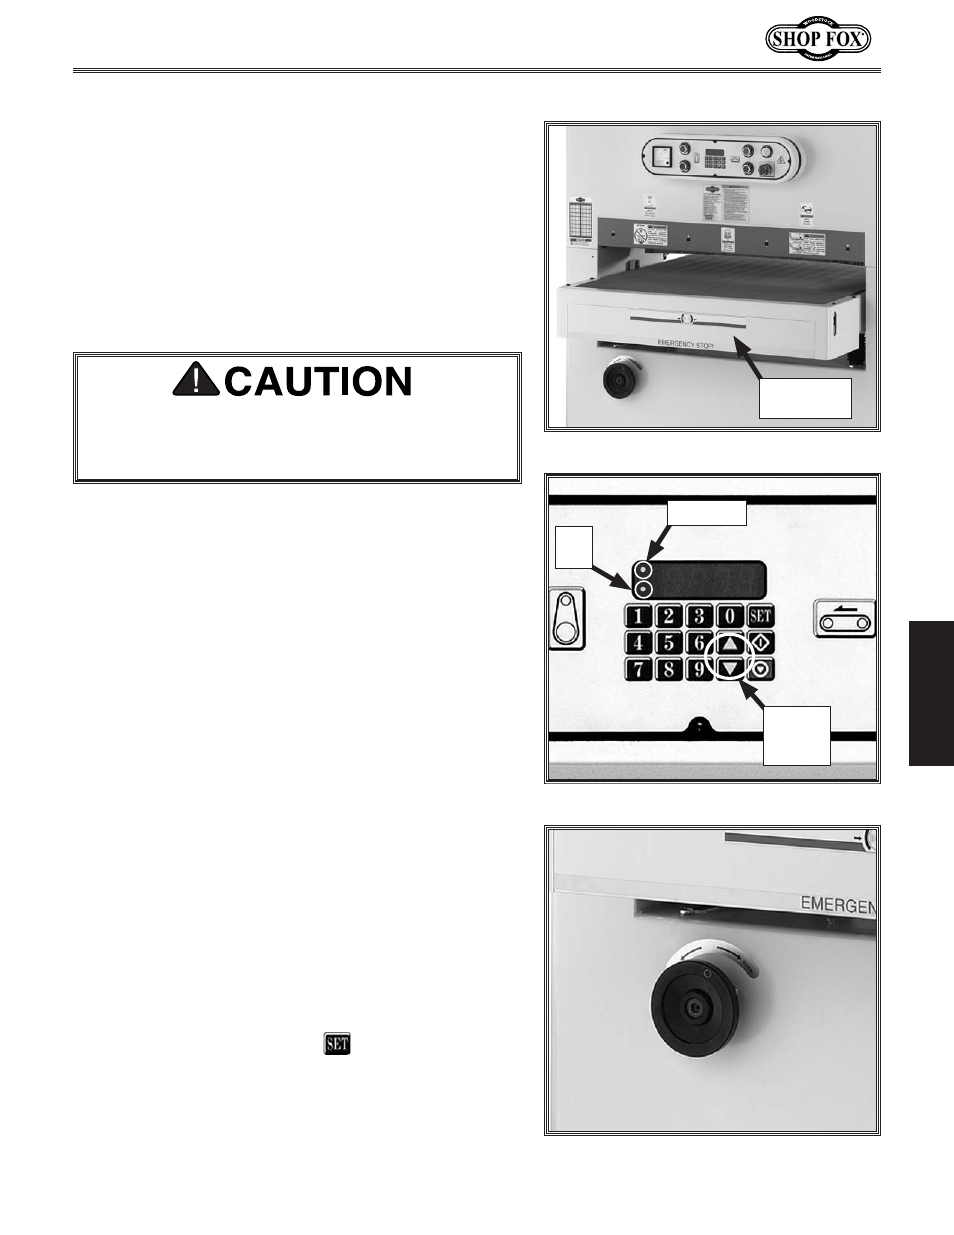
Keypad and Display
Calibrating the Table
You can push the
UP or DOWN arrow keys to lift or
lower the table, or you can use the automated function
of auto height adjustment for your next sanding pass.
All functions are controlled through the key pad and are
presented on the digital display. See
Figure 20.
Input LED
Run
LED
Up and
Down
Keys
When you change the sandpaper or you notice an
inconsistency with the actual sanding thickness in
relationship to your digital setting, you must re-calibrate
the table.
To re-calibrate your table, do these steps:
1. Sand a workpiece multiple times at the same
thickness until no sanding occurs when the
workpiece goes through the sander.
2. Using a caliper capable of measuring 0.001",
measure and record the workpiece thickness.
3. Type the recorded thickness of the workpiece on
the key pad, and the digital display will show the
thickness.
Example: For 1
1
⁄
2
" thickness, type 1.500;
or for 1
3
⁄
8
" thickness, type 1.375.
4. Now press and hold the SET key for 3 seconds:
The table is now calibrated.
Note: Holding the set key for 10 seconds toggles
the digital readout between metric and standard
measurements.
Emergency
Stop Plate