15 enjoying surround sound, Adjusting the dolby pro logic ii parameters – Sherwood RD-6108 User Manual
Page 15
ENGLISH
15
ENJOYING SURROUND SOUND
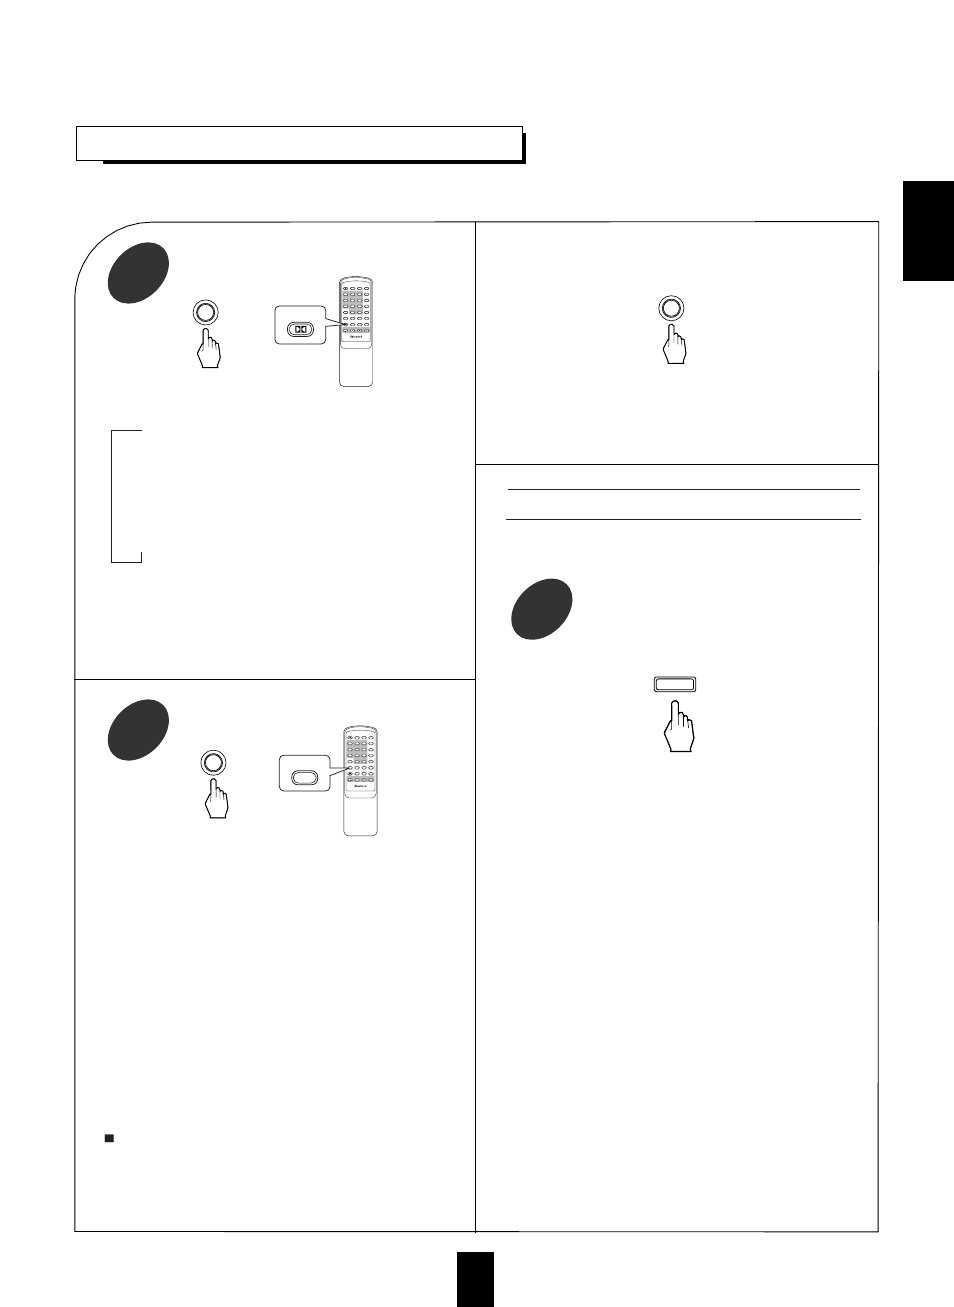
Depending on the input digital signal format, select the
desired decoding mode.
1
Surround sound effect will not work properly if the signal passes through a graphic equalizer.
Please refer to your equalizer operating instructions for guidance on switching off (or defeating) the equalizer.
or
AUTO
POWER
DISPLAY
SLEEP
VIDEO1
1
2
3
VIDEO2
4
5
6
VIDEO3
7
8
9
CD
T.TONE
0
P.SCAN
TUNER
DSP MODE
D.TIME
ADJUST
AUX
MUTE
T.MON
CH. LEVEL
CH. SEL
MASTER VOLUME
REMOTE CONTROL UNIT RM-105
AUTO
AUTO
STEREO
When canceling the surround mode for stereo operation.
• Each time the AUTO button is pressed, the decoding mode changes as
follows:
IN-AUTO : The input digital signal format(DTS, Dolby Digital or
PCM(2 channel stereo), etc.) used by the selected digital input
source is detected automatically to perform the necessary
decoding process for optimum surround modes.
IN-DTS : The DTS signal processing is performed only when DTS
signals are input.
IN-PCM : The PCM signal processing is performed only when PCM
signals are input.
Notes:
• Only when the digital input is selected as signal input for the input sources
except TUNER, AUX and TAPE MONITOR, the decoding mode can be
selected.
• Noise may be generated at the beginning of playback and while searching
during DTS playback in the IN-AUTO mode. In this case, try playing in
the IN-DTS mode.
• Then the stereo mode is selected.
• To cancel the stereo mode, select the desired surround mode with using
the DSP MODE button.
While scrolling “PL II MUSIC”(for Dolby Pro Logic II
Music mode) or “PL II CUSTOM”(for Dolby Pro
Logic II Custom mode), press the MEMORY/ENTER
button to select the desired parameter.
3
Select the desired surround mode.
2
or
DSP MODE
POWER
DISPLAY
SLEEP
VIDEO1
1
2
3
VIDEO2
4
5
6
VIDEO3
7
8
9
CD
T.TONE
0
P.SCAN
TUNER
DSP MODE
D.TIME
ADJUST
AUX
MUTE
T.MON
CH. LEVEL
CH. SEL
MASTER VOLUME
REMOTE CONTROL UNIT RM-105
DSP MODE
AUTO
• Each time the DSP MODE button is pressed, the surround mode changes
depending on the input signal format and the selected decoding mode as
follows:
When Dolby Digital signals are input in the IN-AUTO mode, one of the
following modes can be selected depending on the number of the recorded
channels.
• Dolby Digital 5.1-channel sources: DOLBY DIGITAL and DOLBY VIRTUAL.
• Dolby Digital 2-channel sources: DOLBY PRO LOGIC II MOVIE, DOLBY PRO
LOGIC, DOLBY PRO LOGIC II MUSIC, DOLBY PRO LOGIC II MATRIX,
DOLBY PRO LOGIC II CUSTOM and DOLBY VIRTUAL.
When PCM(2 channel stereo) signals are input in the IN-PCM mode, one of
the following modes can be selected :
DOLBY PRO LOGIC II MOVIE, DOLBY PRO LOGIC, DOLBY PRO LOGIC II MUSIC,
DOLBY PRO LOGIC II MATRIX, DOLBY PRO LOGIC II CUSTOM, DOLBY VIRTUAL,
CHURCH, THEATER,HALL and STADIUM.
• When the analog input is selected as signal input and analog stereo signals
are input, you can select the desired of these above surround modes, too.
• However, when DTS signals are input in the IN-AUTO or IN-DTS mode,
the DTS mode will be selected regardless of using the DSP MODE button.
Notes:
• When the selected decoding mode is not matched to the input signal format,
no sound is heard. Therefore, be sure to select the required decoding mode
and the available surround mode according to the input signal format.
• When the 6 CH DIRECT is selected as an input source, the decoding and
surround modes cannot be selected.
Adjusting the Dolby Pro Logic II parameters
• When selecting the Dolby Pro Logic II Music and Custom modes, you
can adjust the various surround parameters for optimum surround effect.
• Each time this button is pressed, the parameter changes and is displayed
for 5 seconds as follows:
Panorama mode(“PANO”) : This mode extends the front stereo image
to include the surround speakers for an exciting “wraparound”effect
with side wall imaging. Select “OFF” or “ON”.
Center width control(“C-WID”) : This control adjusts the center image
so it may be heard only from the center speaker, only from the
left/right speakers as a phantom image, or from all three front speakers
to varying degrees. The control can be set in 8 steps from 0 to 7.
Dimension control(“DIMEN”) : This control gradually adjusts the
soundfield either towards the front or towards the rear. The control can
be set in 7 steps from - 4 to +2.
7 kHz Low Pass Filter(“LPF”) : Select “OFF” or “ON” to turn off or
on the pass filter on the surround channels.
Shelf Filter(“SH - F”) : Select “OFF” or “ON” to turn off or on the
shelf filter on the surround channels.
Right Surround Channel Polarity Inversion(“PO - I”) : Select “OFF” or
“ON” to turn off or on the polarity inversion.
Automatic Balancing(“BAL”) : Select “ OFF” or “ON” to turn off or
on the automatic balancing
• If the Dolby Pro Logic II Music or Custom display disappears, you
cannot select the parameter. In this case, select the desired surround
mode again by pressing the DSP MODE button.
• In the Dolby Pro Logic II Music mode, you cannot select the 7 kHz Low
Pass Filter, Shelf Filter, Right Surround Channel Polarity Inversion and
Automatic Balancing.
• For your reference, the initial settings for parameters are as follows:
“PANO” : “OFF”, “C-WID” : “0”, “DIMEN” : “0”, “LPF” : “OFF”,
“SH-F” : “OFF”, “PO-I” : “ON”, “BAL” : “OFF”.
MEMO/ENTER