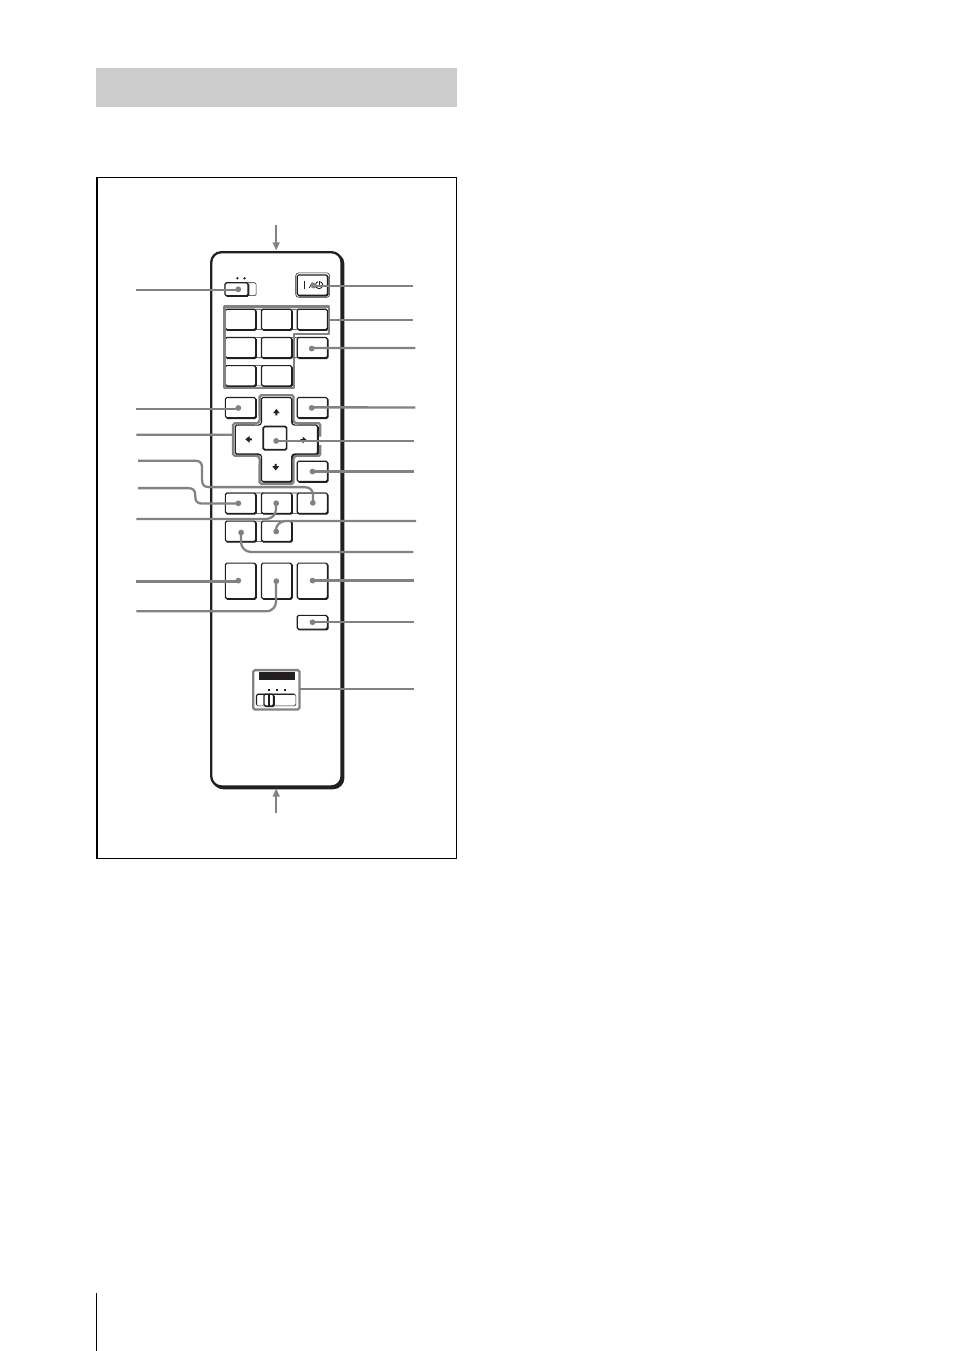
Remote commander, A ? / 1 (on/standby) key b input a/b/c/d/e keys, C air shot key – Sony FE40L User Manual
Page 14: D apa (auto pixel alignment) key, E enter key f reset key, H aspect key, I volume +/– keys j freeze key, K id mode 1/2/3 keys, L control s out jack (stereo mini-jack)
14
Location and Function of Controls
The keys that have the same names as those
on the control panel function identically.
a ?/1 (On/Standby) key
b INPUT A/B/C/D/E keys
Selects the input signal output from the
connector of the same name as those of
the Remote Commander.
c AIR SHOT key
Displays the Network Presentation
Home.
For details, see Operating Instructions
for Network (stored on the CD-ROM).
d APA (Auto Pixel Alignment) key
Automatically adjusts a picture to its
clearest while a signal is input from a
computer.
For details, see “APA” in “The Screen
Menu” on page 30.
e ENTER key
f RESET key
Resets the value of an item to its factory
preset value. This key functions when a
setting item is displayed on the screen.
g KEYSTONE (Vertical trapezoidal
distortion correction) key
Adjusts the vertical trapezoidal
distortion of the image manually. When
you press this key, the V Keystone menu
is displayed. Use the arrow keys (
M/m/
h ASPECT key
Select the aspect ratio of the picture.
Each time you press this key the aspect
ratio changes according to the input
signals.
i VOLUME +/– keys
j FREEZE key
Freezes the projected picture. To cancel
the frozen picture, press the key again.
k ID MODE 1/2/3 keys
When you apply the same identification
number as the projector to a Remote
Commander you can easily adjust or
control each projector with a Remote
Commander whenever you use two or
more projectors in one room.
For details, see “ID Mode” in the
Installation menu on page 37.
l CONTROL S OUT jack (stereo
mini-jack)
Connects to the CONTROL S IN jack on
the projector with the connecting cable
(not supplied) when using the Remote
Commander as a wired one. In this case
you do not need to install the batteries
since the power is supplied via the
CONTROL S IN jack on the projector.
Remote Commander
COMMAND
INPUT
A
INPUT
B
INPUT
C
INPUT
D
VIDEO
ENTER
MENU
APA
RESET
SHIFT
ZOOM
FOCUS
ASPECT
D ZOOM
MUTING
PIC
AUDIO
+
–
+
–
VOLUME
FREEZE
1 2 3
KEY
STONE
S VIDEO
INPUT
E
AIR
SHOT
OFF ON
ID MODE
1
2
wa
qs
3
4
5
6
7
8
9
0
qa
qk
qf
qh
qj
qg
qd
w;
ql