Viewing timer, Checking timer settings, Canceling or changing timer settings – JVC HM-DT100U User Manual
Page 50: Return to normal screen, Engage timer recording standby mode, Set view timer, Access timer list screen, Access timer mode screen, Timer recording (cont.), Press [menu
Masterpage:Left-FullCol
50
EN
Filename [HM-100U_Eng_05Index.fm]
TIMER RECORDING (cont.)
F
Return to normal screen
Press [MENU].
G
Engage timer recording standby mode
Press [TIMER (j)].
The VCR turns off automatically and [j] is
displayed on the front display panel.
To use the VCR while it is in timer recording standby
mode
Press [TIMER (j)] to cancel the timer recording standby
mode, then press [POWER] to turn on the VCR.
DO NOT forget to put the VCR into timer recording
standby mode again by pressing [TIMER (j)] after you use
the VCR; otherwise, you cannot record the broadcasts
you want.
•
When “AUTO TIMER” (A page 68) is set to “ON”, the
timer recording standby mode is automatically engaged
when the VCR is turned off. It is temporarily canceled
when the VCR is turned on. You do not have to press
[TIMER (j)] to engage or disengage the timer recording
standby mode.
Viewing timer
First follow steps B to D on page 49, then go to the
following steps.
A
Set view timer
B Press [FG] to select the individual items
“Channel”, “Date”, “Start Time”and “Weekly/
Daily”, and [D E] to enter the desired setting
(channel, date, start time etc.).
•
The “Weekly/Daily” item allows you to
choose from a selection of “Once”,
“Weekly”, “Mon-Fri” or “Daily”.
C Press [FG] to move the arrow to “Set Timer” upon
completing the necessary settings, then press [OK].
•
A mark appears in front of the program title.
B
Return to normal screen
Press [MENU].
NOTES:
•
The View timer is functional only when the VCR is powered
on.
•
The “End Time” and “Stop Mode” items are not selectable
when setting view timer.
Checking timer settings
First follow steps B and C on page 49, then go to the
following steps.
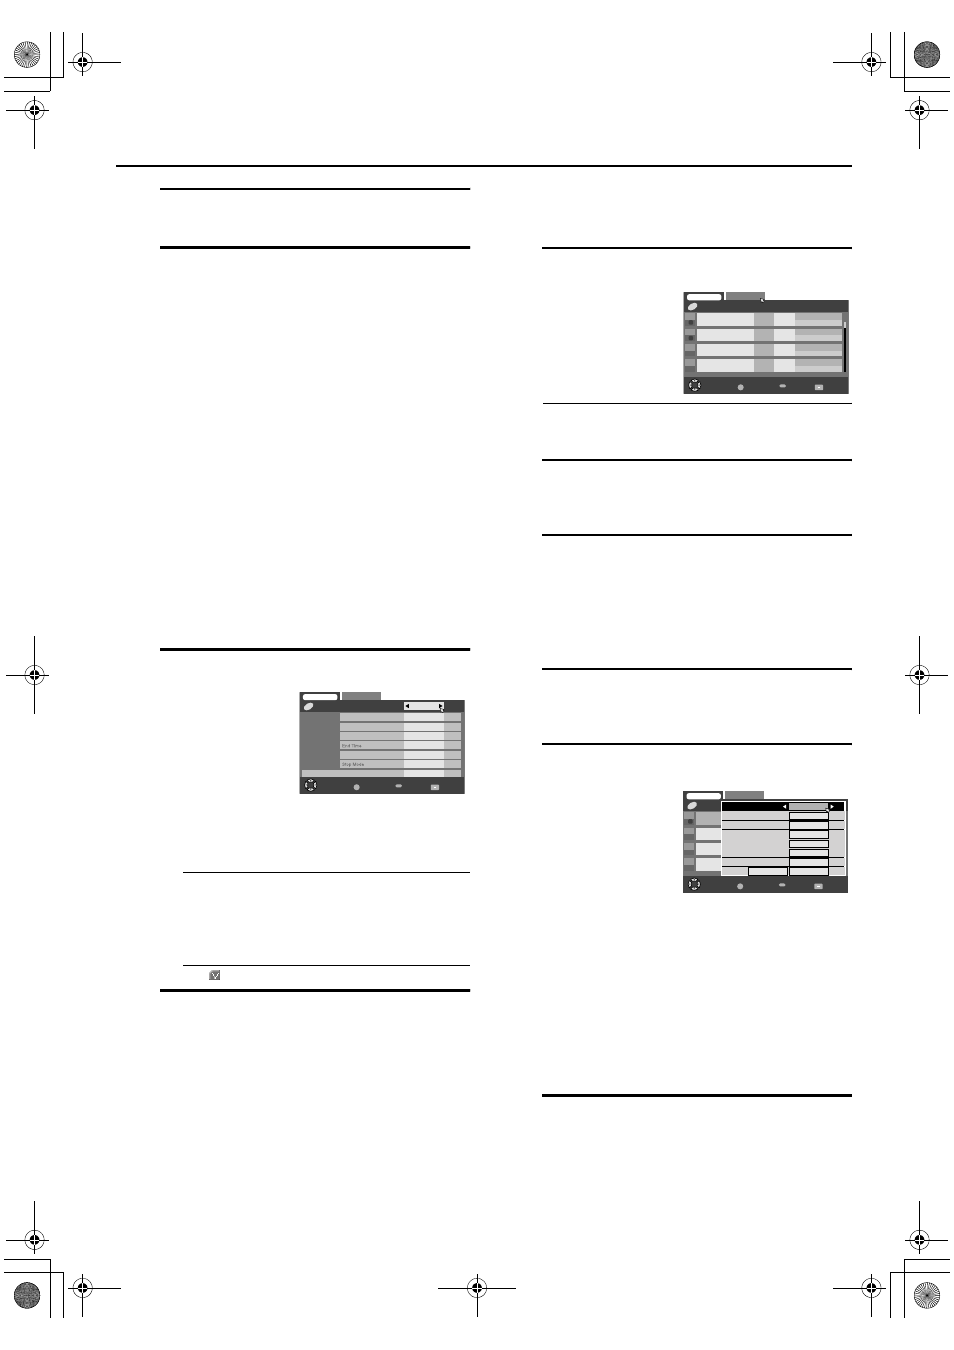
A
Access Timer List screen
•
The Easy Rec Timer or Easy View Timer set by
EPG (A page 51) will also be displayed in the
timer list.
B
Access Timer Mode screen
Press [FG] to select a program, then press [OK]
to check more detailed information.
C
Return to normal screen
Press [MENU].
Canceling or changing timer settings
First follow steps B and C on page 49, then go to the
following steps.
A
Access Timer List screen
Press [D E] to move the arrow to “Timer List”,
then press [G] or [OK].
B
Access Timer Mode screen
To change a program,
A Press [FGD E] to select and change the set-
ting.
B Press [FG] to move the arrow to “Set Timer”
upon completing the necessary changes, then
press [OK].
To delete a program,
Press [F E] to move the arrow to “Delete”, then
press [OK].
C
Return to normal screen
Press [MENU].
A Press [D E] to
select “View”,
then press [G]
or [OK].
Select
Operate
BACK
OK
DTV MENU
Exit
Timer List
Controller
TIMER
View
Timer
Timer mode
Channel
Date
Start Time
Weekly/Daily
Program 2
DTV 8-1
May 1 (Wed)
2:30 PM
Once
Set Timer
Back
Press [D E] to move
the arrow to “Timer
List”, then press [G]
or [OK].
Press [FG] to select a
program, then press
[OK].
Select
Operate
BACK
OK
DTV MENU
Exit
Timer List
Controller
TIMER
Timer
1.
2.
3.
4.
May 14
(Fri)
May 15
(Sat)
7:00 PM
10:00 PM
6:00 PM
7:00 PM
3-8
80-1
R
V
Weekly
Event
Once
Back
Select
Operate
BACK
OK
DTV MENU
Exit
Timer List
Controller
TIMER
Timer
1.
2.
3.
4.
May 14
(Fri)
May 15
(Sat)
7:00 PM
10:00 PM
6:00 PM
7:00 PM
3-8
80-1
R
Weekly
Event
Once
Back
Timer mode
Channel
Rec
DTV 3-1
Sept. 13 (Fri)
7:00PM
Once
Event
Set Timer
Delete
End time
Date
Start Time
Weekly/Daily
Stop mode
HM-DH100U_Eng.book Page 50 Thursday, August 5, 2004 1:54 PM