Audio dubbing, Make connections, Set input mode – JVC DD868EU User Manual
Page 42: Locate start point, Engage audio dubbing, Start dubbing, End audio dubbing, Editing (cont.)
42
EN
PLAY
TV PROG
STOP
PAUSE
A. DUB
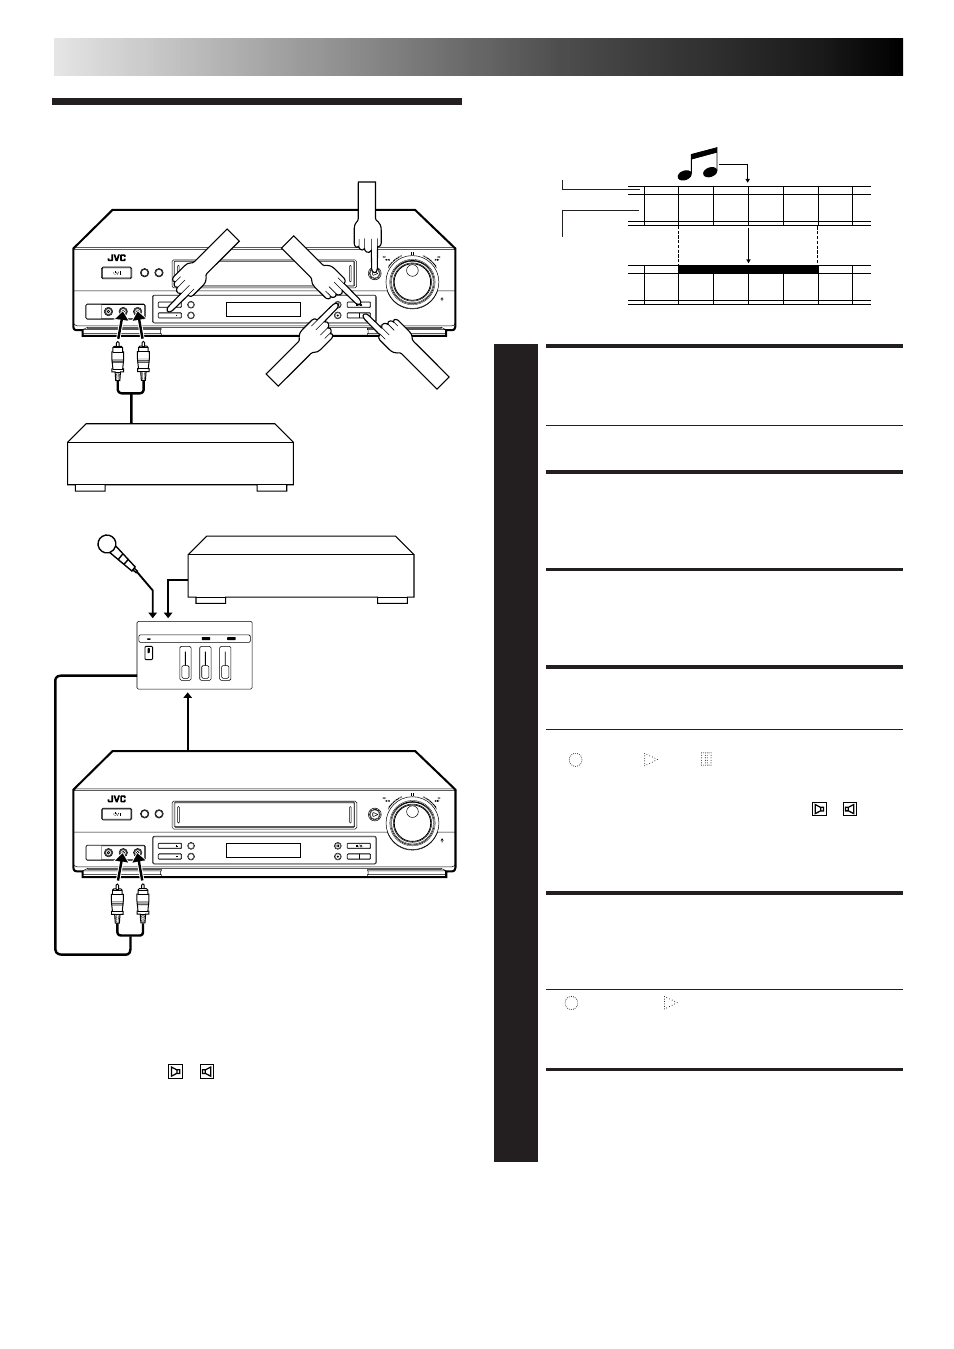
Audio dubbing replaces the normal audio sound of a previously
recorded tape with a new soundtrack.
Audio Dubbing
Original sound
AUDIO OUT
Audio mixer
MAKE CONNECTIONS
1
Connect an audio component to the AUDIO L + R
connectors on the recorder's front panel.
● When connecting monaural equipment, use only the
recorder's AUDIO L connector.
SET INPUT MODE
2
Press NUMBER key "0" and/or TV PROG so that "F-1"
appears in place of a channel number.
LOCATE START POINT
3
Press PLAY to start playback of the tape in your
recorder, and press PAUSE when you find the point
where you want to start dubbing.
ENGAGE AUDIO DUBBING
4
Press A. DUB.
● Your recorder enters the Audio Dubbing Pause mode.
(" " blinks, " " and " " light up on the front display
panel.)
● To perform audio dubbing with audio mixing, press
AUDIO on the remote control to select "
+
(L+R)"
at this point.
* Audio dubbing with audio mixing is not possible if
you're using a monaural audio component, or if
you don't have an audio mixer.
START DUBBING
5
Engage the audio component's Play mode, then press
PLAY to start the tape in your recorder. Audio dubbing
begins at this point.
● " " blinks and " " is displayed on the front display
panel.
● To stop dubbing temporarily, press PAUSE. Press
PLAY to resume dubbing.
END AUDIO DUBBING
6
Press STOP to stop the tape in your recorder, and
engage the audio component's Stop mode.
Audio-dubbed tape
CD Player etc.
Mixer
output
Pre-recorded tape
Normal audio track
Video/Hi-Fi audio
track
NOTES:
●
When monitoring the sound during Audio Dubbing, the normal
soundtrack is automatically selected. If you wish to hear the mixed
sound (Hi-Fi + Normal soundtracks), press AUDIO on the remote
control to select " + (L+R)+NORM" (
੬
pg. 17).
●
Audio dubbing stops automatically when the counter reaches
"0:00:00", and the recorder enters the Play mode. Check the
counter reading before dubbing.
●
Audio dubbing is also possible using the rear panel AV1 IN/OUT
or AV2 IN/DECODER connector. When using these connectors,
make sure to select the correct input mode in step 2.
●
Audio dubbing cannot be performed on a cassette that has
had its record safety tab removed.
●
When playing back an audio-dubbed tape, press AUDIO on
the remote control to select the soundtrack you wish to hear
(
੬
pg. 17).
CD Player etc.
EDITING (cont.)