9 time code – JVC BR-DV600UA User Manual
Page 18
32
9 TIME CODE
1 Set the menu switches.
(
੬
See pages 22 and 23.)
5 Set the No. 413
“INTERNAL”.
5 Set the No. 414
“PRESET”.
5 Set the No. 415
Setting is not necessary for user bits.
REC RUN:
The time code is counted only during
recording.
FREE RUN: The time code is counted after the
preset is complete.
5 Set the No. 416
Setting is not necessary for user bits. (U MODEL)
NON DROP: Engages the Non-Drop Frame mode.
DROP:
Engages the Drop Frame mode.
2 Press the [HOLD] button to engage the time code
setting mode.
[
The uppermost digit blinks.
3 Press the [ADVANCE] button to change the value.
[
The blinking number increases.
• Hold down the [SHIFT] button and press the
[ADVANCE] button to reset all digits to “0”.
4 Press the [SHIFT] button to change the digit.
[
The blinking cursor on the digit moves to the right.
5 To change the digit, repeat steps 3 to 4.
6 Press the [PRESET] button to enter the value.
[
The time code setting mode is released and the
normal display is restored.
7 To check the preset time code, press the [REC]
button in the Stop mode.
H
M
S
F
H
M
S
F
H
M
S
F
H
M
S
F
H
M
S
F
33
V.IN/A.MONI A.OUT
COUNTER
DV
CTL
TC
UB
CH-1/2
CH-3/4
Y/C
(CPN)
LINE
L
R
MIX
MIX
PHONES
MIC
REMOTE
LOCAL
EJECT
OPERATE
REC LEVEL
CH-2/4
CH-1/3
SHIFT
SET
SELECT
SHIFT
MENU
HOLD
SHIFT
A. DUB
ADVANCE PRESET
REW
STOP
FF
REC
PLAY
PAUSE
ON/OFF
MENU
OVER
OVER
H
M
S
F
AUD LOCK
SP
32k
48k
SLAVE
PB
NDF
SERVO RF
DEW
AUTO OFF
HOLD
CH 2/4
CH 1/3
VIDEO CASSETTE RECORDER BR-DV600UA
dB
40 30
20
10
0
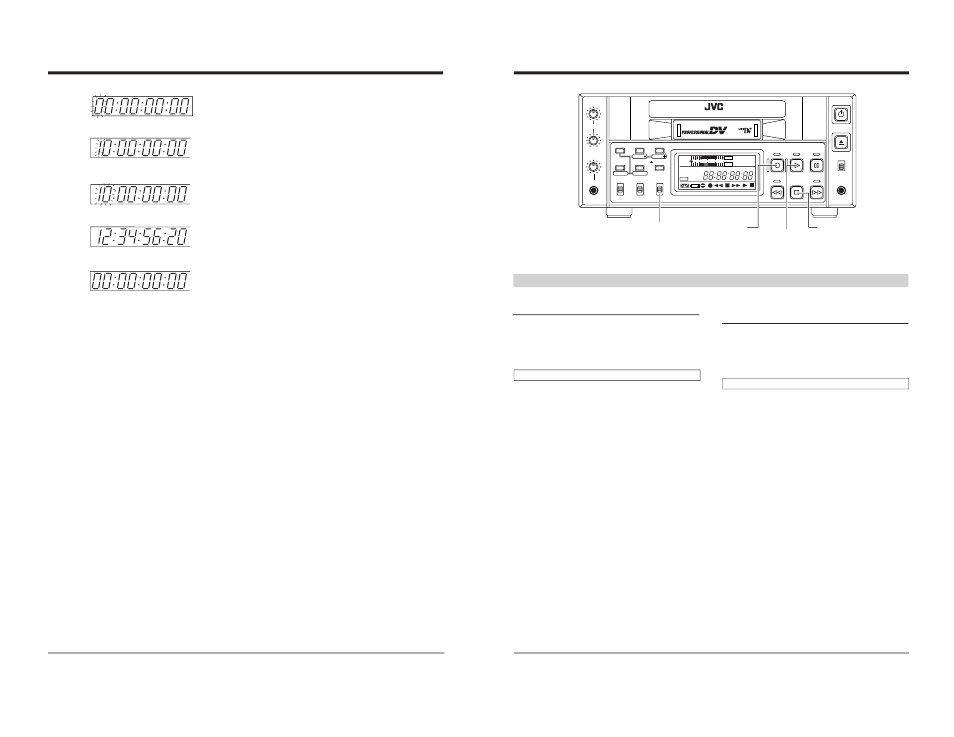
9 TIME CODE
[COUNTER] switch
[REC] button
[PLAY] button
[STOP] button
Recording
5 Time code recording follows the time code already
recorded on the tape.
Menu switch setting
No. 413
No. 414
No. 415
No. 416
(U MODEL)
Operation
1 Start recording.
While pressing the [REC] button, press the [PLAY]
button.
[
The time code and user bits are recorded following
the data recorded on the tape.
The time code data is shown on the on-screen display
and counter display. On the on-screen display, the
counter mode is shown as “TCR” or “UBR”.
To stop recording, press the [STOP] button.
5 Time code recording starts from the preset data.
Menu switch setting
No. 413
No. 414
No. 415
No. 416
(U MODEL)
Operation
1 Check the preset value.
Set the [COUNTER] switch to “TC” or “UB”.
In the Stop mode, press the [REC] button.
[
Time code data is shown on the on-screen display
and counter display. On the on-screen display, the
counter mode is shown as “TCG” or “UBG”.
Release your finger from the [REC] button to restore the
previous display.
2 Start recording.
While pressing the [REC] button, press the [PLAY]
button.
[
Time code and user bits are recorded.
To stop recording, press the [STOP] button.