Recording, Self-timer, Advanced features (cont.) – JVC LYT0633-001A User Manual
Page 26
26
EN
1
D
S
5
T
W
W
R
I
E
S
E
I
I
E
S
L
L
D
N
M
T
F
E
E
D
A
U
–
N
R
T
M
M
C
U
N
I
A
O
U
A
M
C
D
T
L
E
R
E
R
O
ME
O
O
N
F
N
U
F
Self-Timer
Once the camcorder is set, the camcorder operator can
become part of the scene in a more natural way, adding
the final touch to a memorable picture.
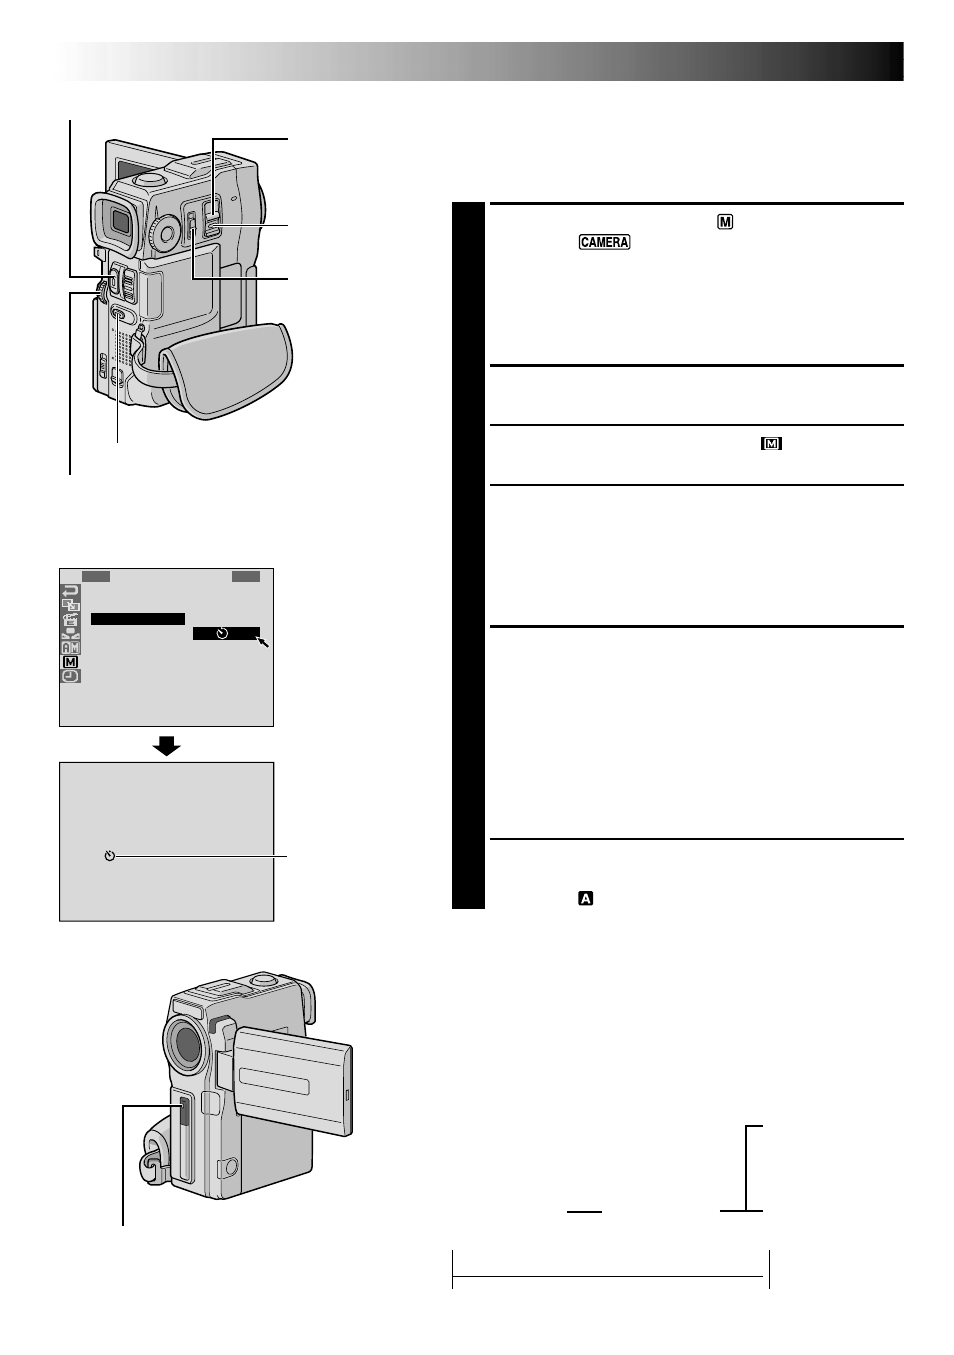
1
Set the Operation Switch to “
” and set the POWER
Switch to “
” while pressing down the Lock
Button located on the switch, then pull out the
viewfinder or open the LCD monitor fully.
•You can tilt the LCD monitor upward to 180° so that
it faces forward and view yourself while self-
recording with the viewfinder pushed back.
2
Press the MENU wheel. The Menu Screen appears.
3
Rotate the MENU wheel to select “
”, and press it.
4
Rotate the MENU wheel to select “SELF-TIMER”, and
press it. The Sub Menu appears. Rotate the MENU
wheel to select “ON”, and press it. Selection is
complete. Rotate the MENU wheel to select
“1RETURN”, and press it twice to close the Menu
Screen.
5
To engage the Self-Timer for video recording, press
START/STOP. After 15 seconds, the beep sounds and
video recording starts. To stop Self-Timer recording,
press START/STOP again. The camcorder re-enters
Record-Standby mode.
OR
Press SNAPSHOT. After 15 seconds, the beep sounds
and snapshot recording starts. After that, the
camcorder re-enters Record-Standby mode.
6
To end Self-Timer recording, select “OFF” in step 4 or
set the POWER Switch to “OFF” or set the Operation
Switch to “
”.
NOTE:
If “BEEP/TALLY” is set to “OFF” (
੬
pg. 23), the beep does
not sound and the tally lamp does not light.
Self-Timer
indication
When START/STOP or SNAPSHOT is
pressed, the tally lamp changes as shown:
POWER Switch
Display
MENU Wheel
Menu Screen
RECORDING
Advanced Features (cont.)
START/STOP Button
SNAPSHOT Button
Operation Switch
Lock Button
Blinks quickly
(Self-Timer
shooting
starts soon)
Stops blinking
and stays on
(Self-Timer video
record-ing starts)
Begins blinking
(Self-Timer starts)
After approx. 15 sec.
Turns off
(Self-Timer
snapshot
recording starts)
4
4
4
4