Installing a pim, Led blinks and then turns off, Figure 1: removing a pim – Juniper Networks J6300 User Manual
Page 3: Captive screws, Power on
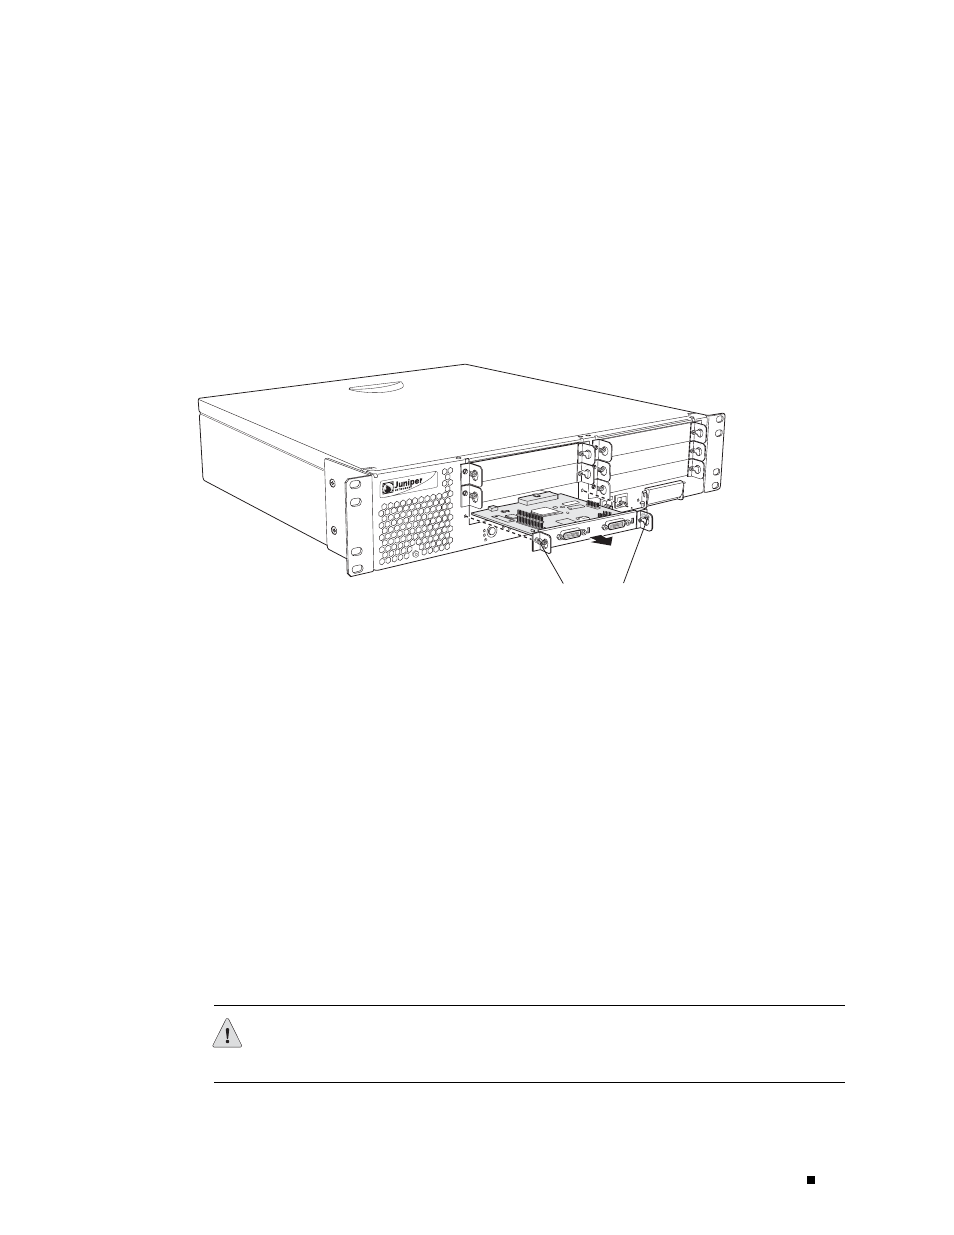
7.
Loosen the captive screws on each side of the PIM faceplate.
8.
Grasp the handles on each side of the PIM faceplate and slide the PIM out of
the router. Place it in the electrostatic bag or on the antistatic mat.
9.
If you are not reinstalling a PIM into the emptied slot, install a blank PIM panel
over the slot to maintain proper airflow.
Figure 1: Removing a PIM
ALAR
M
S
LO
T
10
/1
00
E
T
H
E
R
N
E
T
POWE
R ON
CONF
IG
PORT
0
COMP
ACT F
LASH
USB
CONS
OLE
PORT
1
SLOT
1/0
SLOT
3/0
SLOT
5/0
J4300
g003539
EJECT
S
E
R
IA
L
PORT
0
STATU
S
PORT
1
STATUS
Captive screws
USE
IN
Installing a PIM
To install a PIM (see Figure 2):
1.
Attach an electrostatic discharge (ESD) grounding strap to your bare wrist and
connect the strap to the ESD point on the chassis, or to an outside ESD point if
the Services Router is disconnected from earth ground. For more information
about ESD, see the J-series Services Router User Guide.
2.
Press and release the power button to power off the router. Verify that the
POWER ON
LED blinks and then turns off.
3.
Align the notches in the connector at the rear of the PIM with the notches in
the PIM slot in the Services Router, and then slide the PIM in until it lodges
firmly in the router.
CAUTION: Slide the PIM straight into the slot to avoid damaging the components
on the PIM.
Installing a PIM
3